

Deploy a Serverless Website
Deploy a Serverless Website with Lambda, API Gateway, S3 and Route53
In this tutorial, you will learn how to deploy a serverless website utilizing S3 for static website hosting, Lambda and API Gateway to deliver dynamic content and optionally, Route53, to register and connect a domain name.
In order to follow along you will need:
- an AWS account
- basic understanding of HTML
- text editor
Step 1: Login to the AWS Management Console.

Step 2: Navigate to S3.
- Navigate to S3 by typing it into the search bar or looking under the Services drop-down menu under the Storage category.
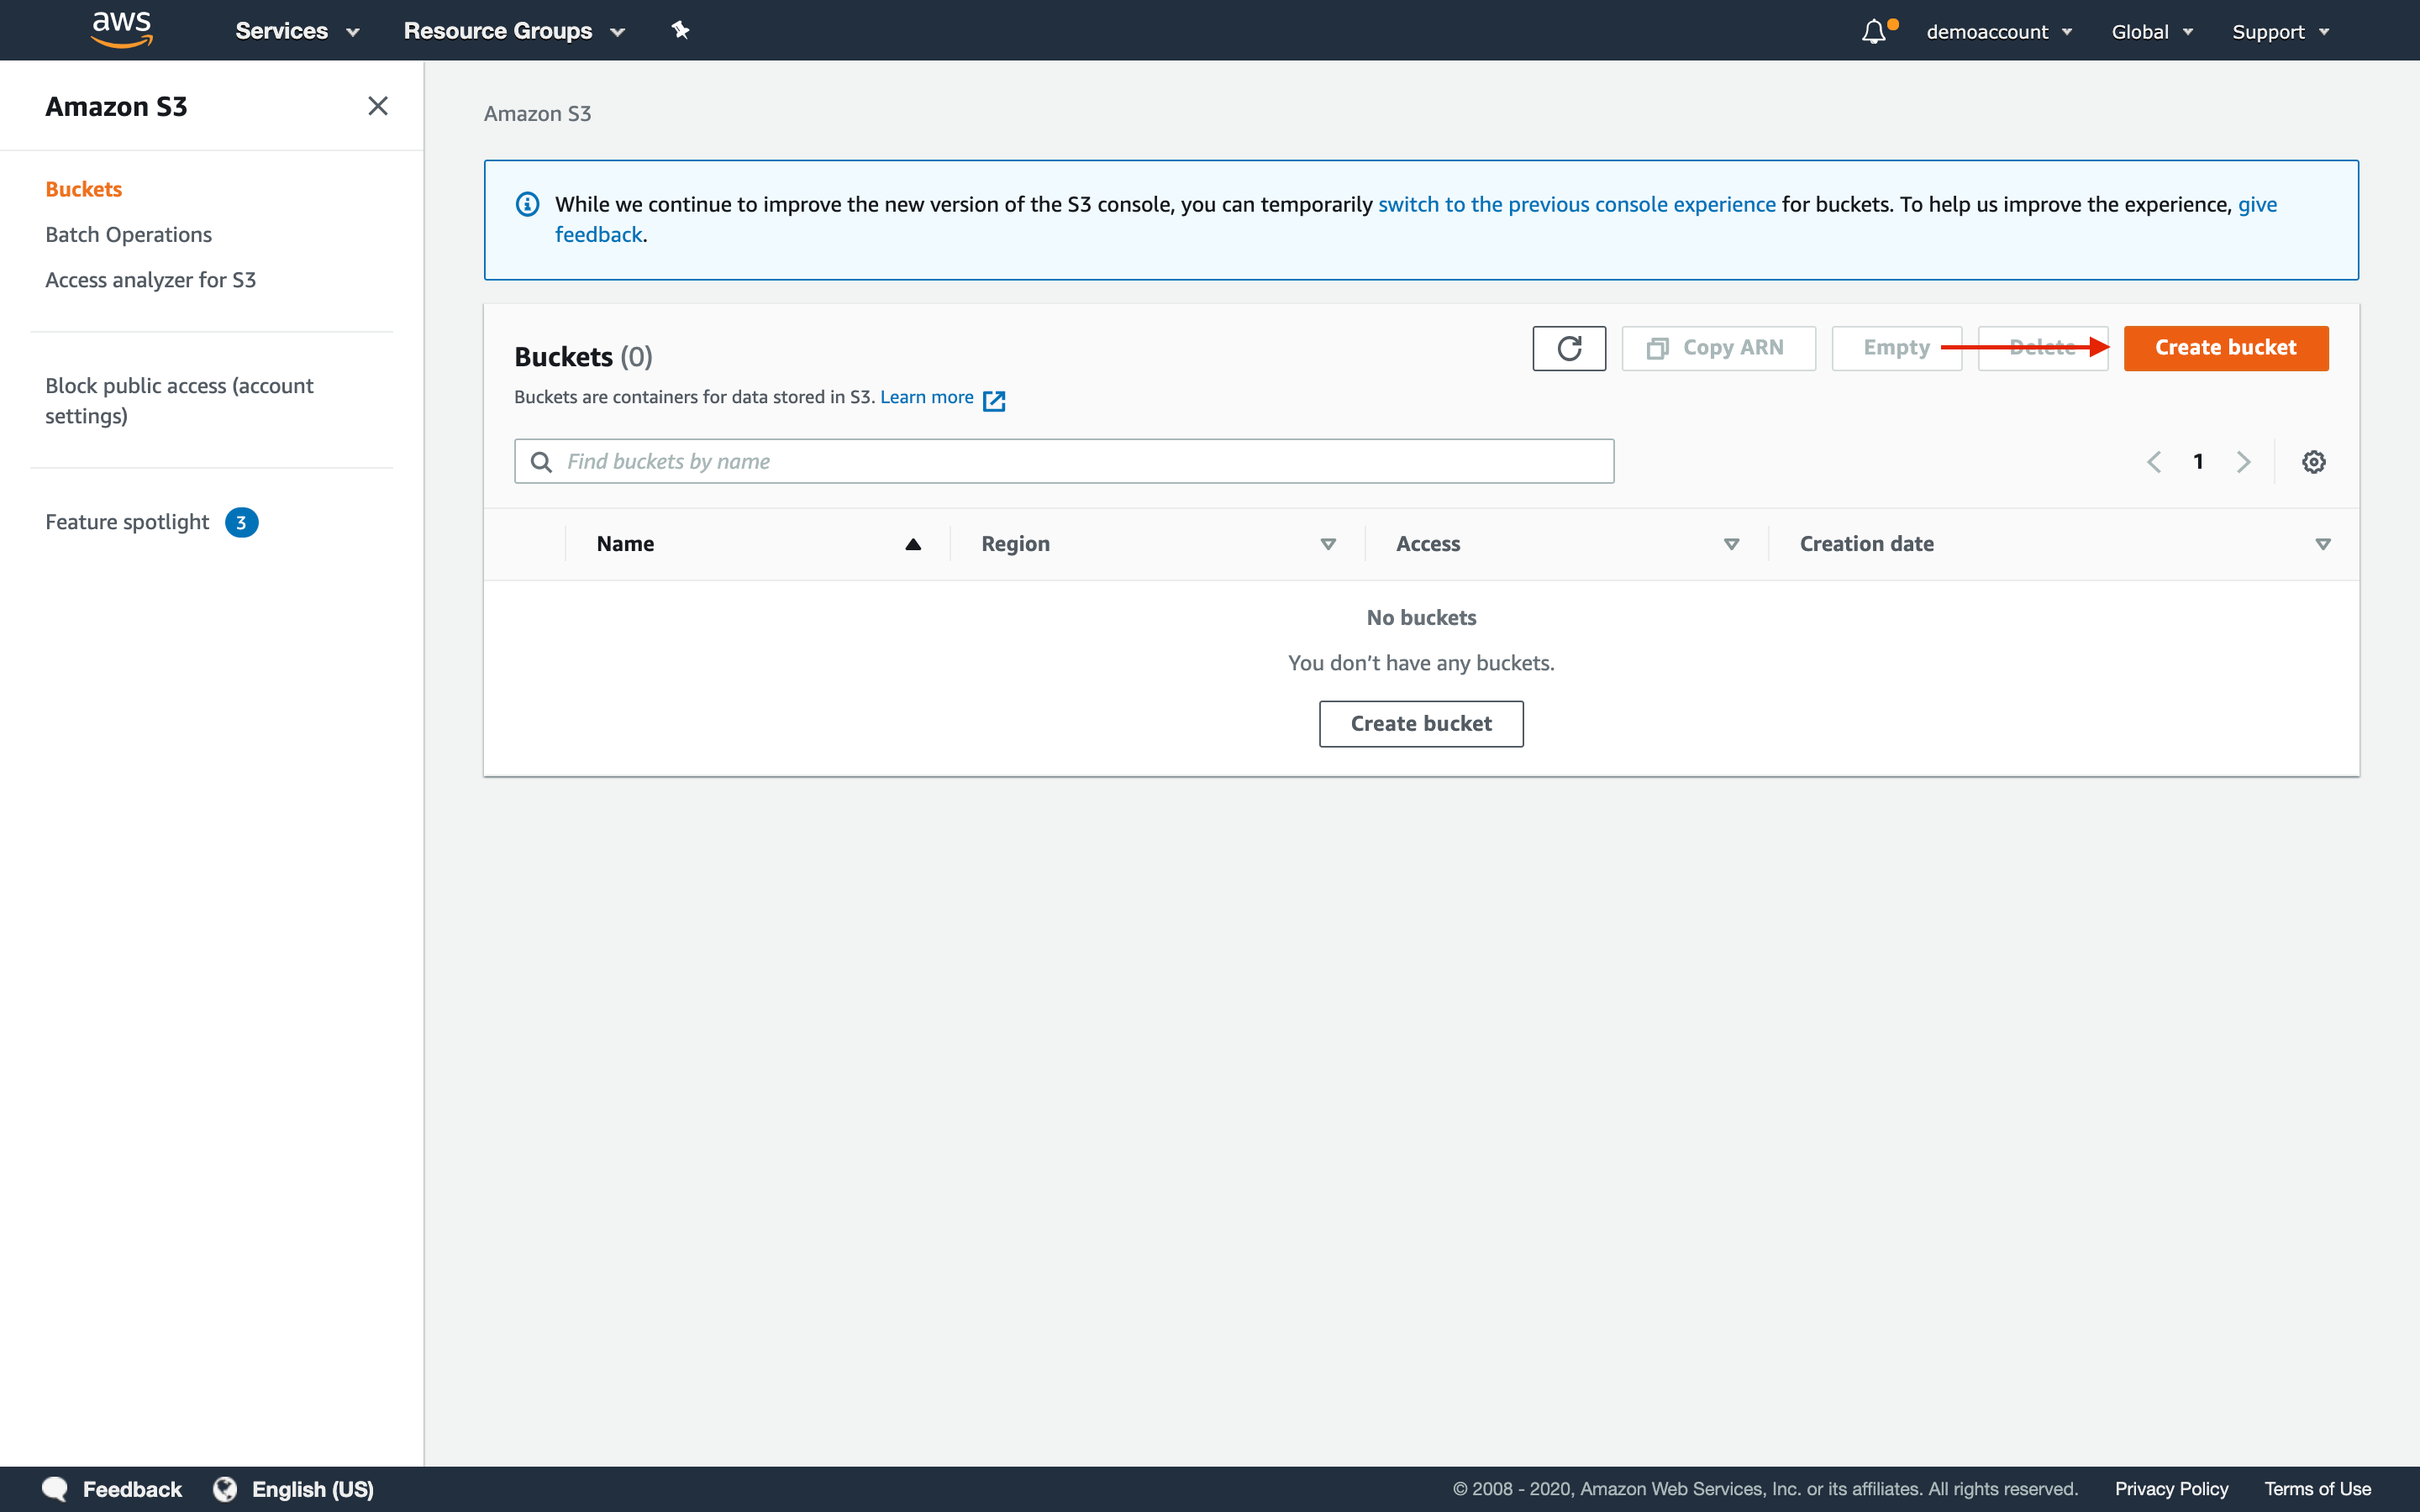
Step 3: Create a new bucket in S3.
- Click Create Bucket
-
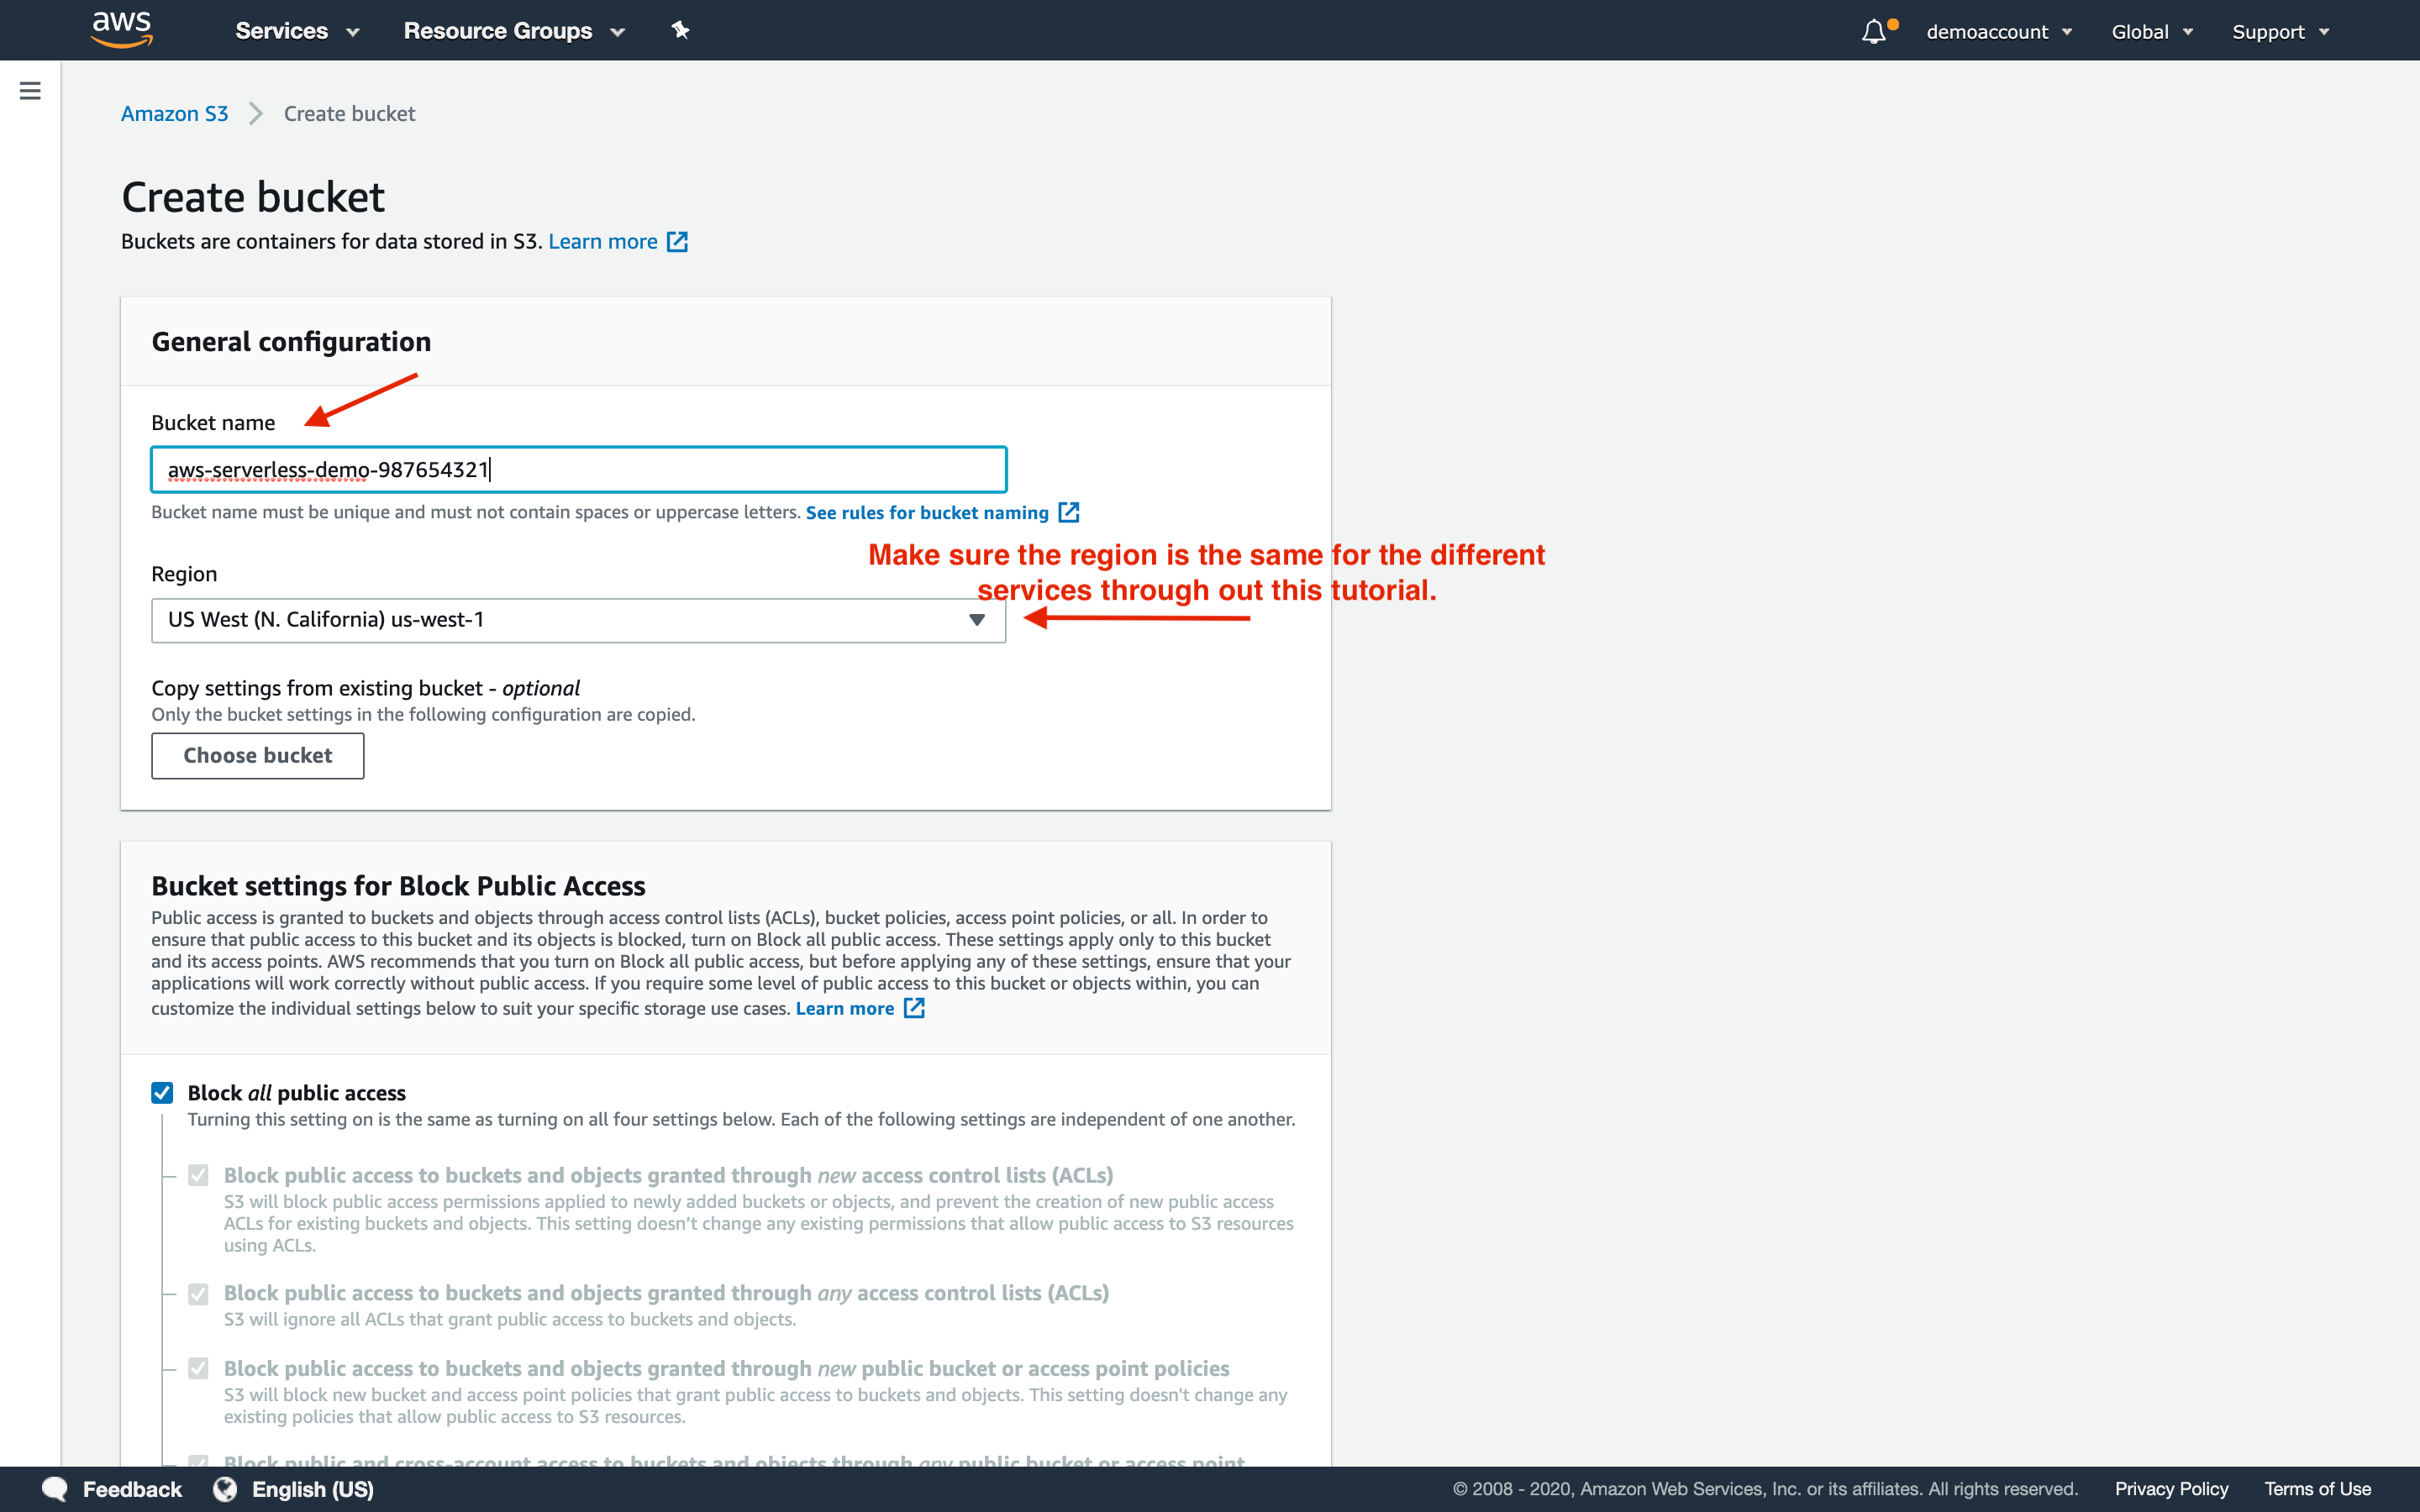
Name your bucket.
If you intend to use your own domain name, the bucket name must match the second-level domain name exactly. That is, the part of the domain before .com, .org, .edu, etc.
Additionally, remember that bucket names must be globally unique. Globally meaning, unique across all AWS accounts, not just your account.
Be sure to note the Region for this bucket. S3, Lambda, and API Gateway are all regional services.
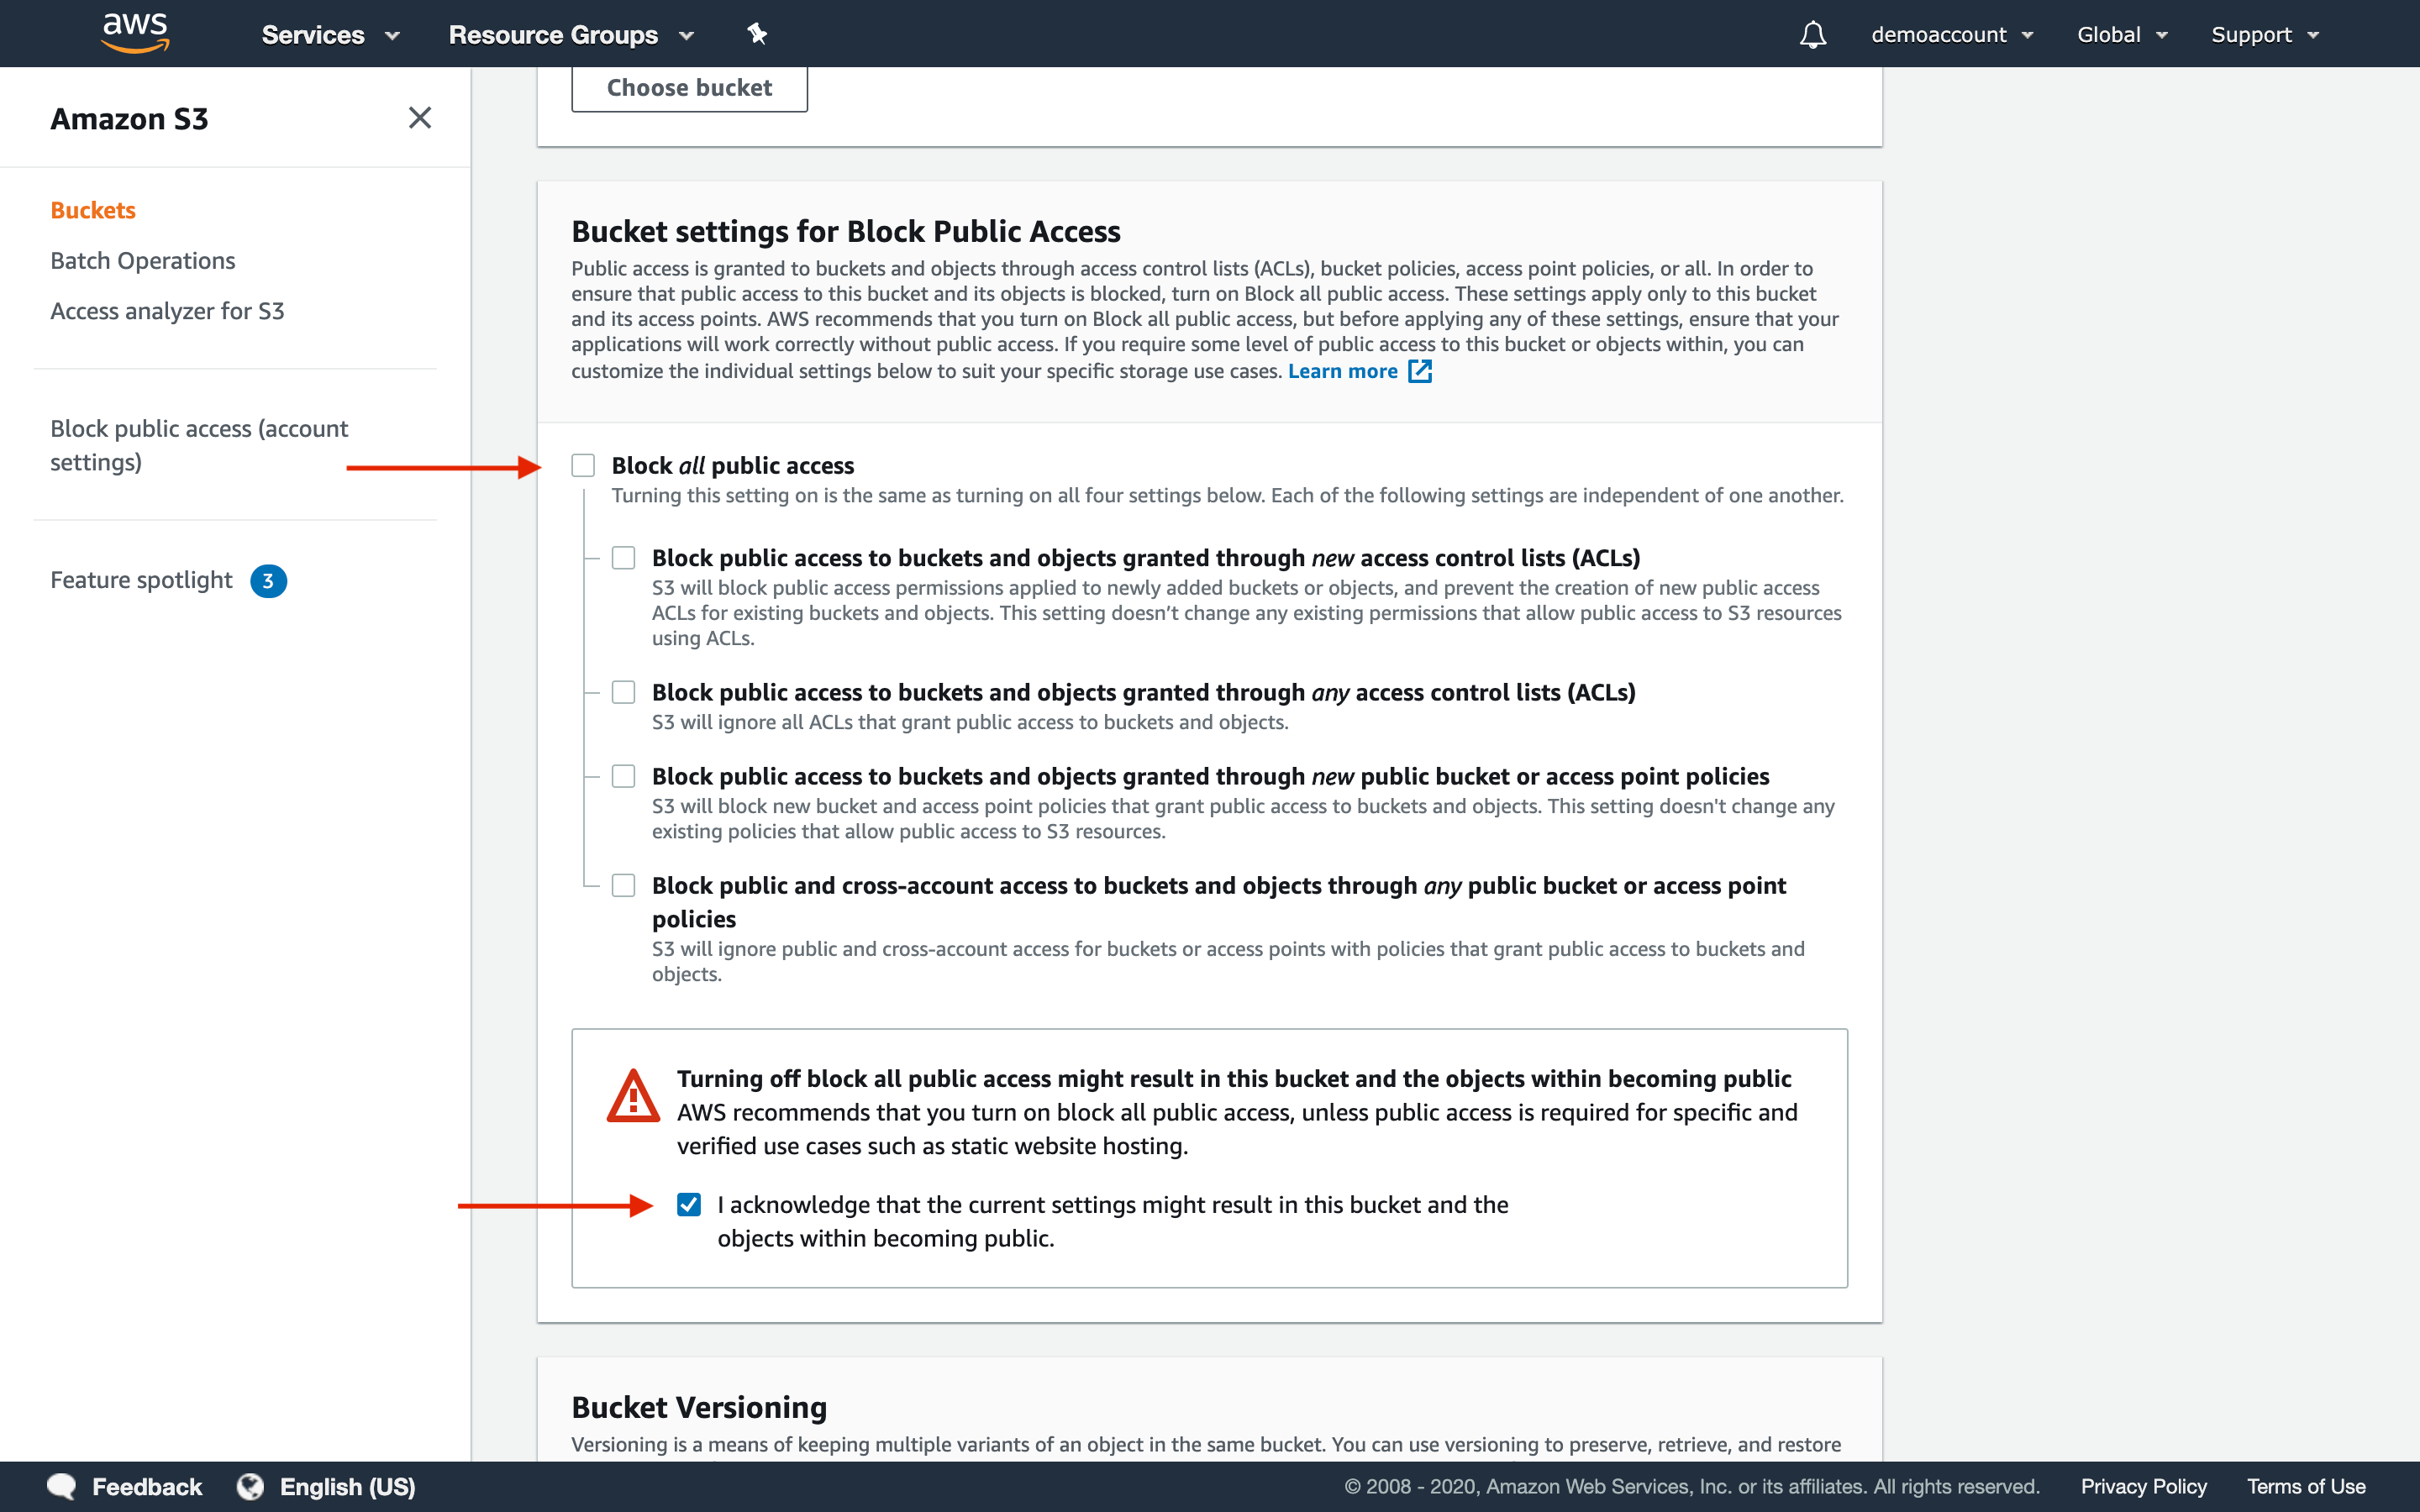
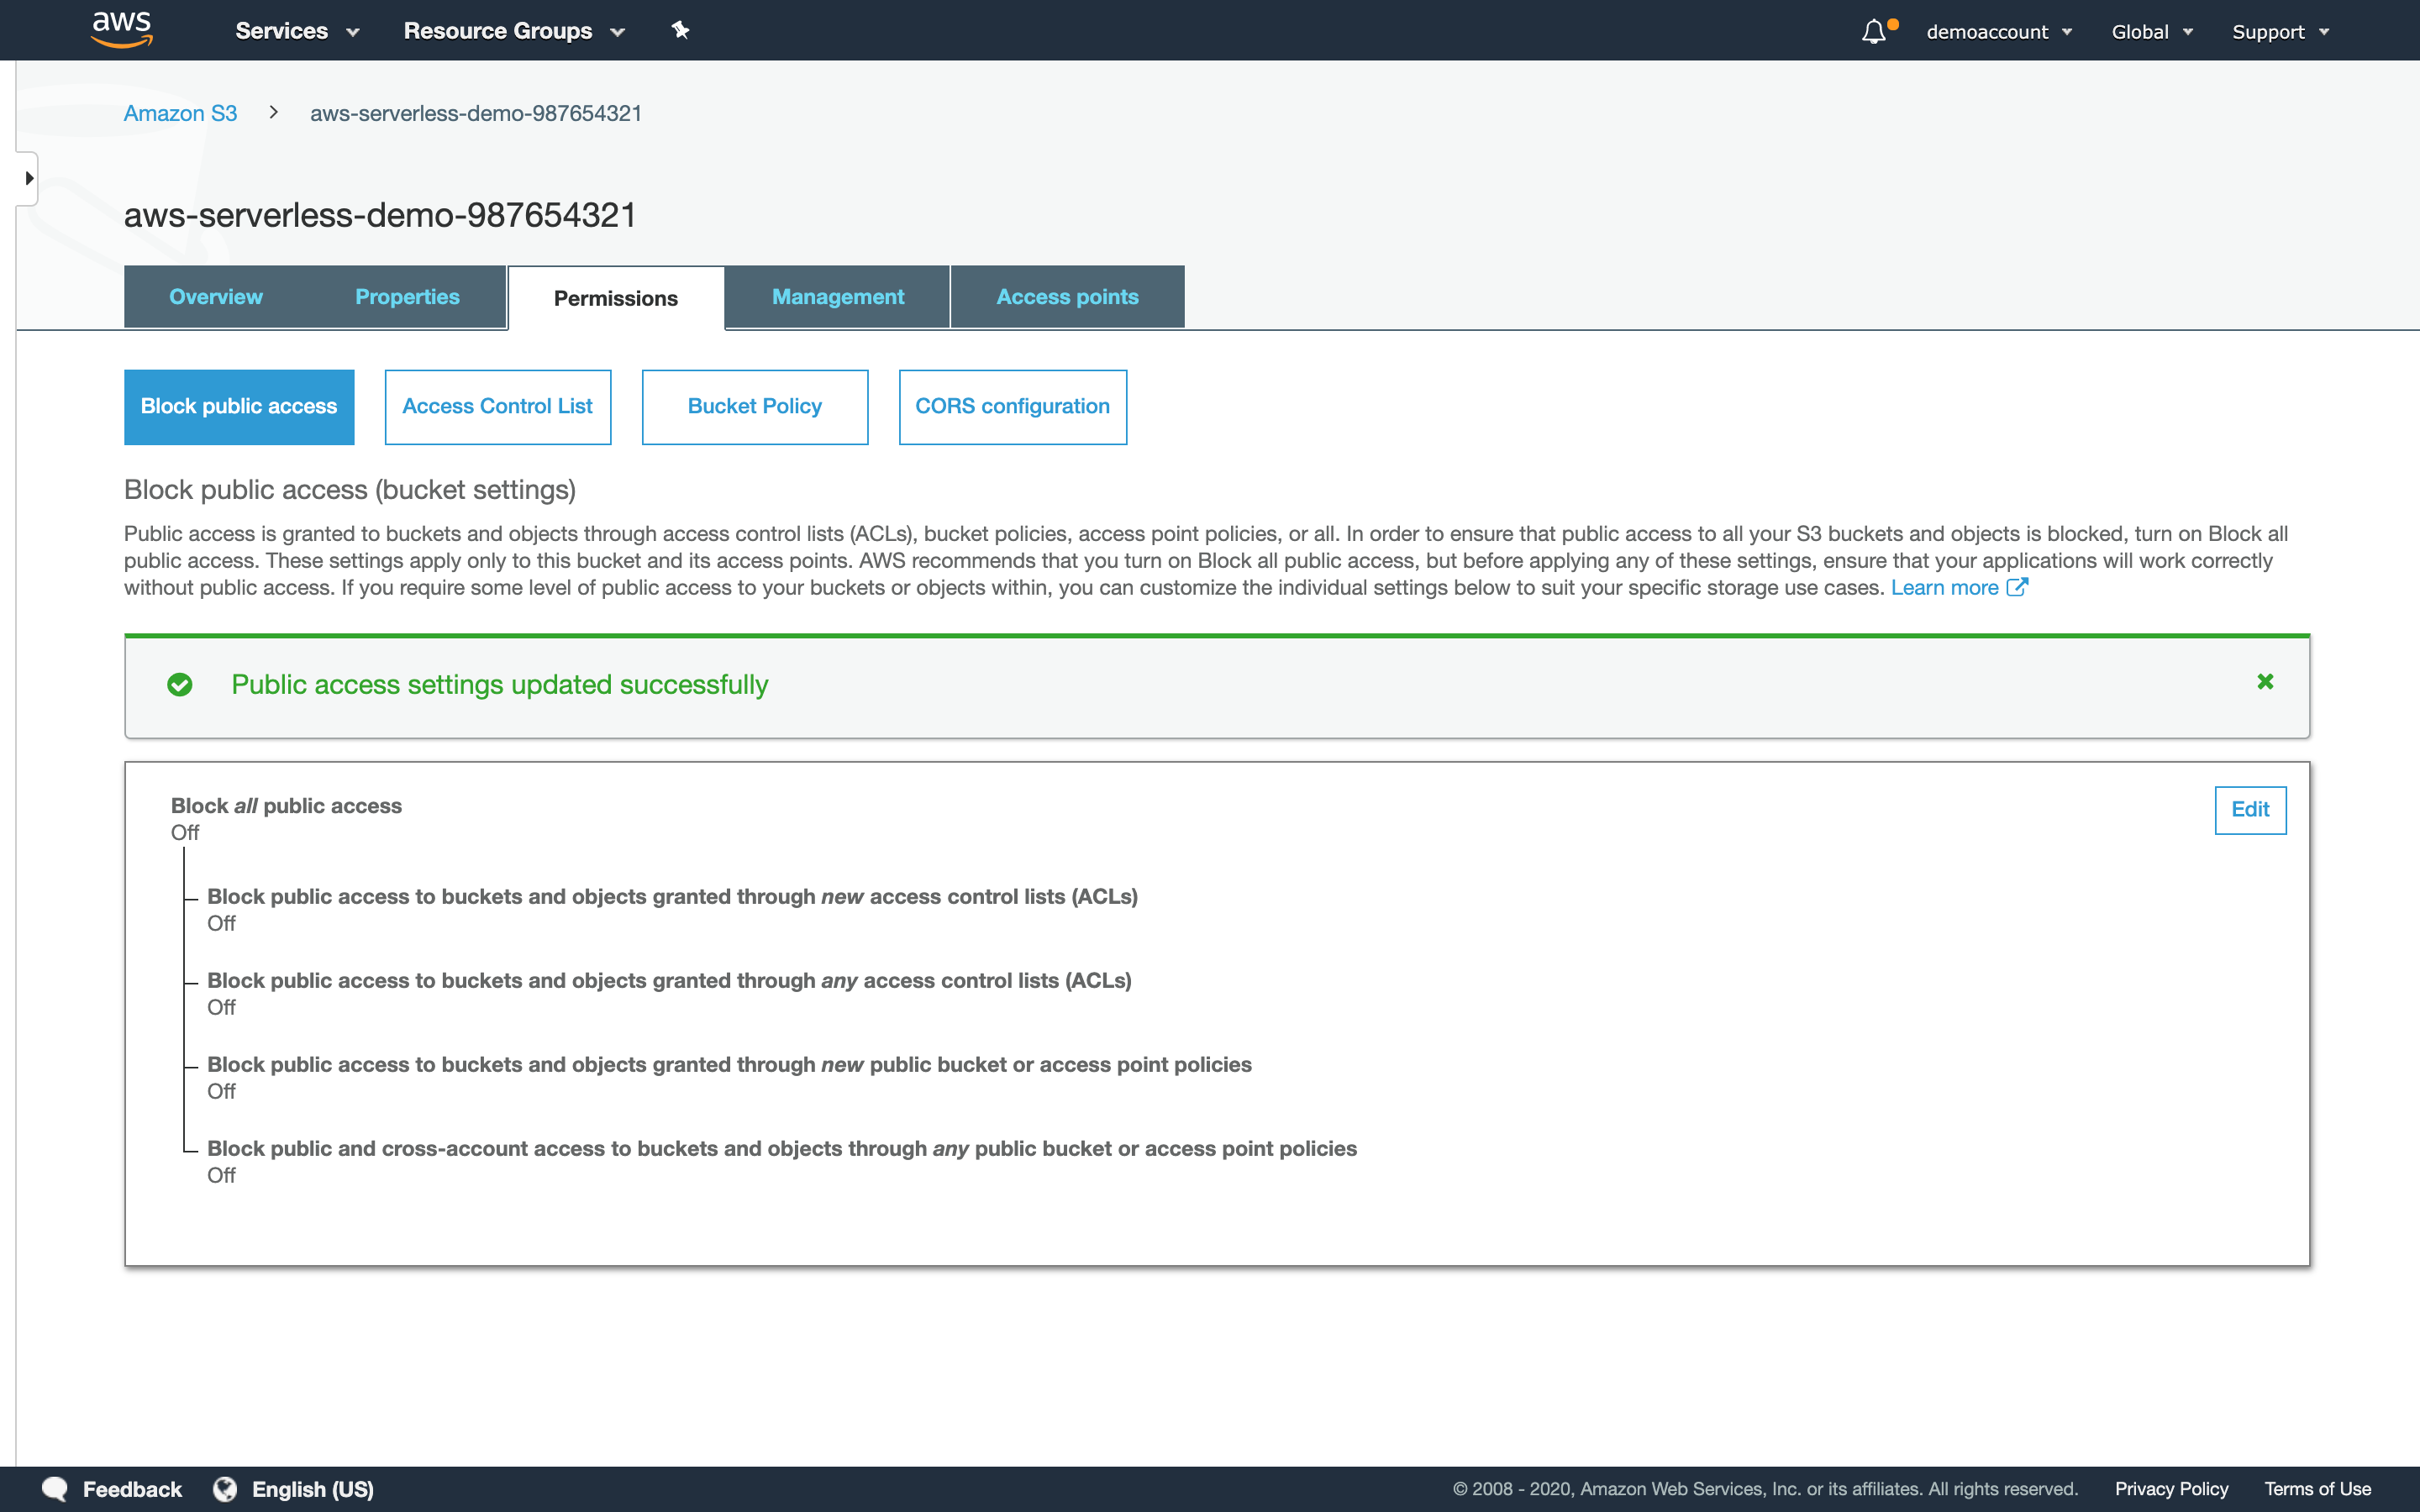
- Uncheck Block all public access. This will bring up a warning and prompt you to acknowledge the risks. Select I acknowledge…
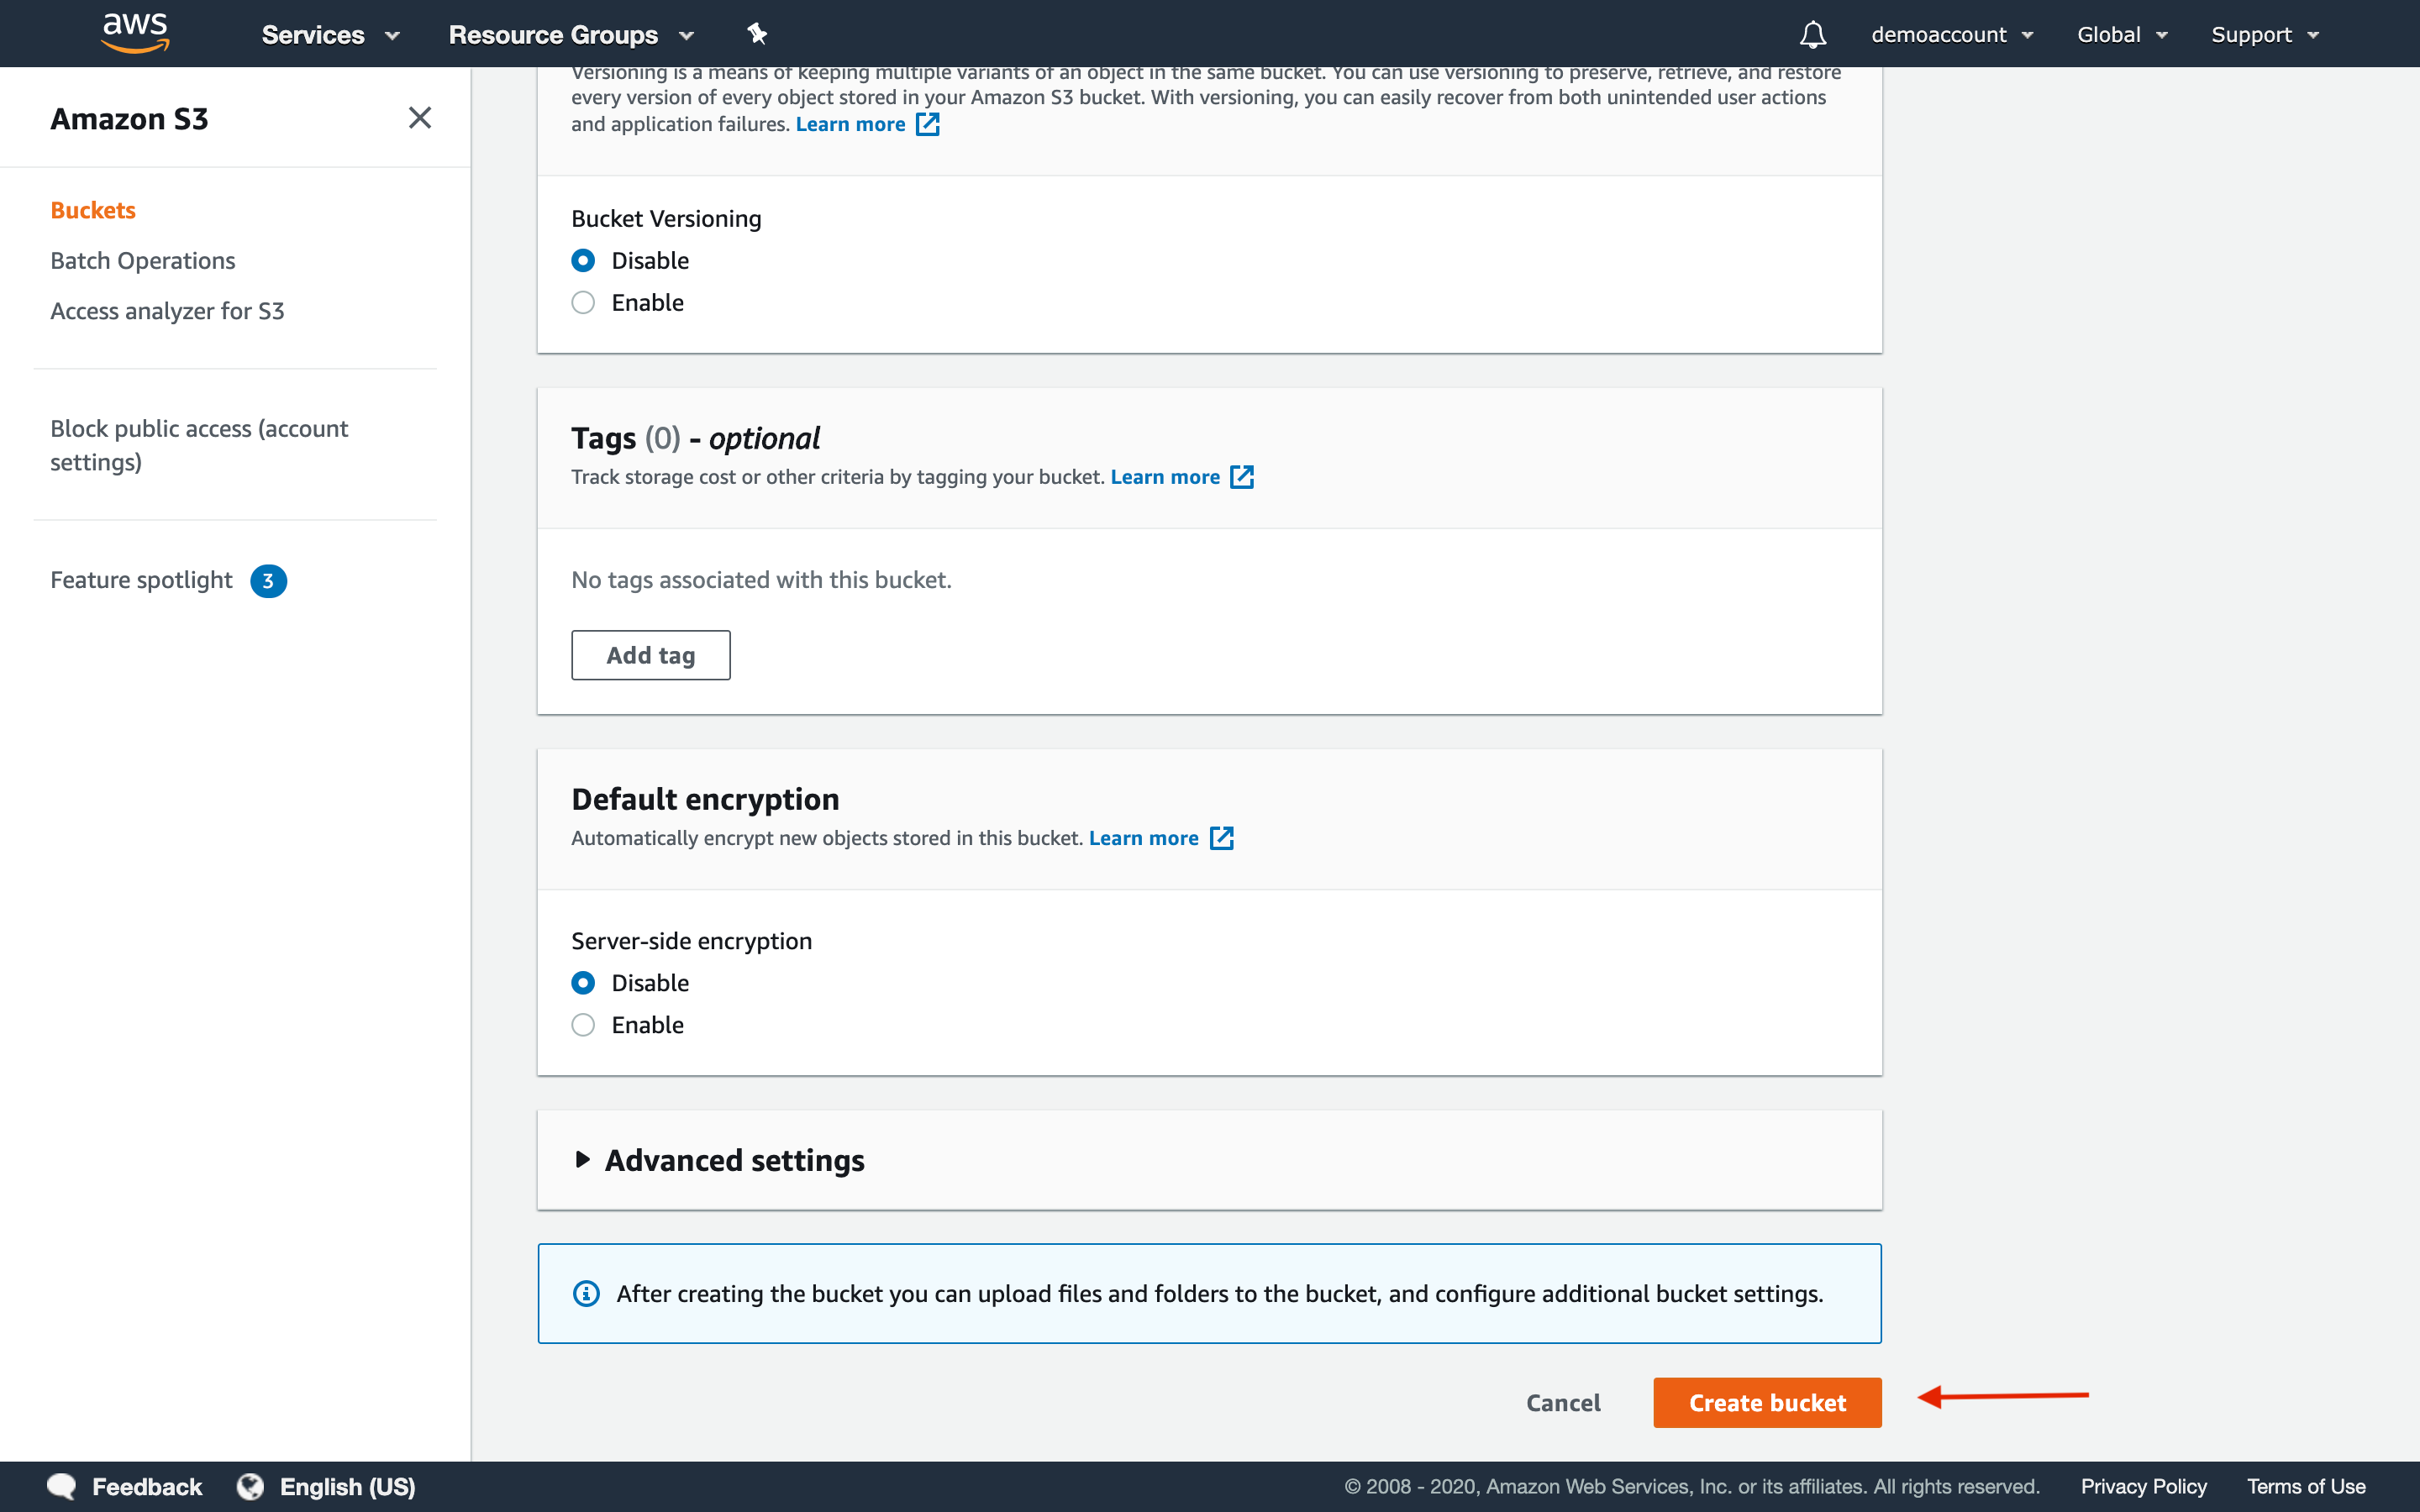
- Click Create bucket.
Step 3b (Optional): Make your S3 bucket public.
If you are using an existing bucket, you must make it public in order for Step 4 to work.
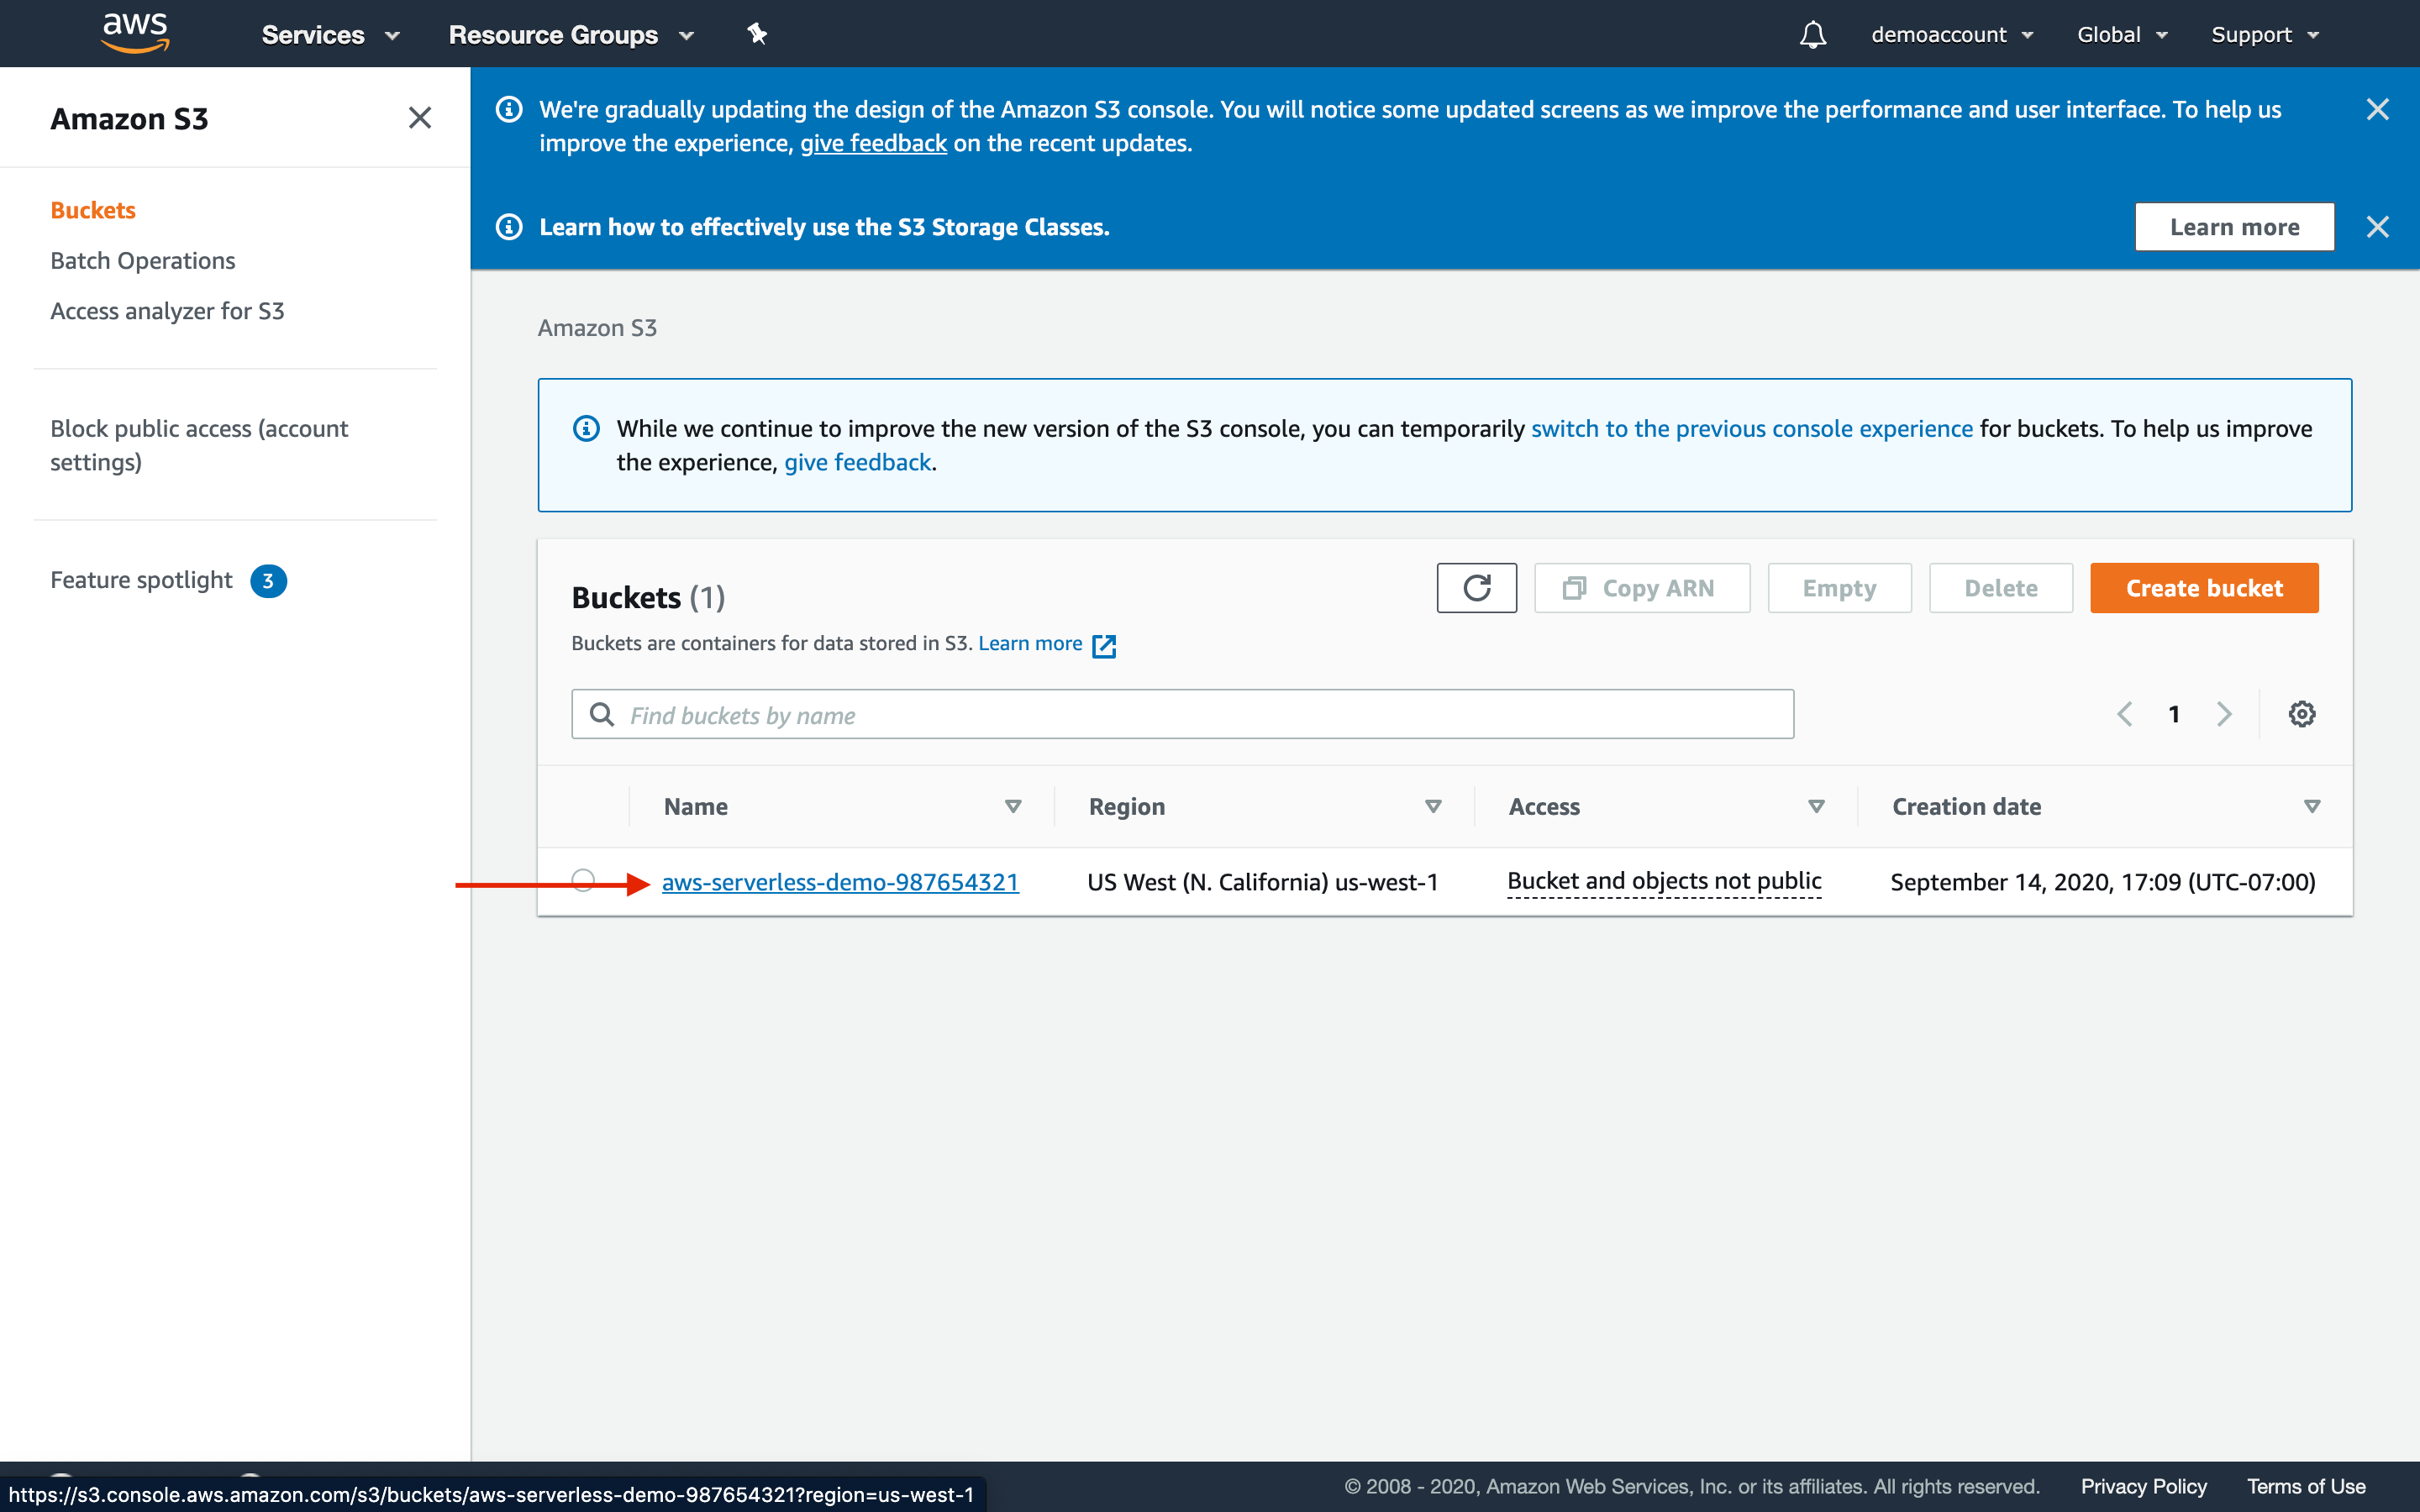
- Click on the bucket’s name within the S3 console.
-
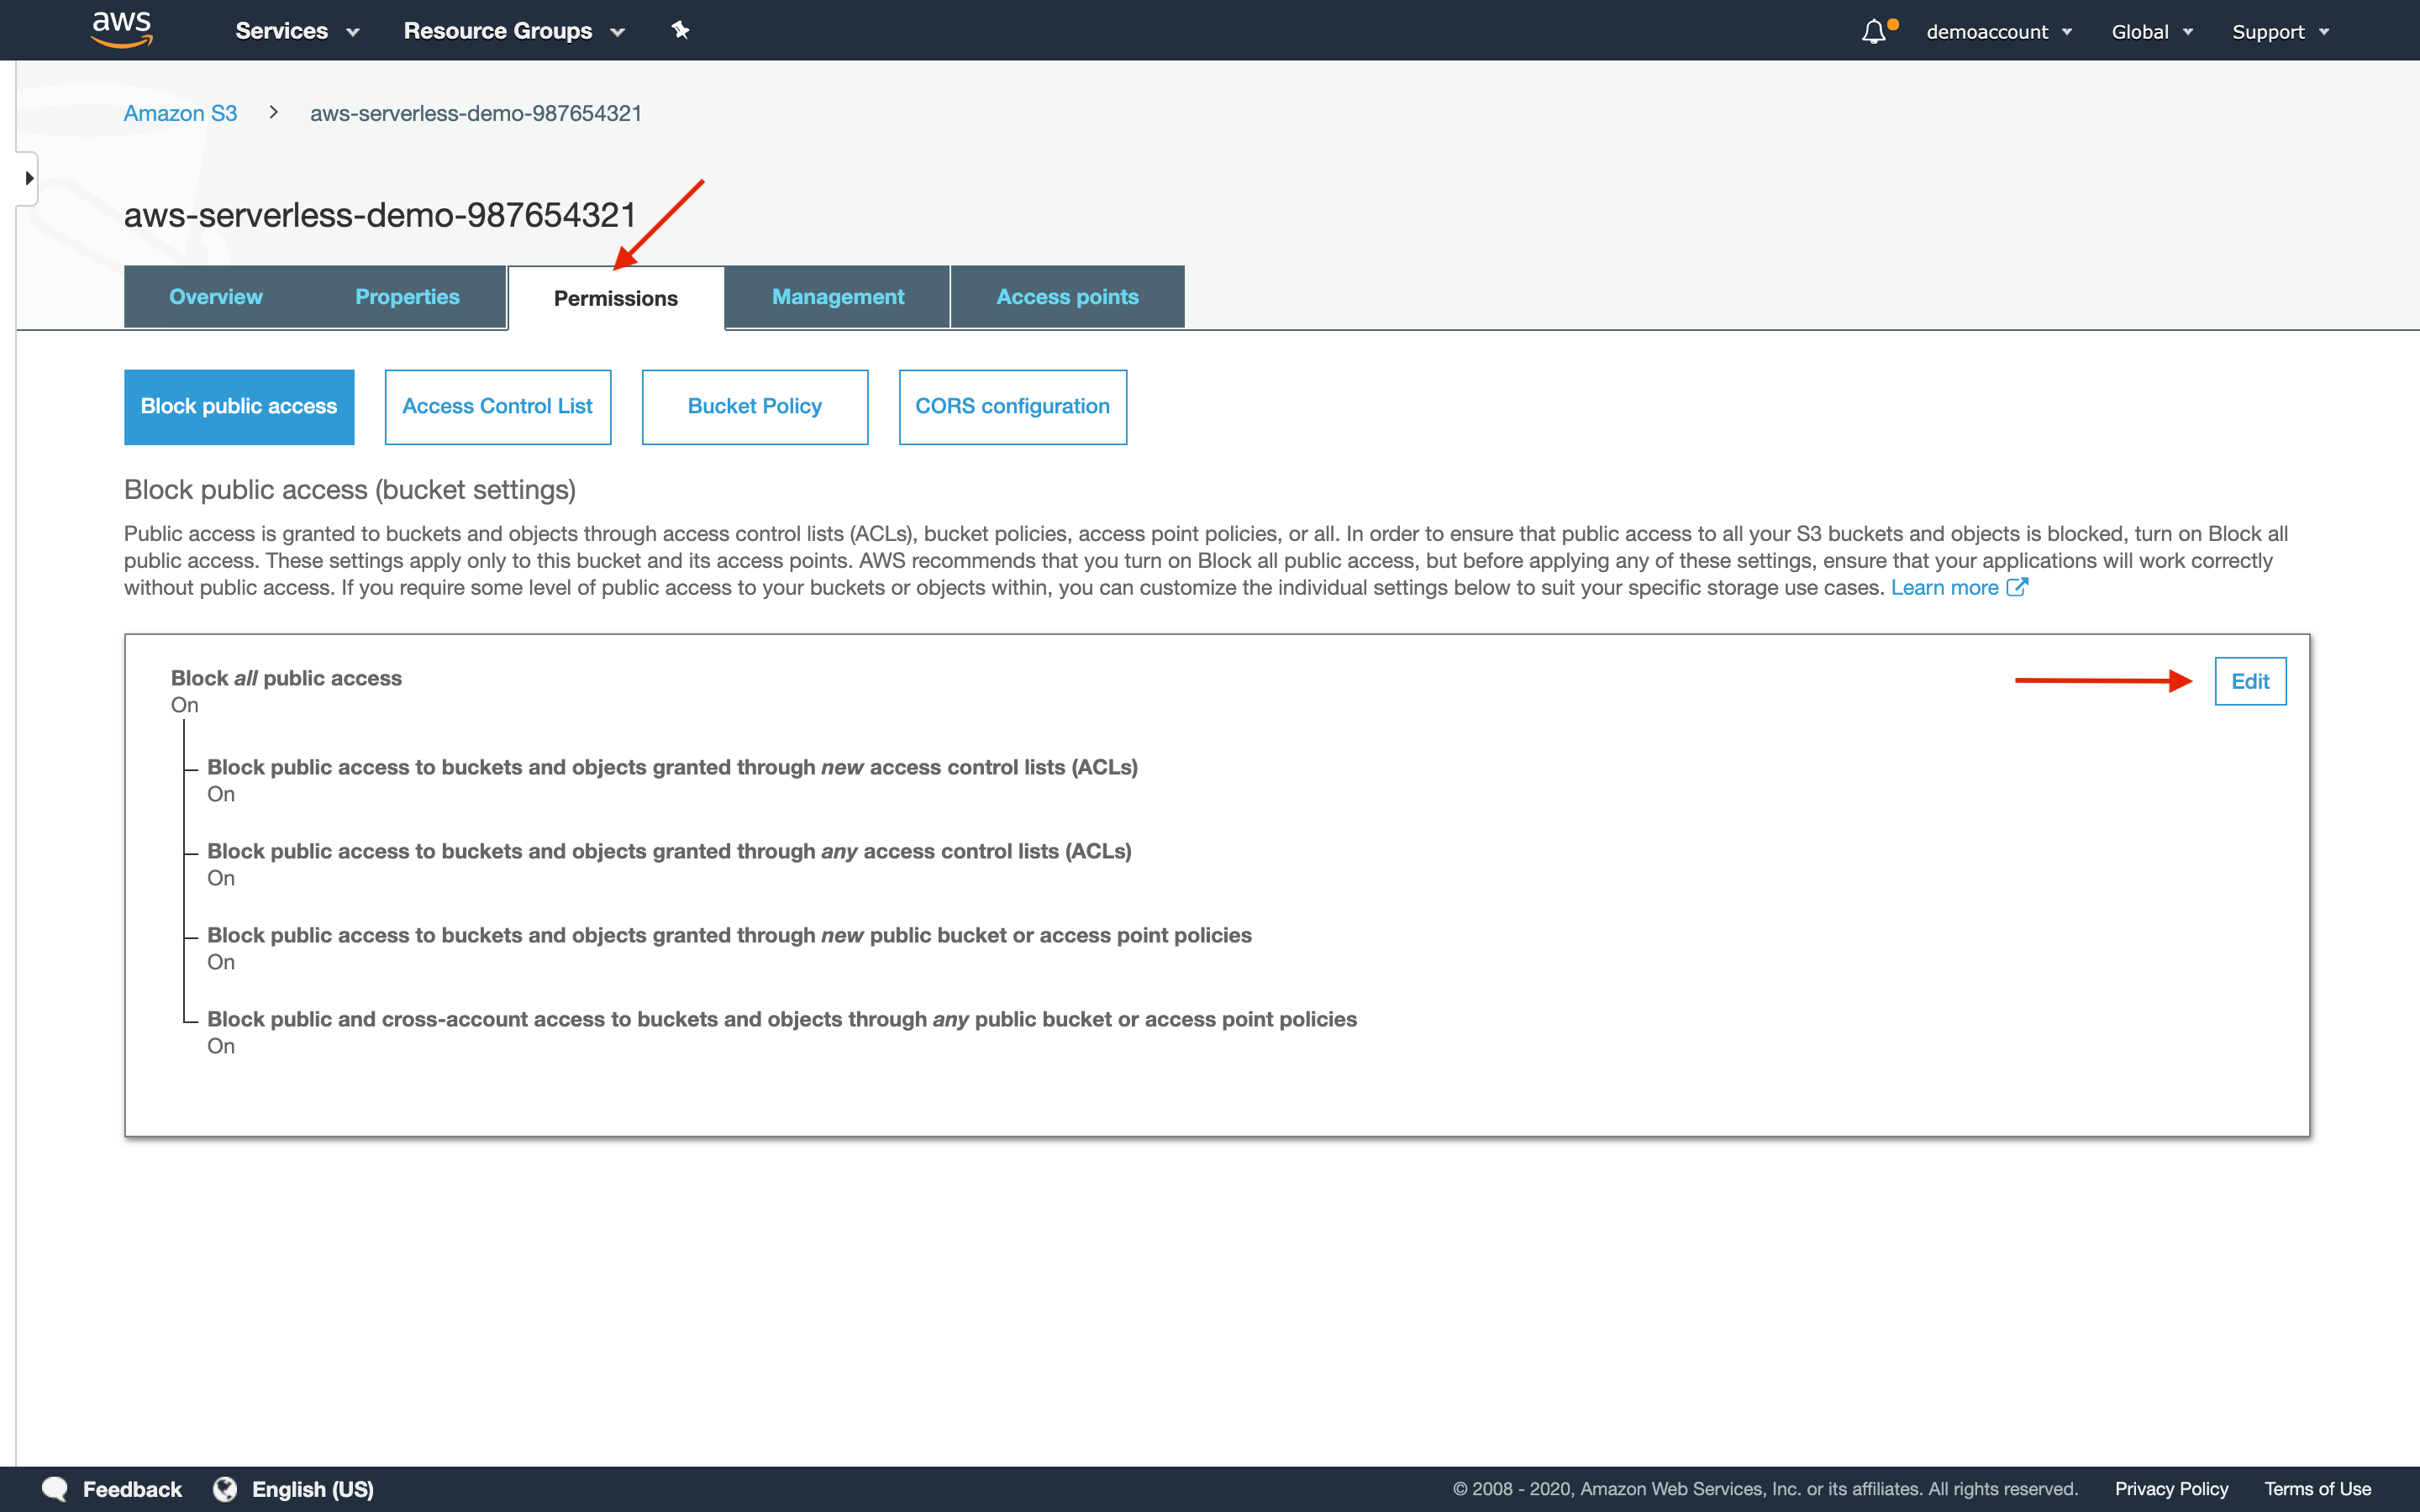
Click the Permissions tab. This will automatically open on Block public access.
-
Click Edit.
-
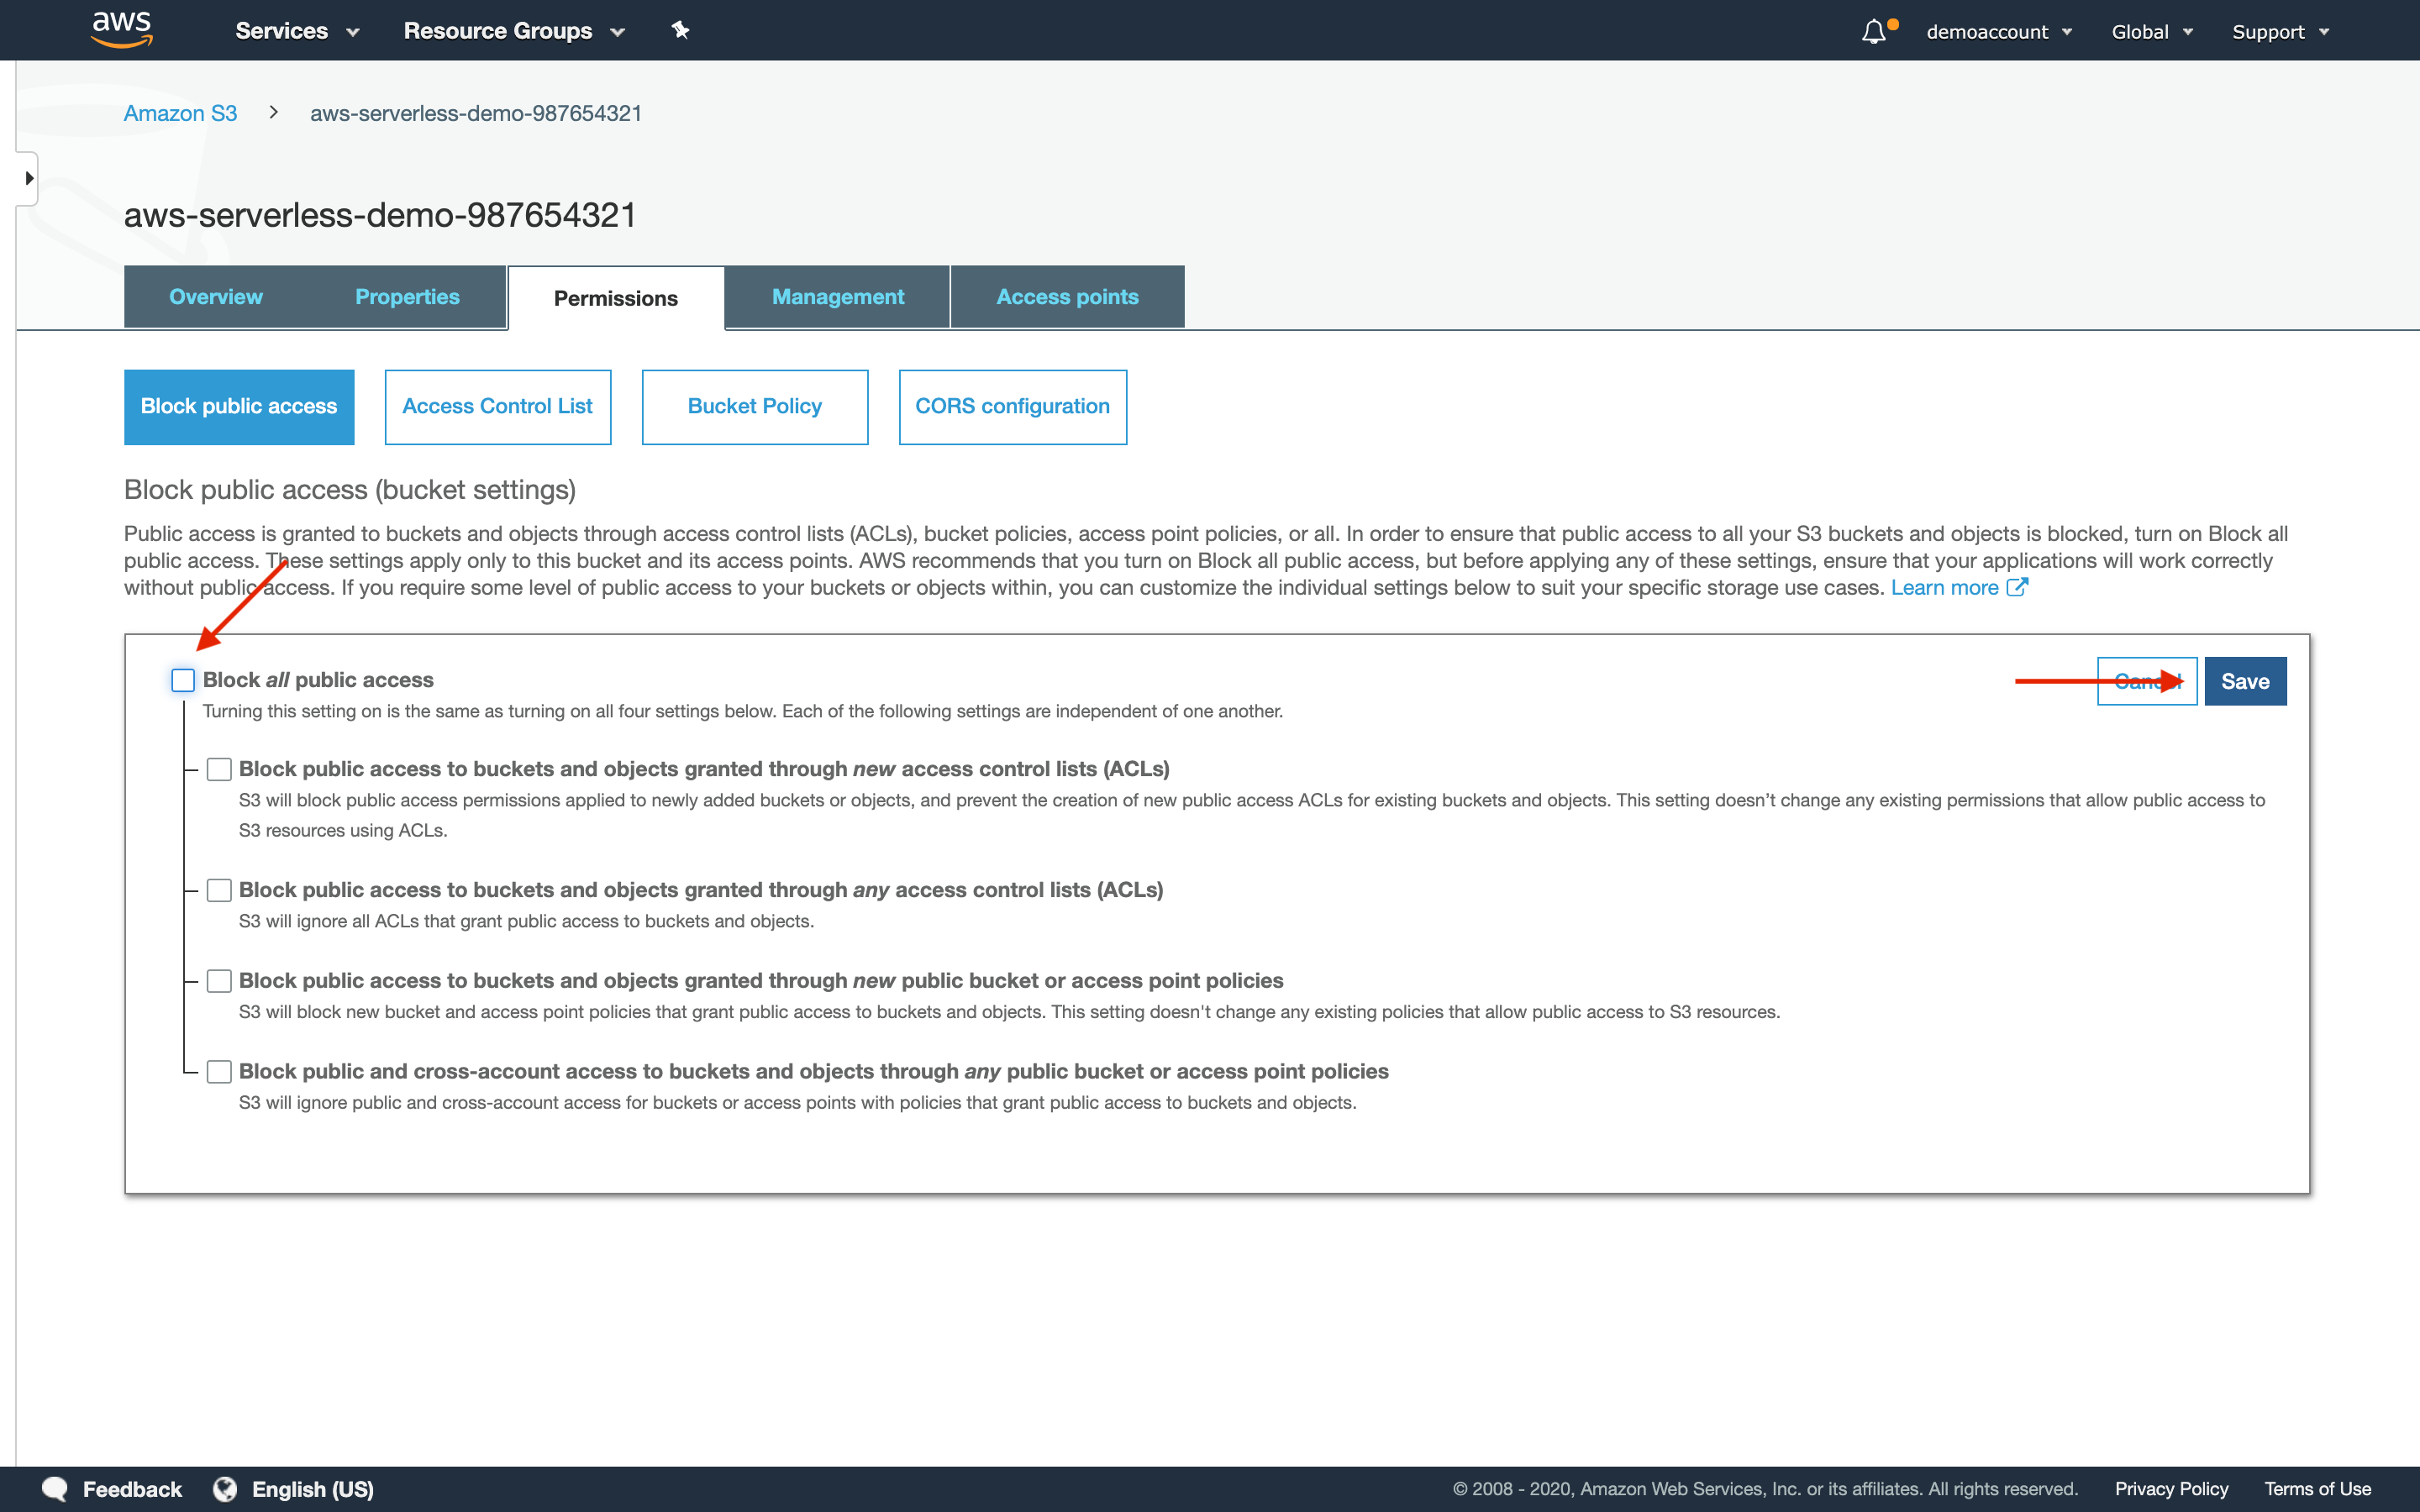
Uncheck Block all public access.
-
Click Save.
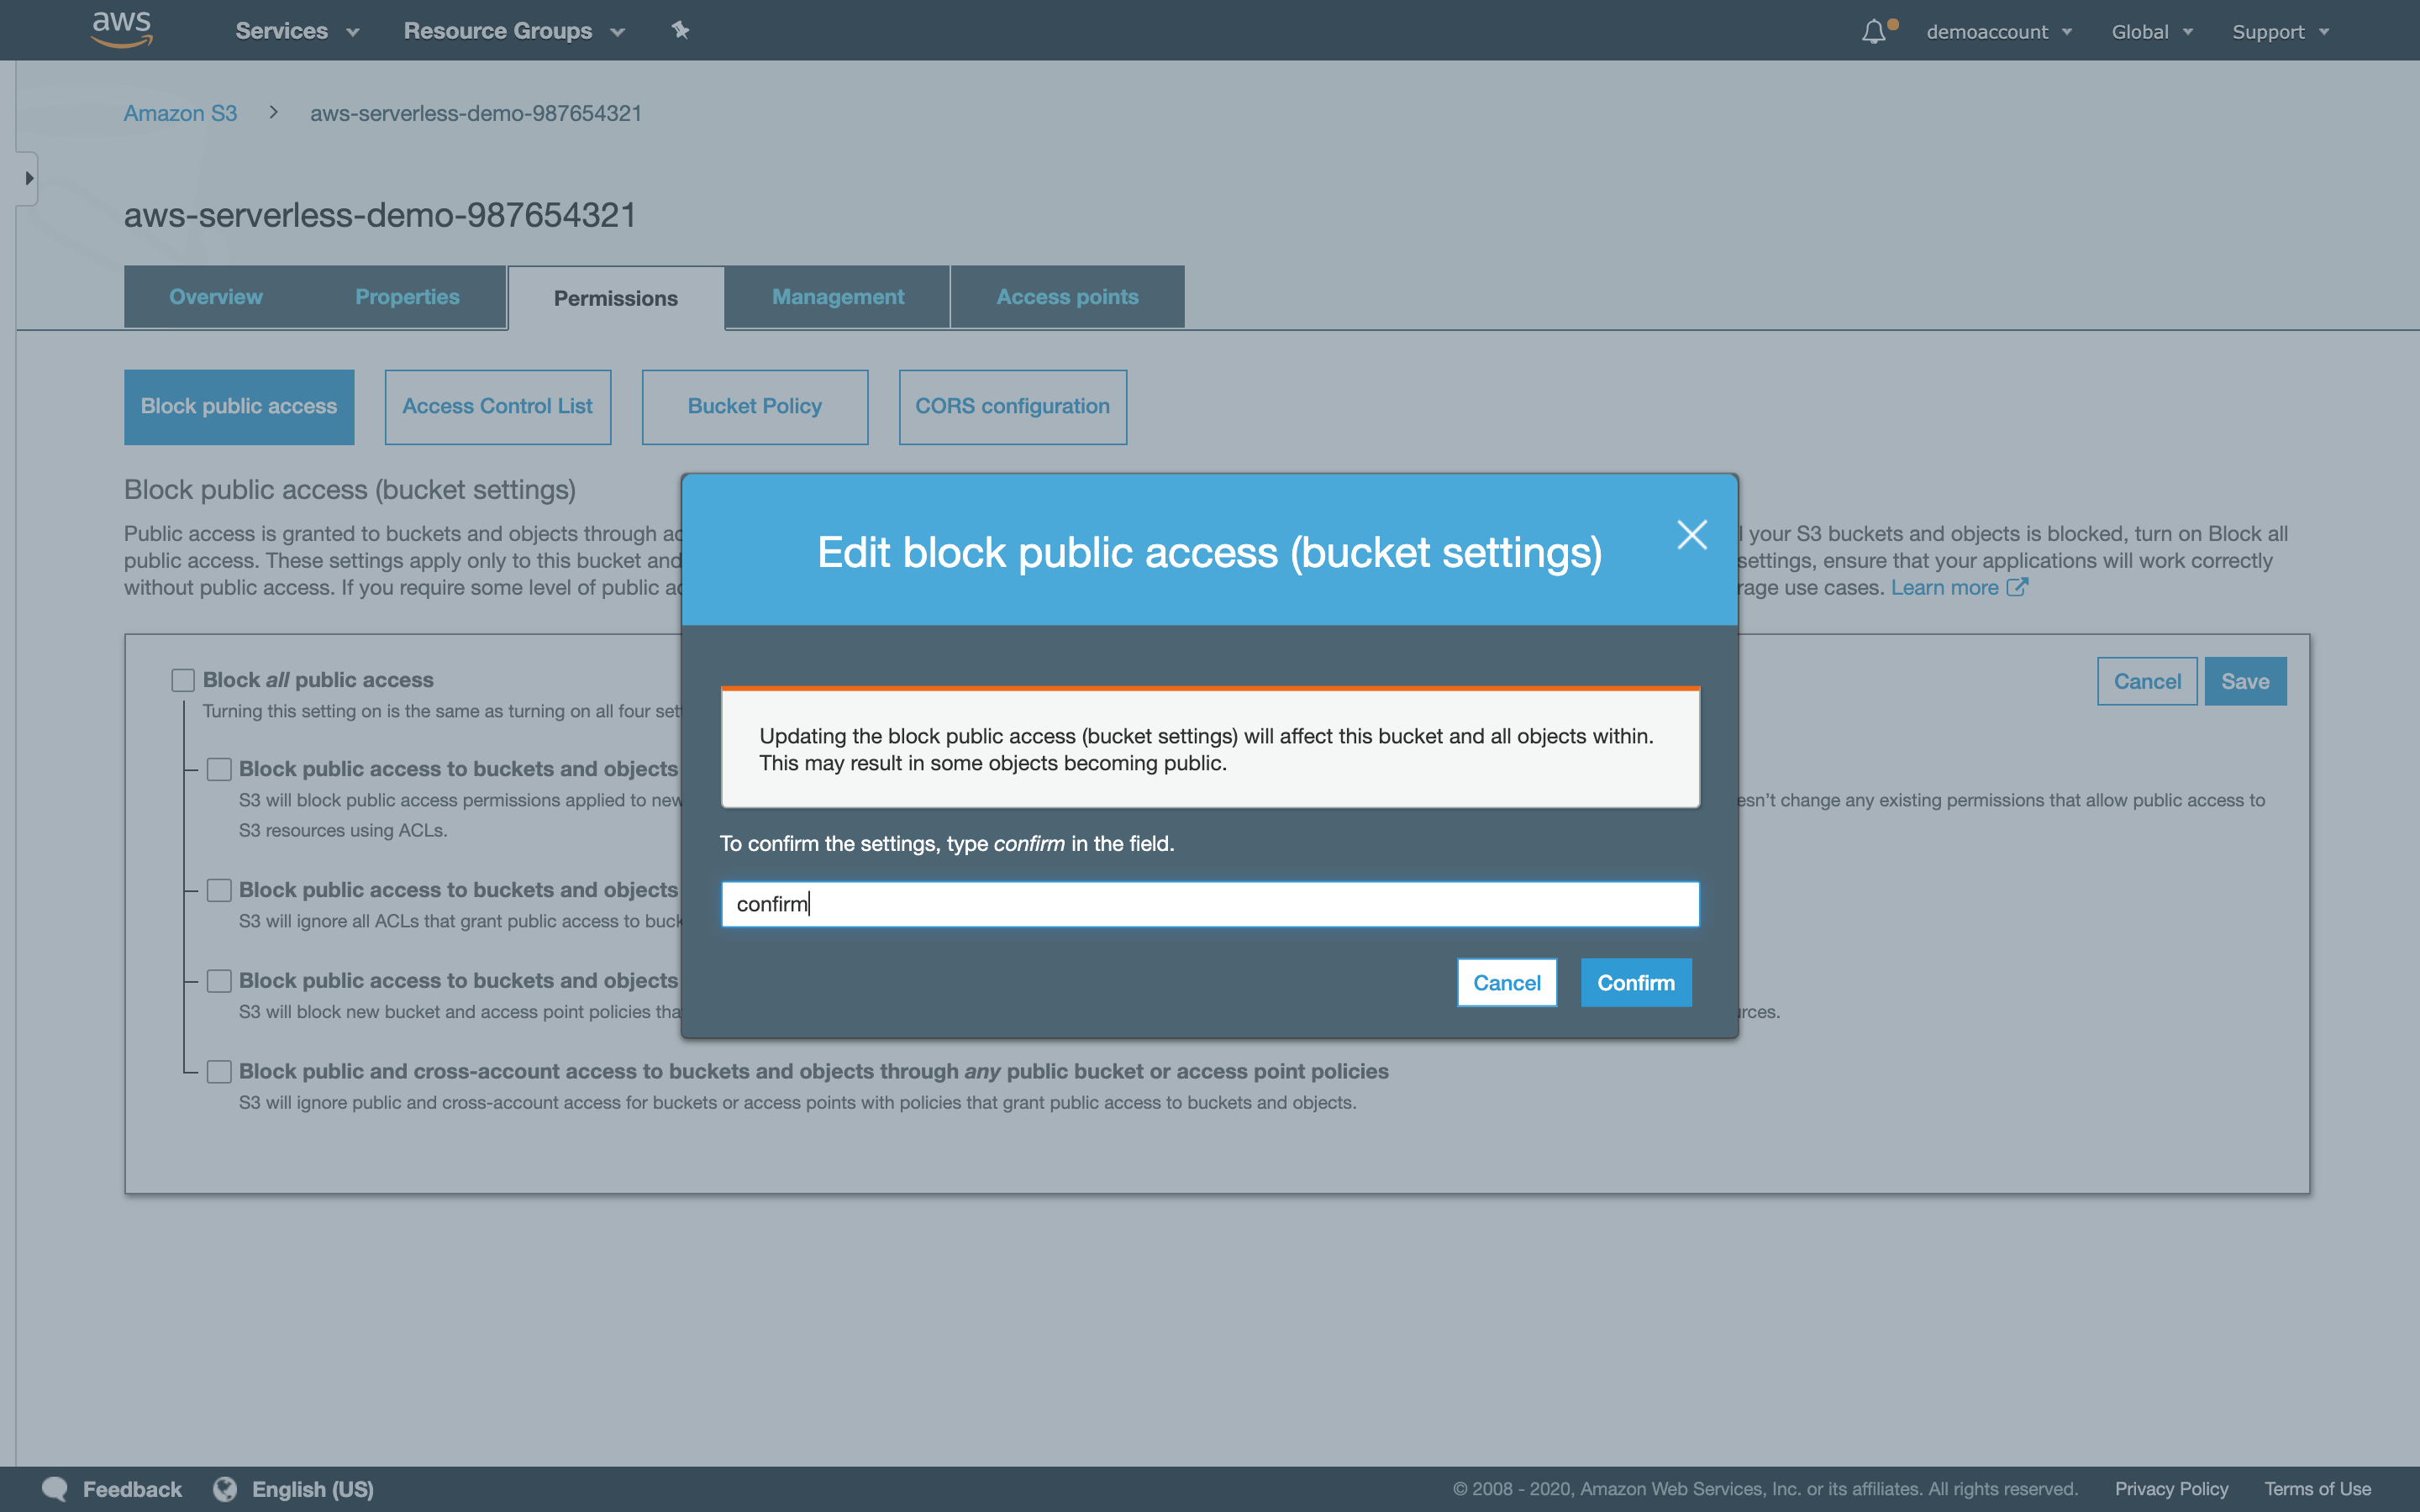
- Clicking Save will prompt a confirmation window. Type confirm as directed, and then click click Confirm.
Step 4: Enable Static website hosting.
- From the S3 console, click on the bucket name.
- Select Properties in in the top menu bar.
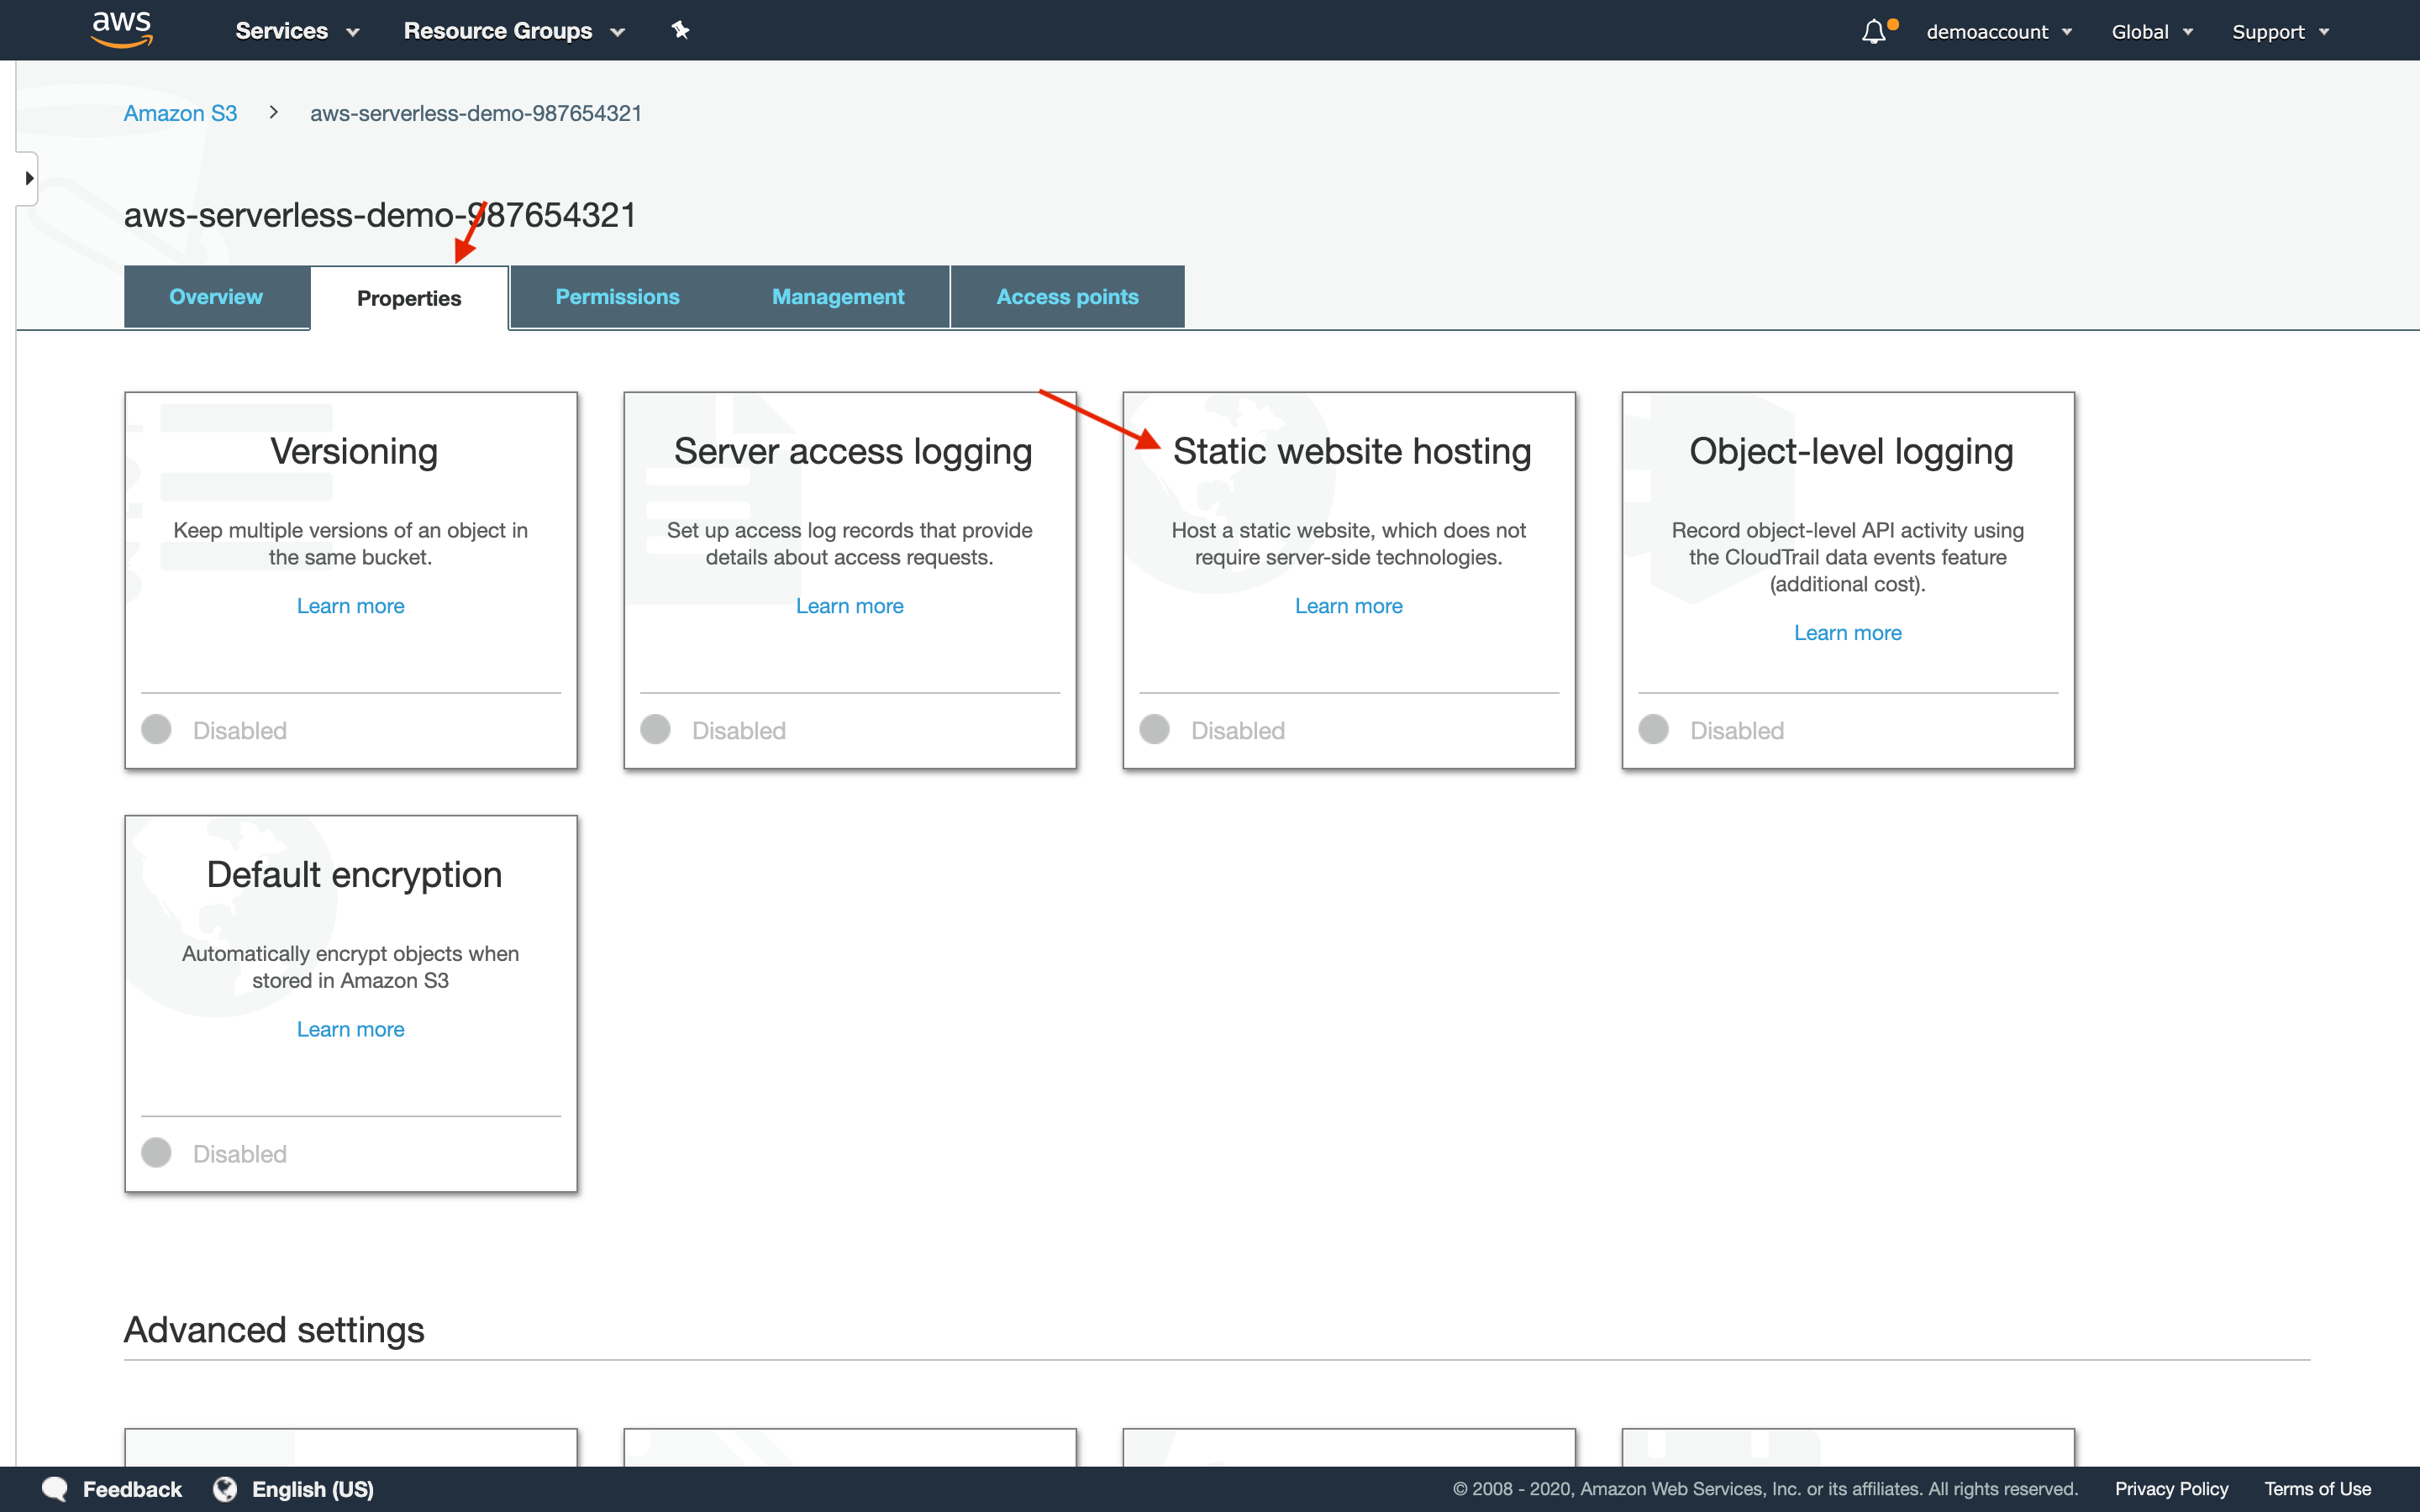
- Select Static website hosting.
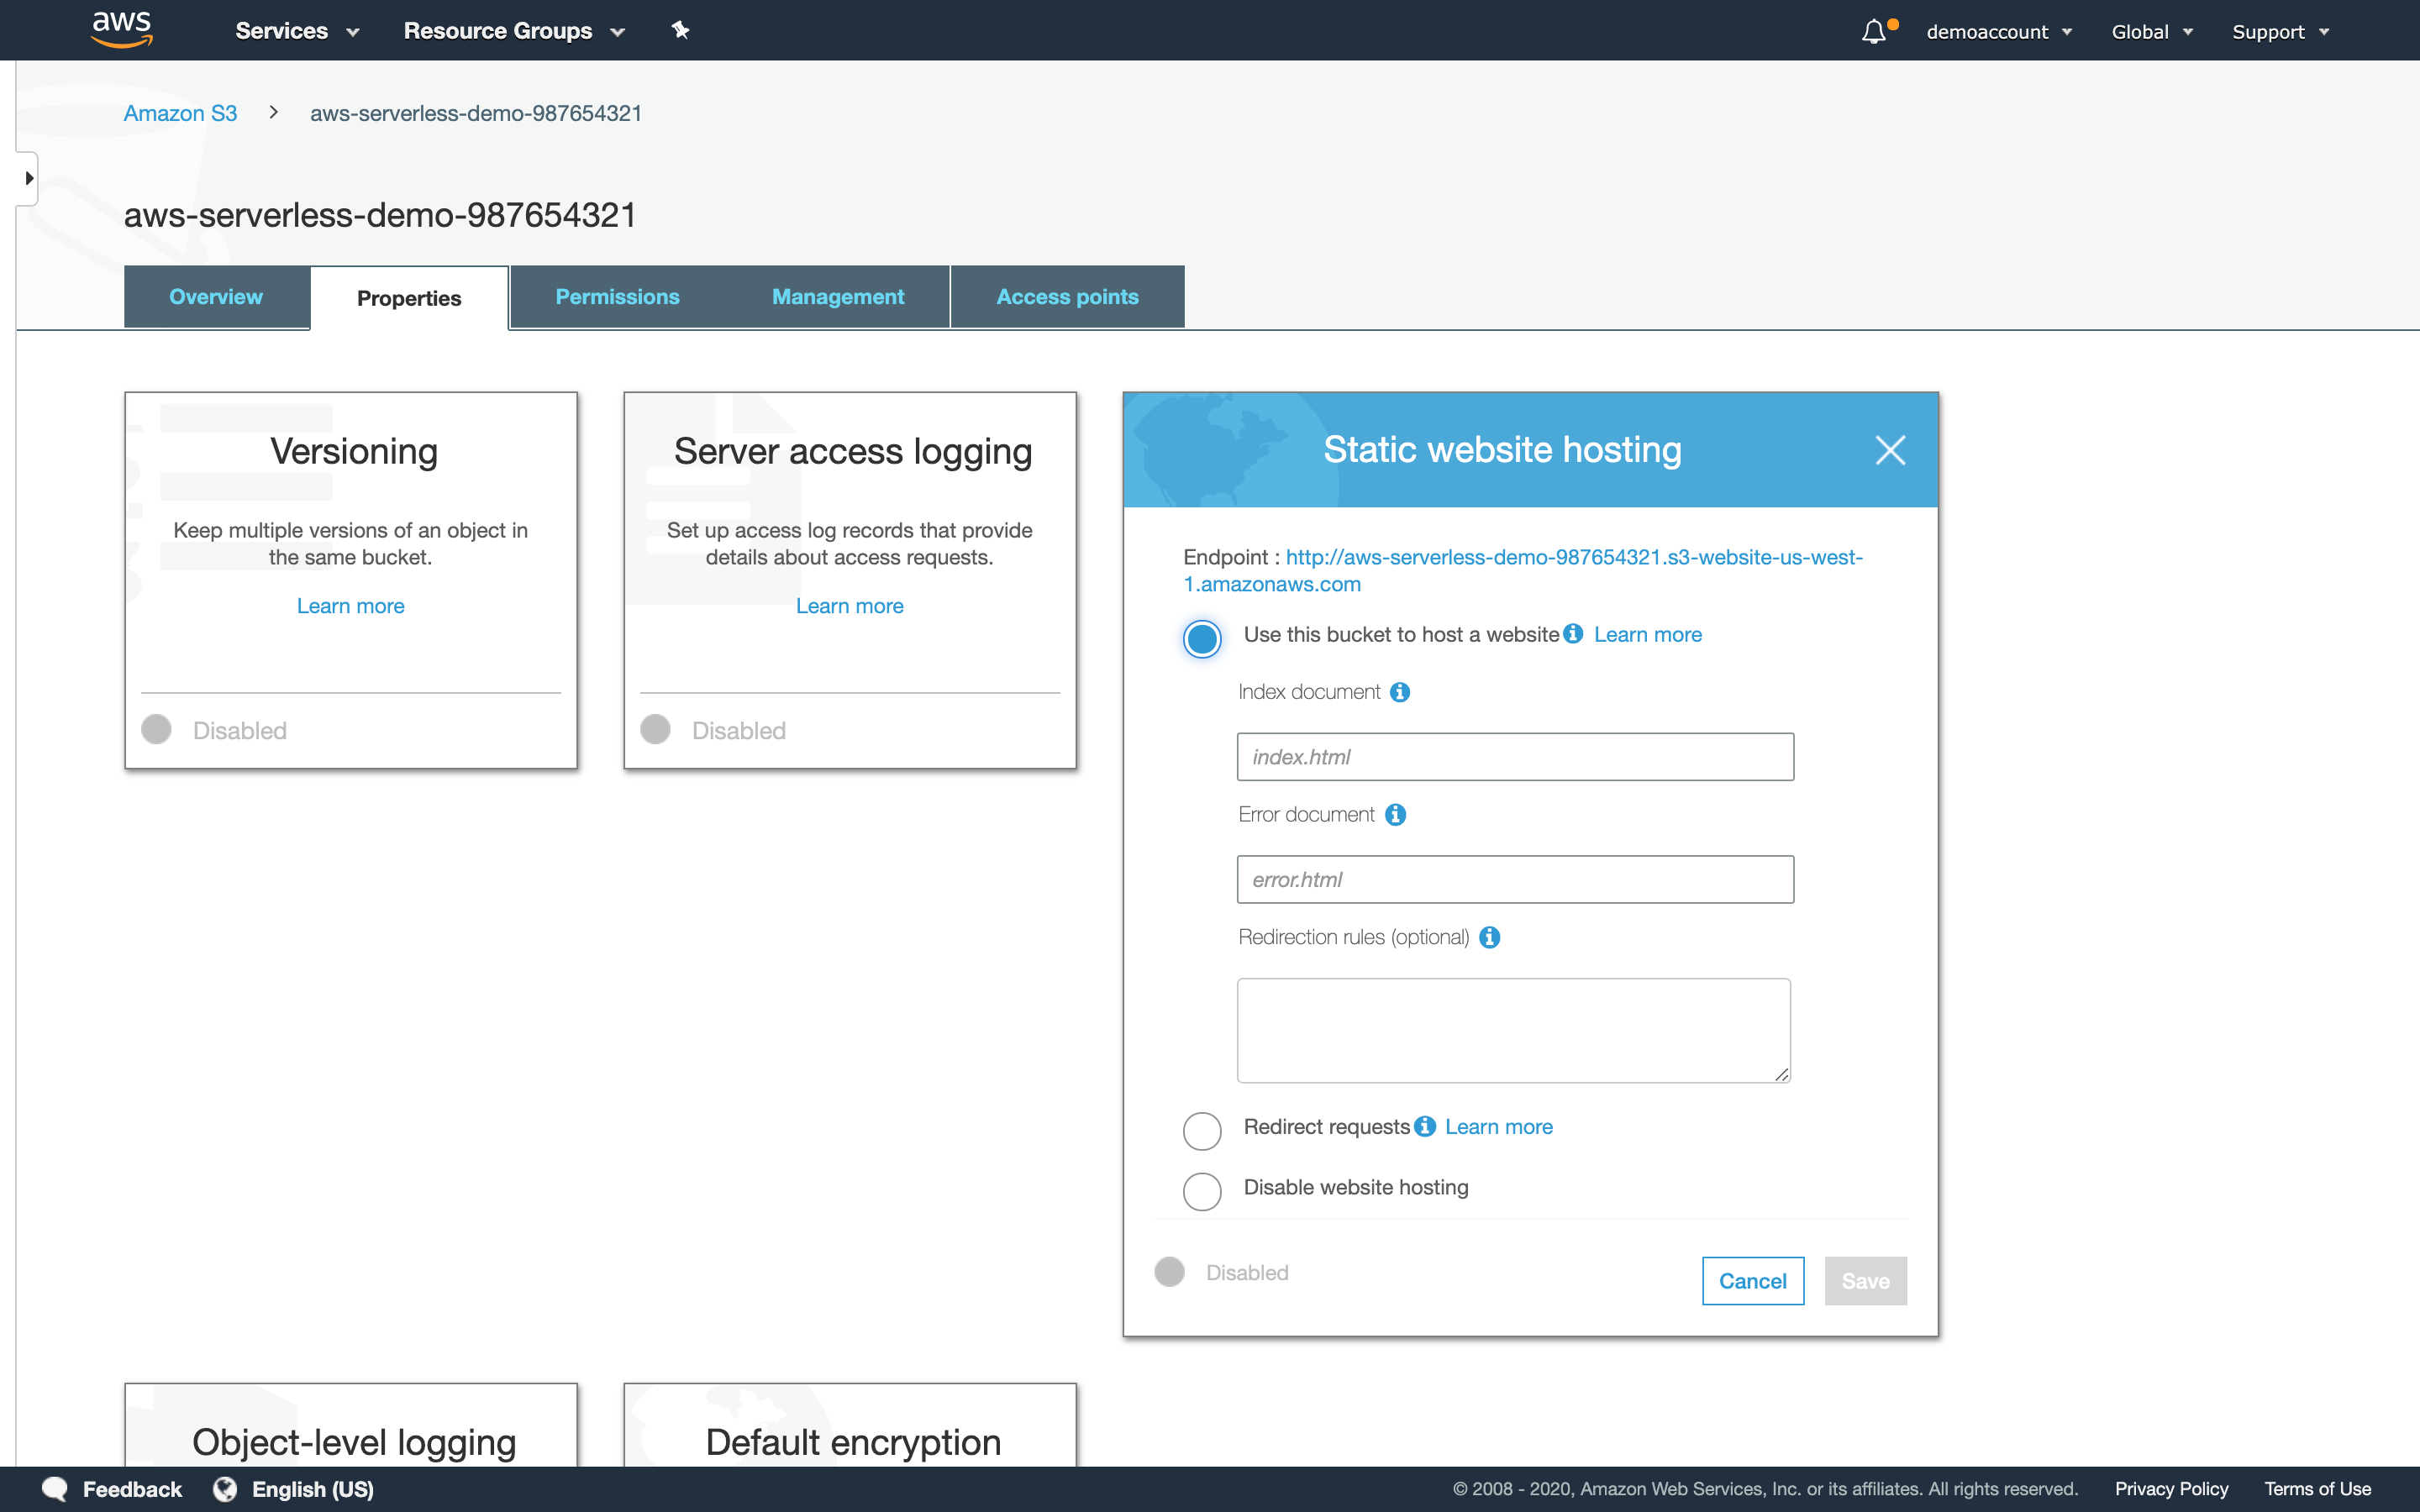
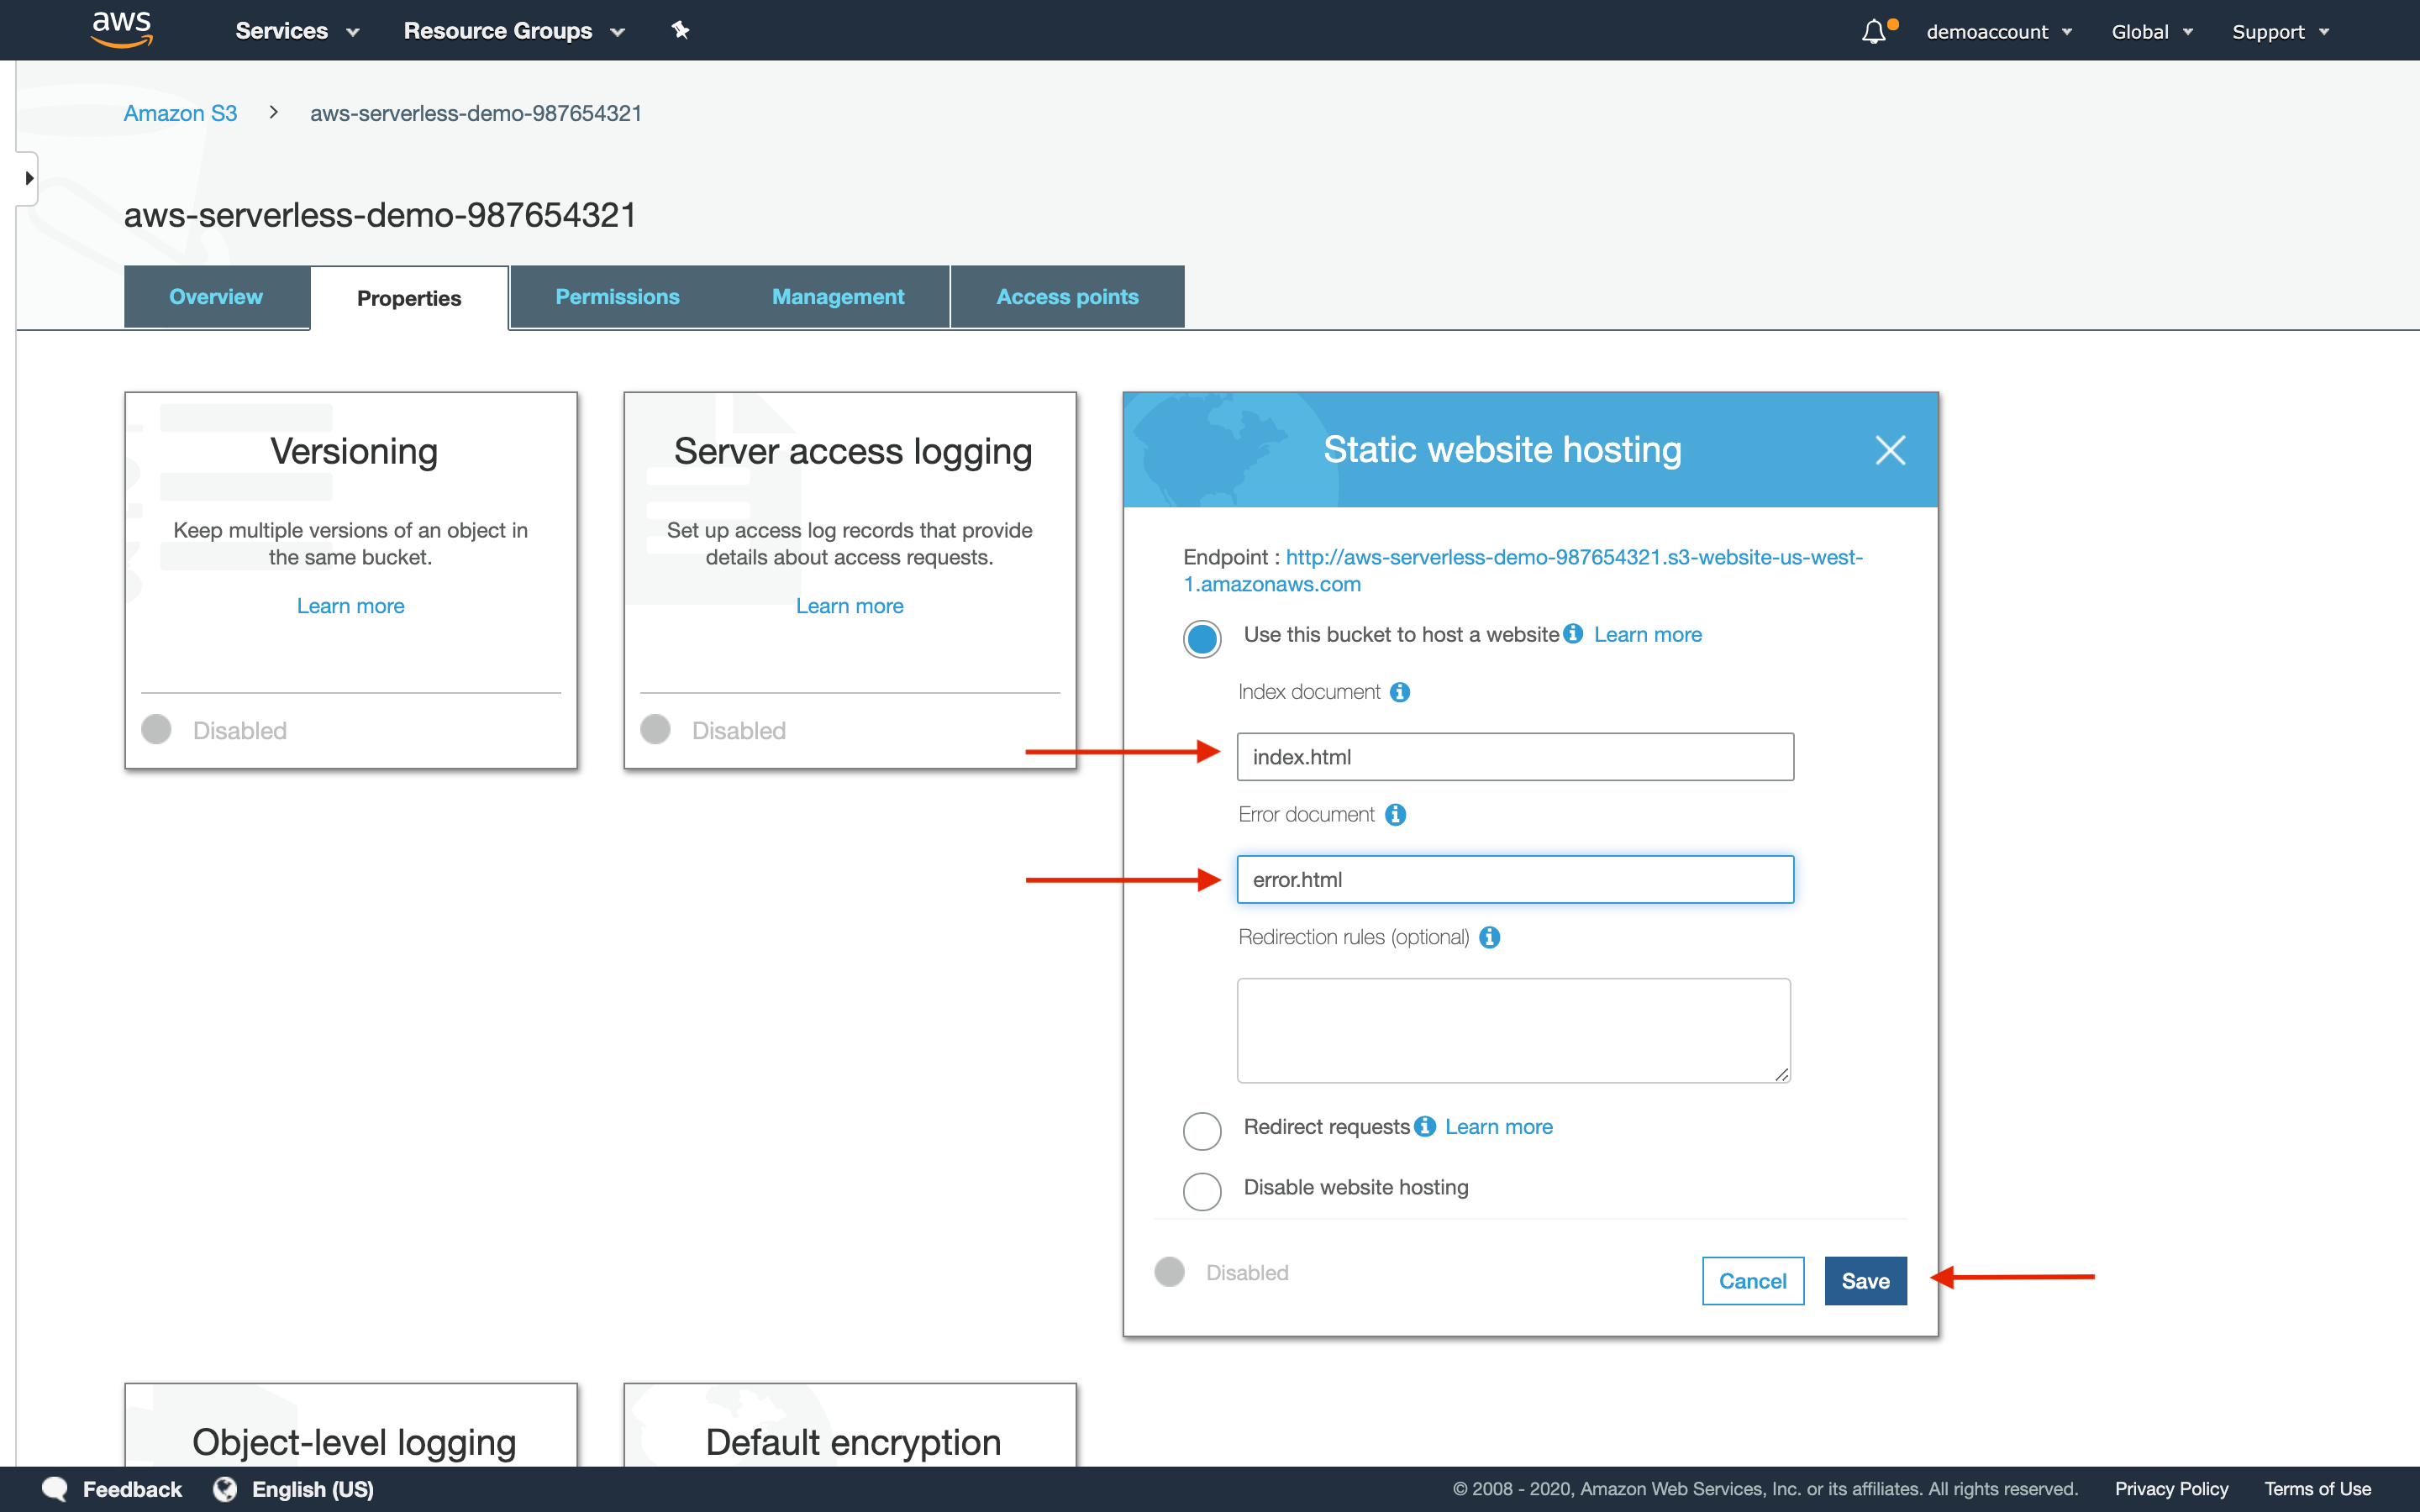
- Type in index.html and error.html where prompted and click Save.
Step 5: Register your domain. (Optional)
- If you haven’t already, register your domain name. It must match the bucket name.
- This process can take up to 72 hours to complete, but it is often finishes before then. As an alernative to registering and connecting a domain name, the S3 bucket will have its own URL.
Step 6: Navigate to the Lambda console.
- Navigate to Lambda by typing it into the search bar or looking under the Services drop-down menu under the Compute category.
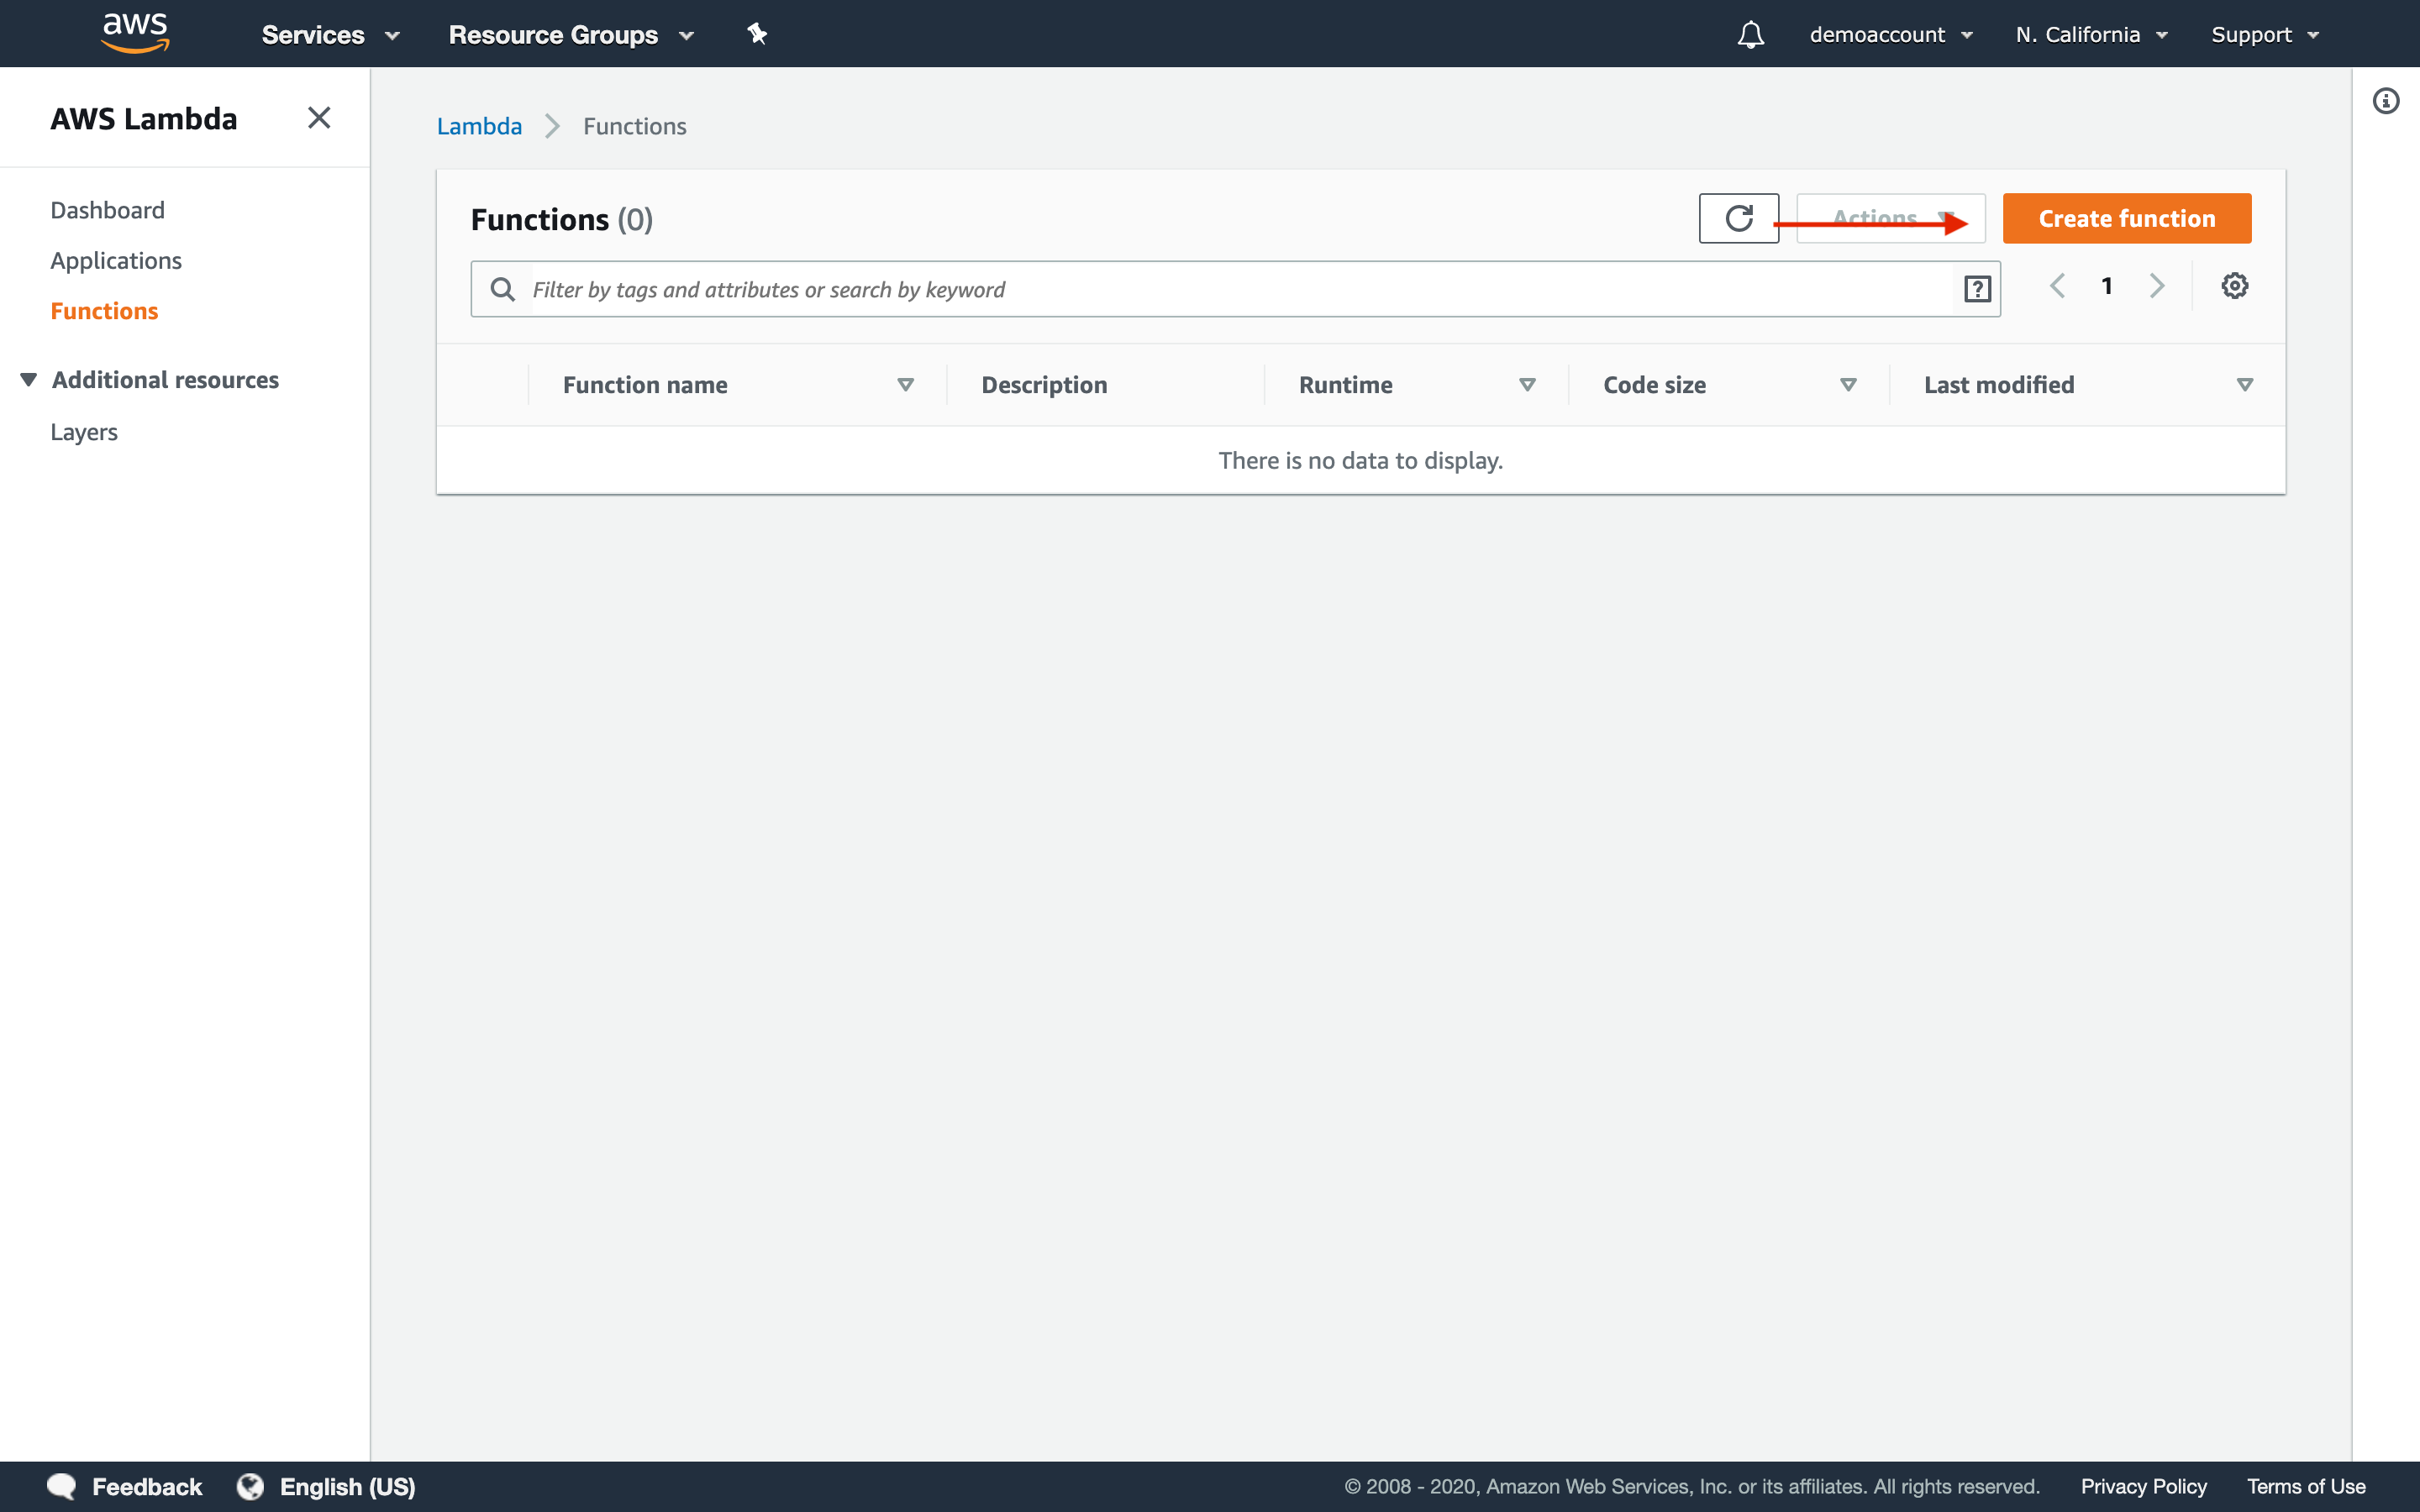
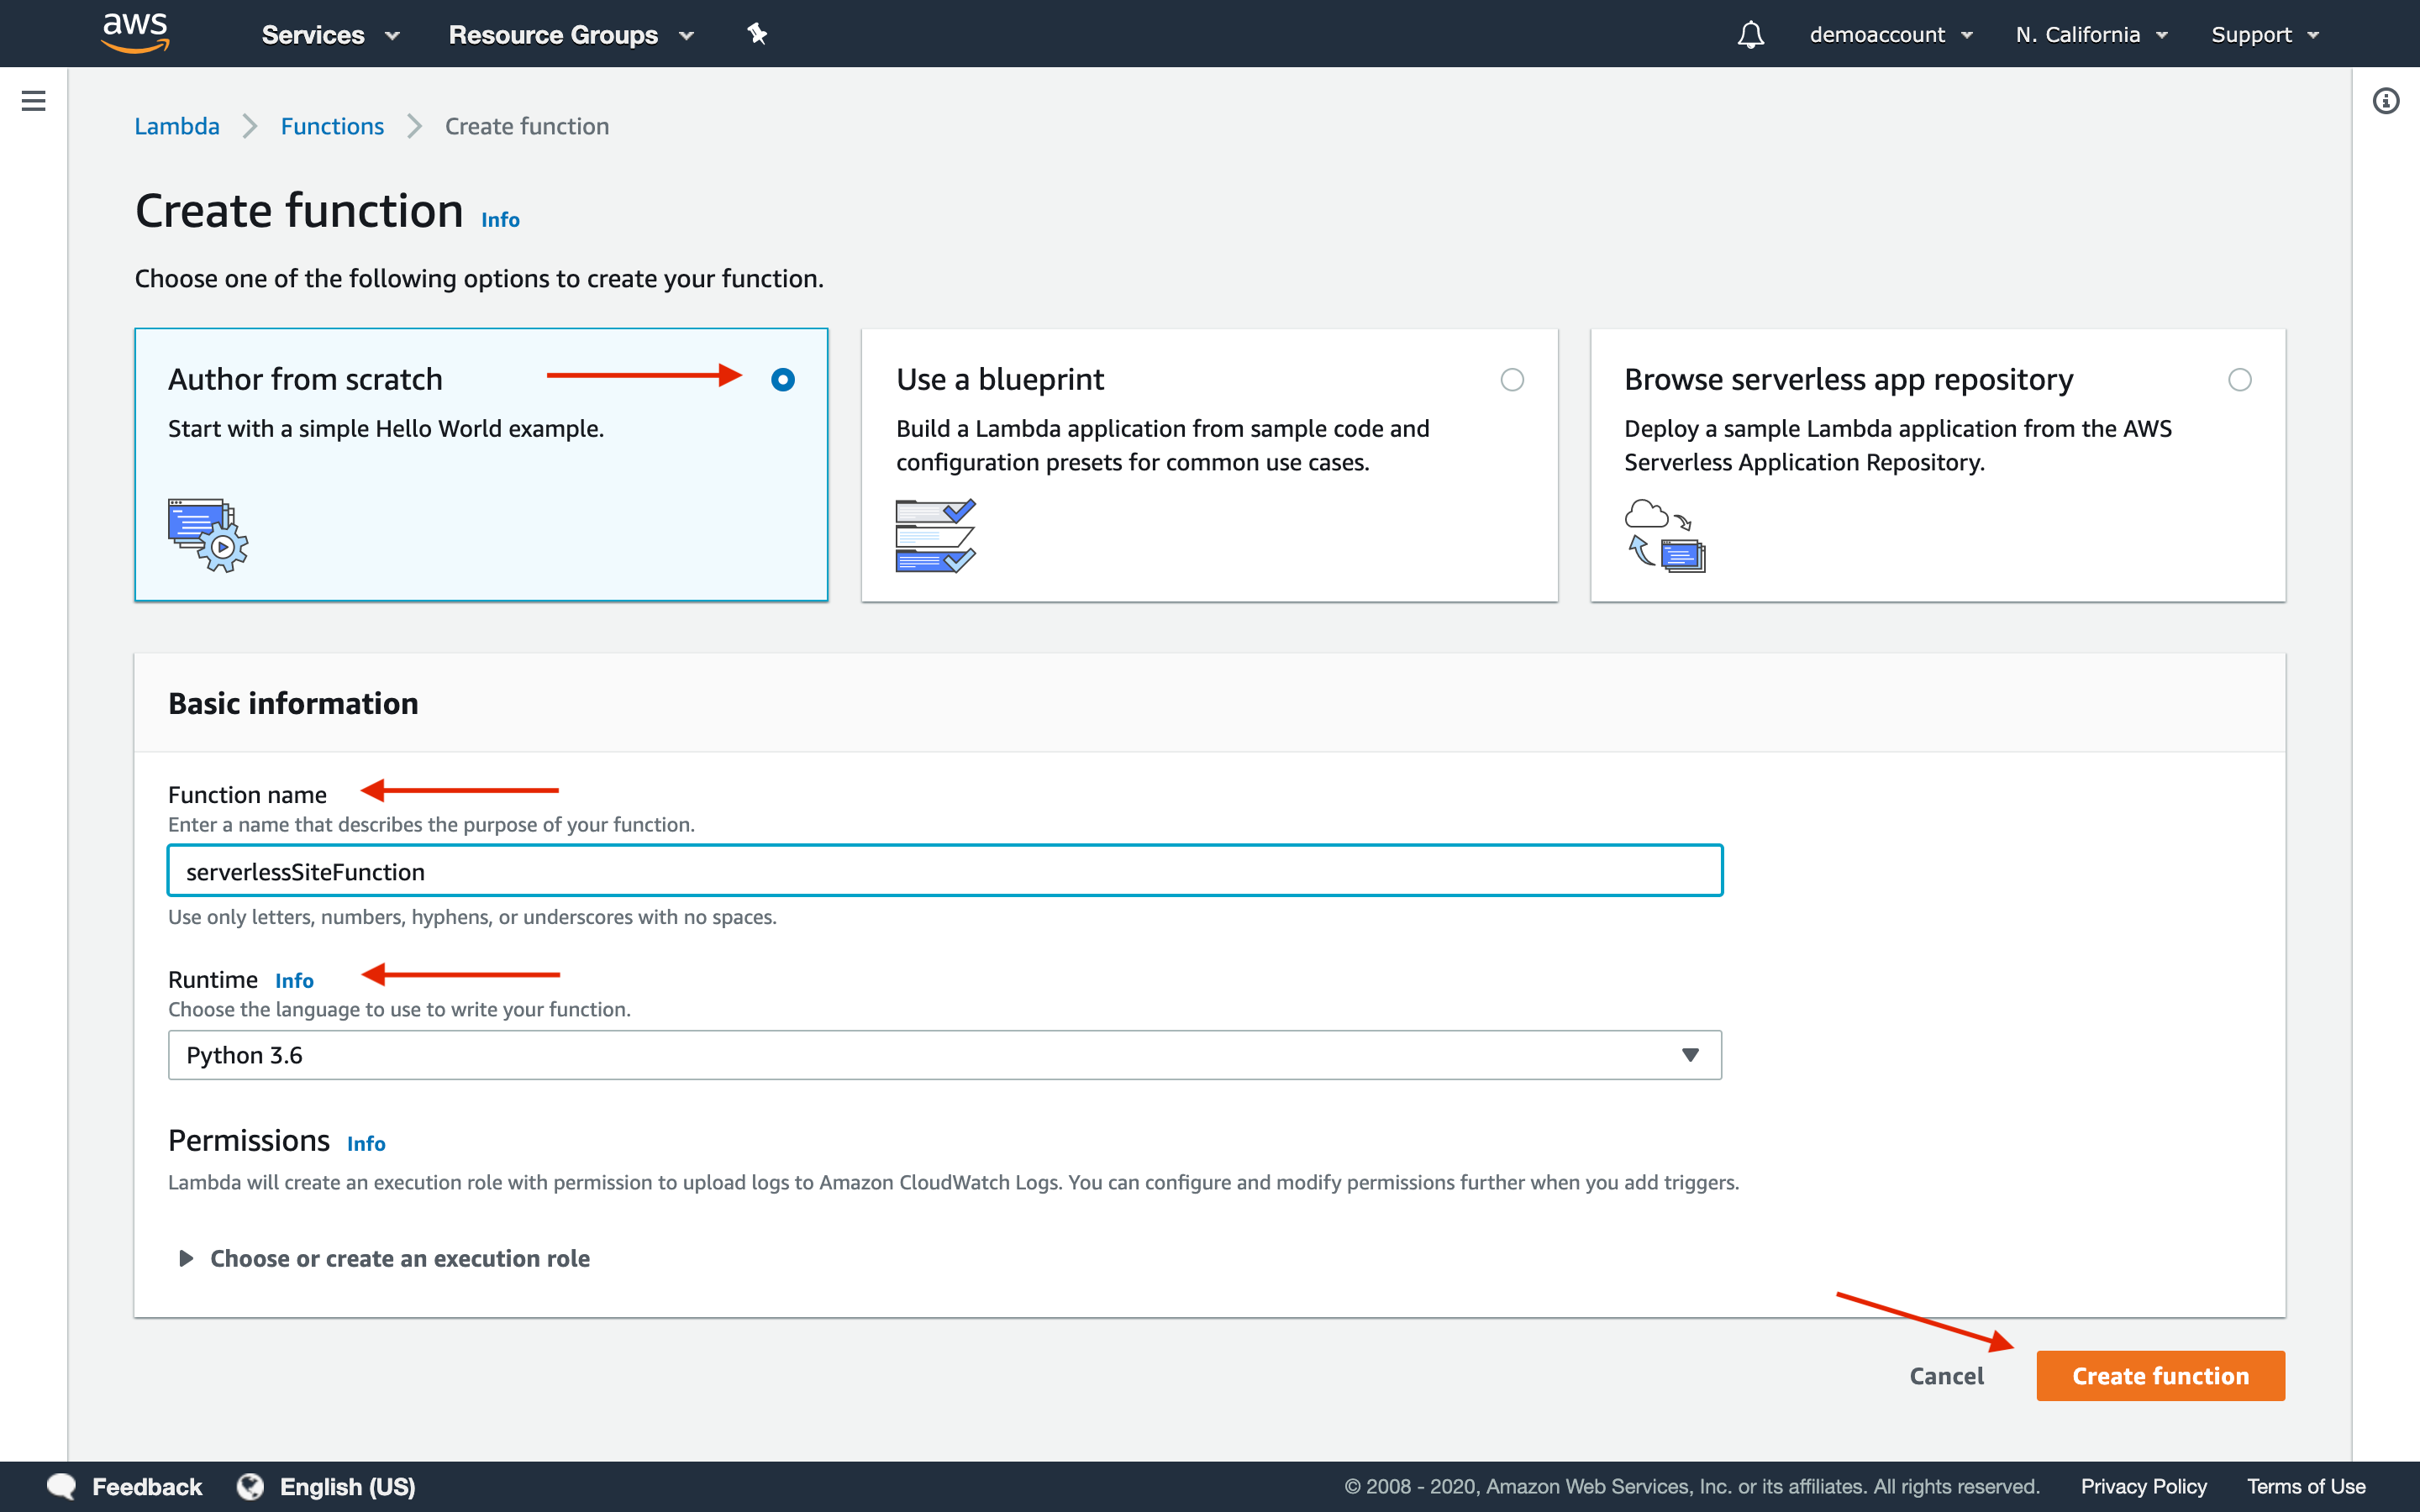
Step 7: Create a Function.
- Click Create function.
-
Select Author from scratch.
-
Name you function.
-
For runtime select Python 3.6.
-
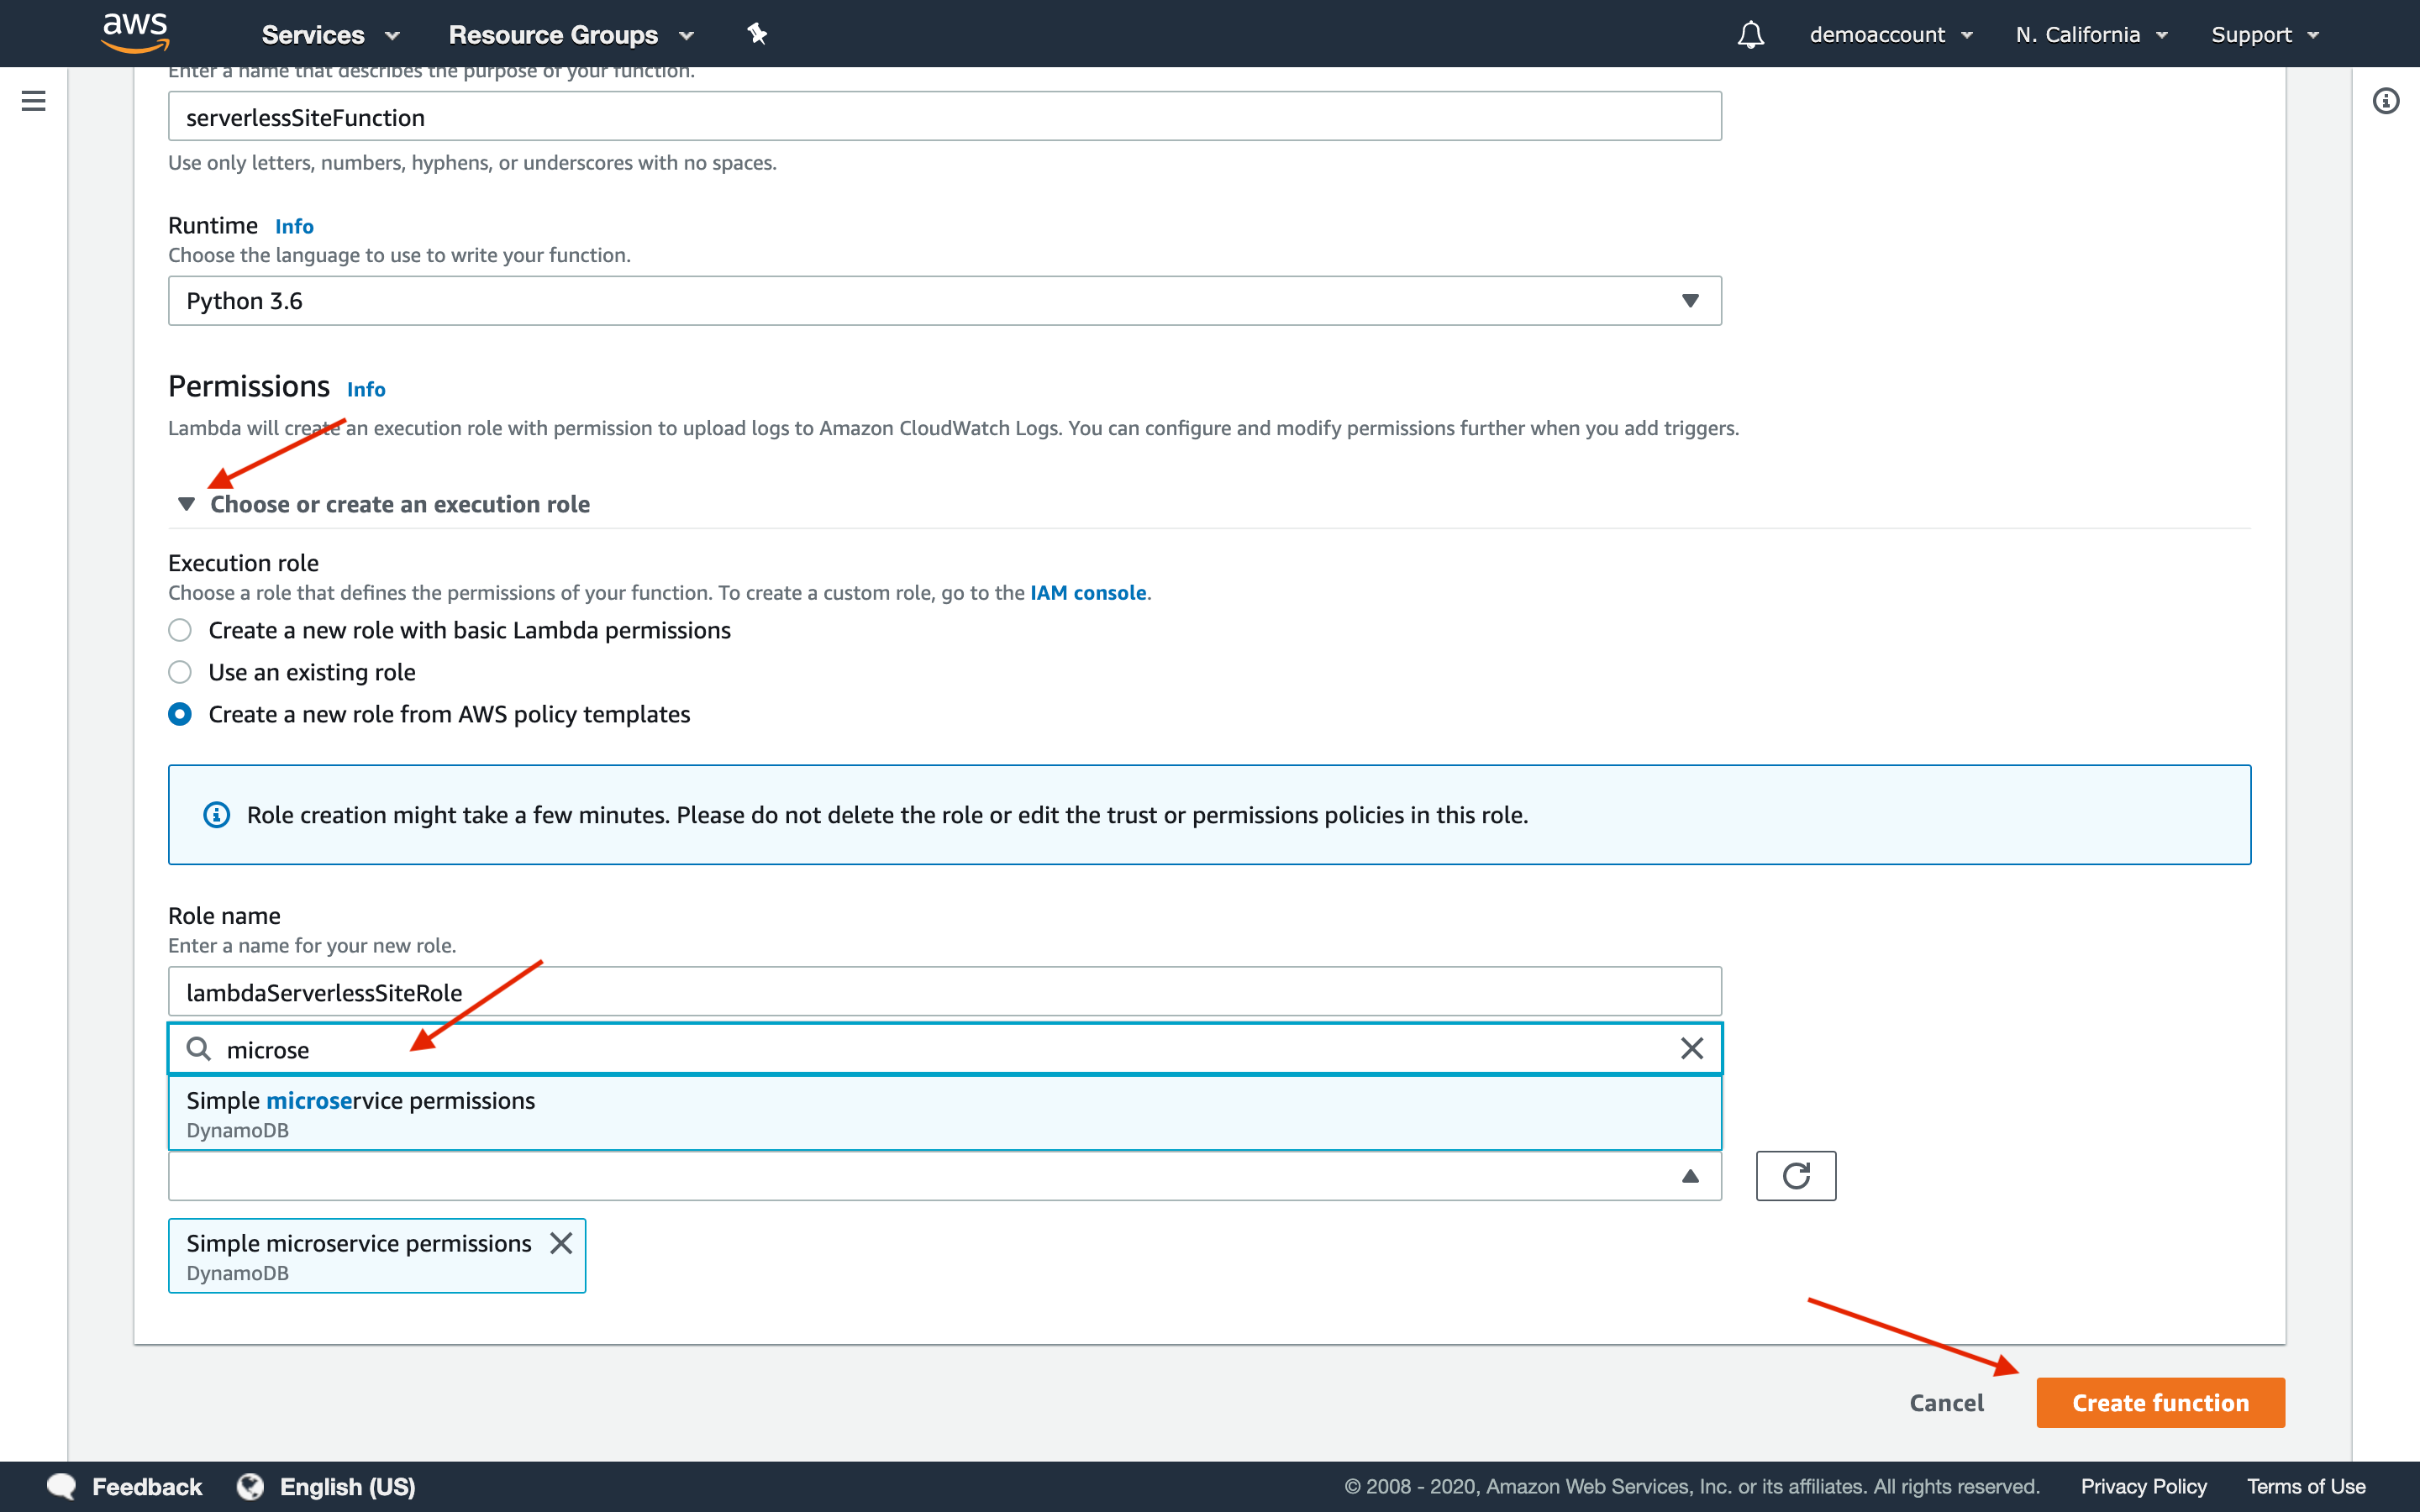
Expand Choose or create an execution role If this is your first time using Lambda you will need to create a new role.
-
Select Create a new role from AWS policy templates.
-
Name it.
-
Search for the Simple microservice permissions policy template.
-
Click Create Function.
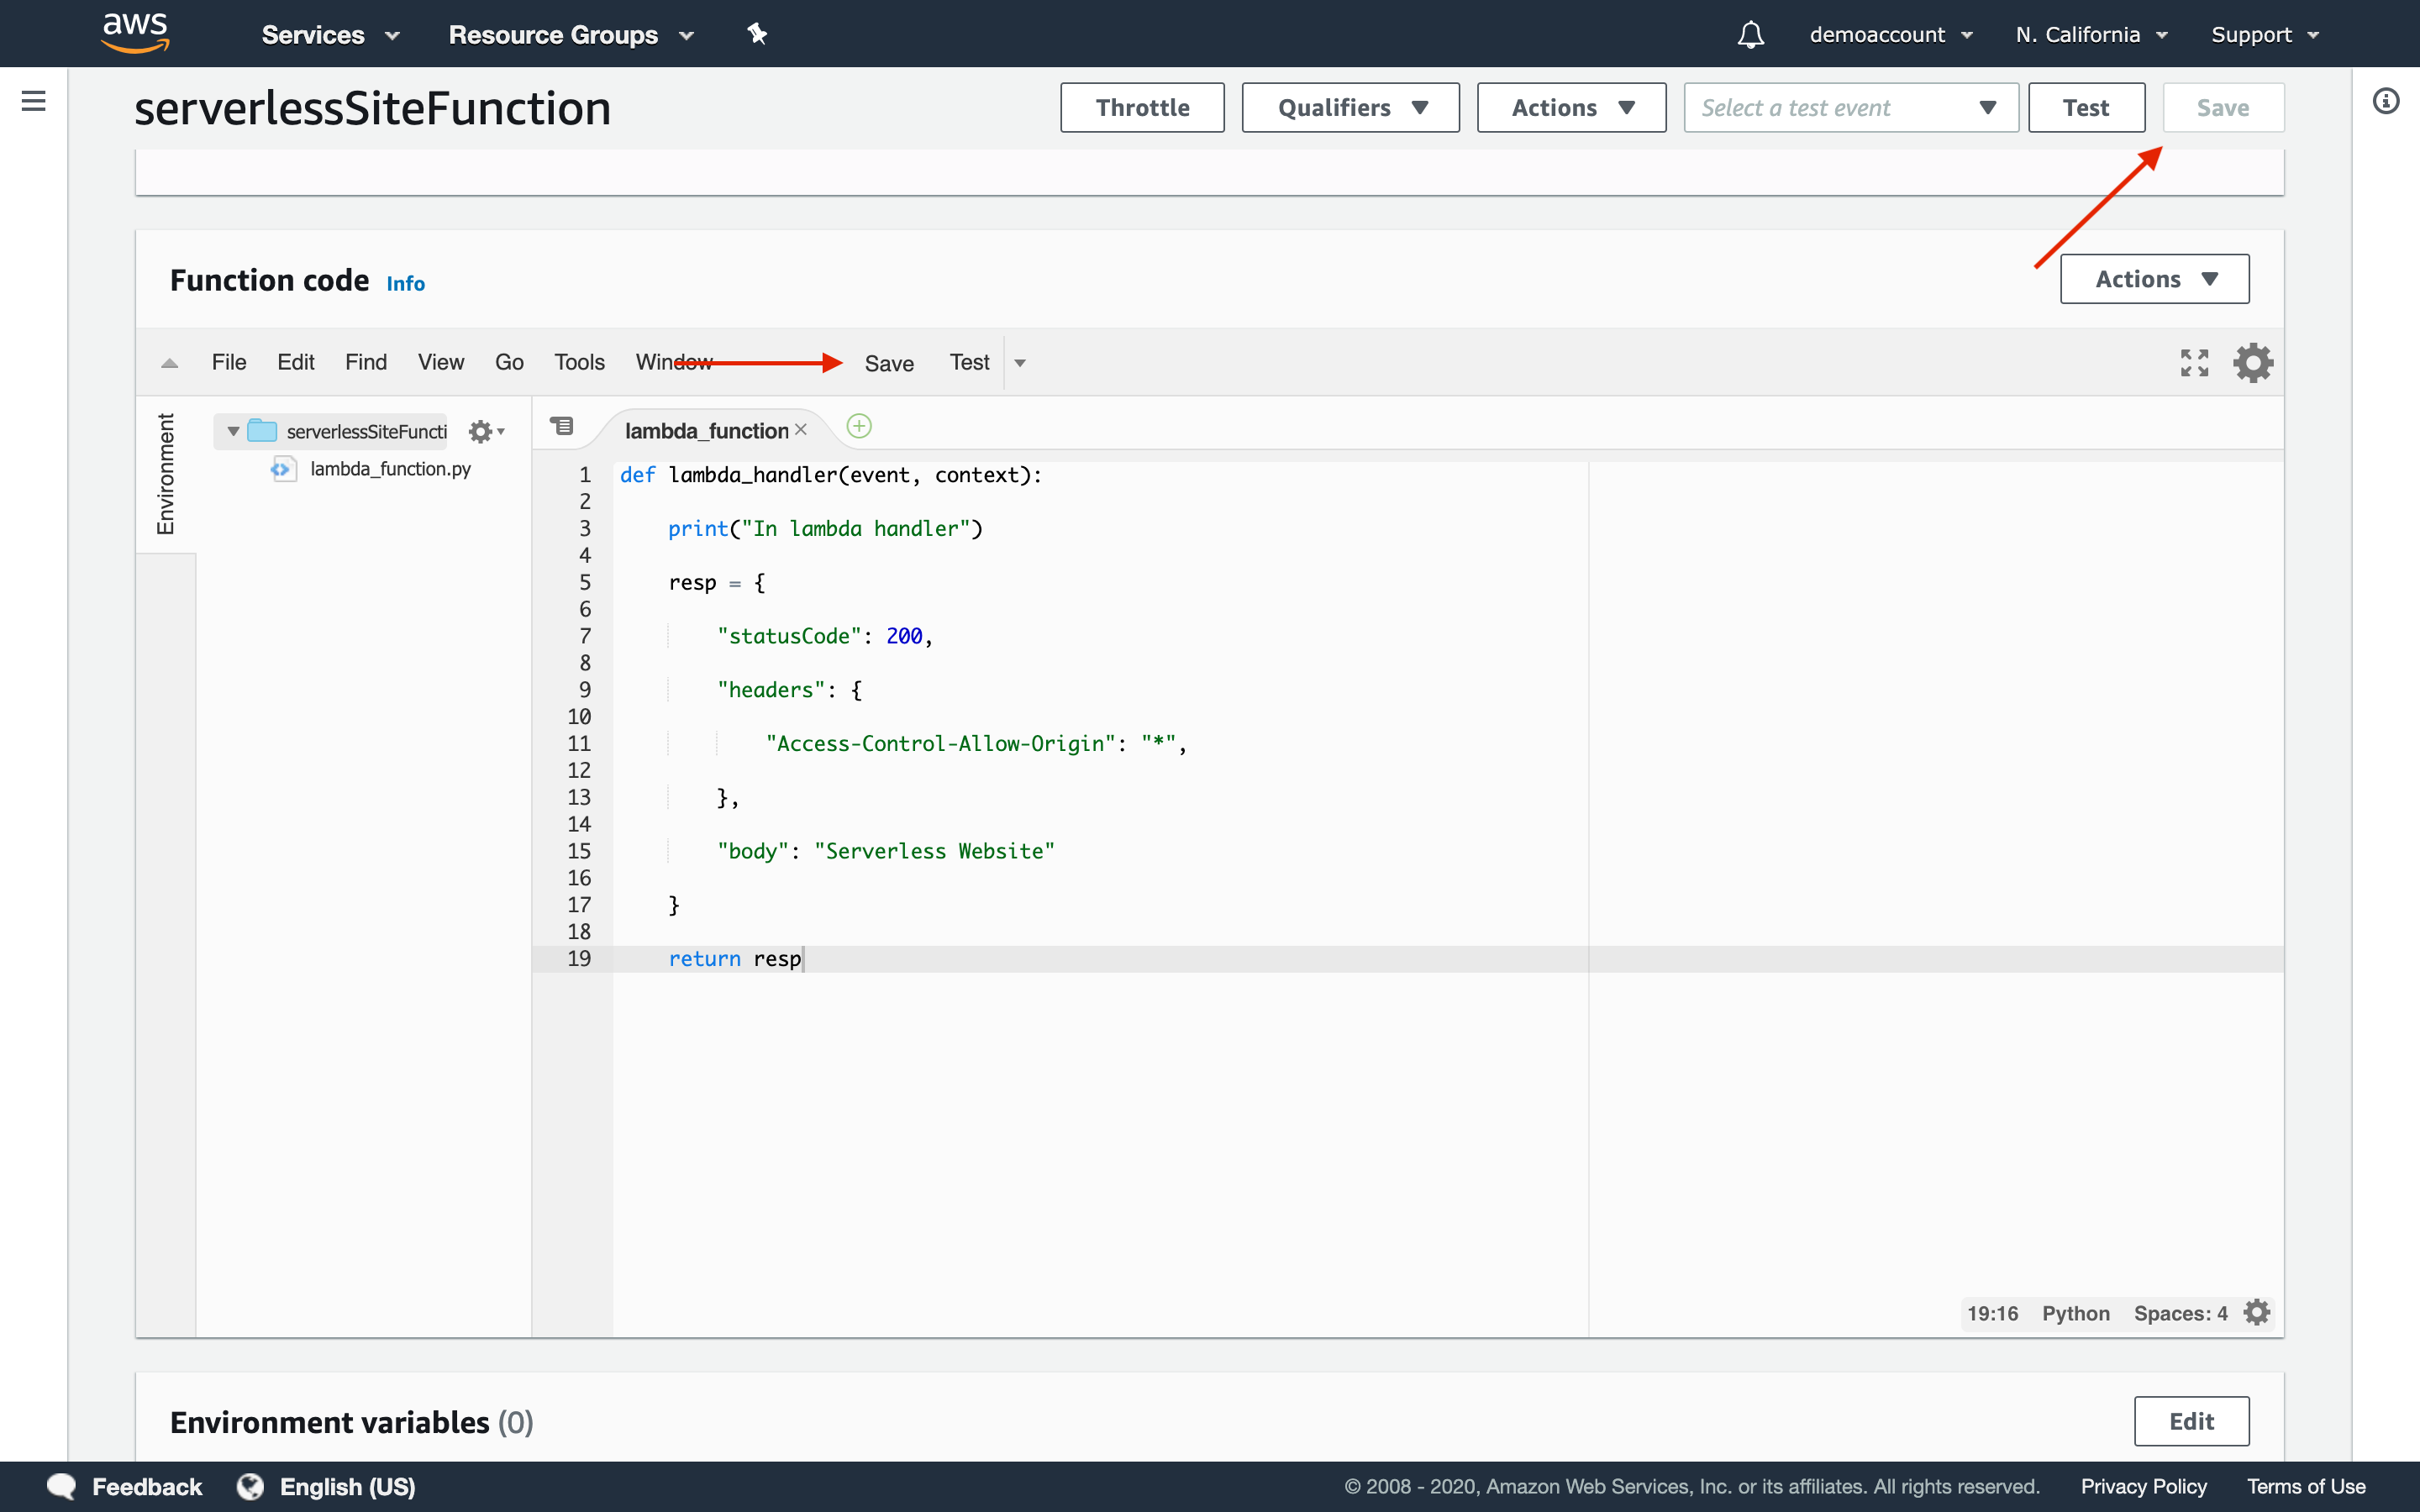
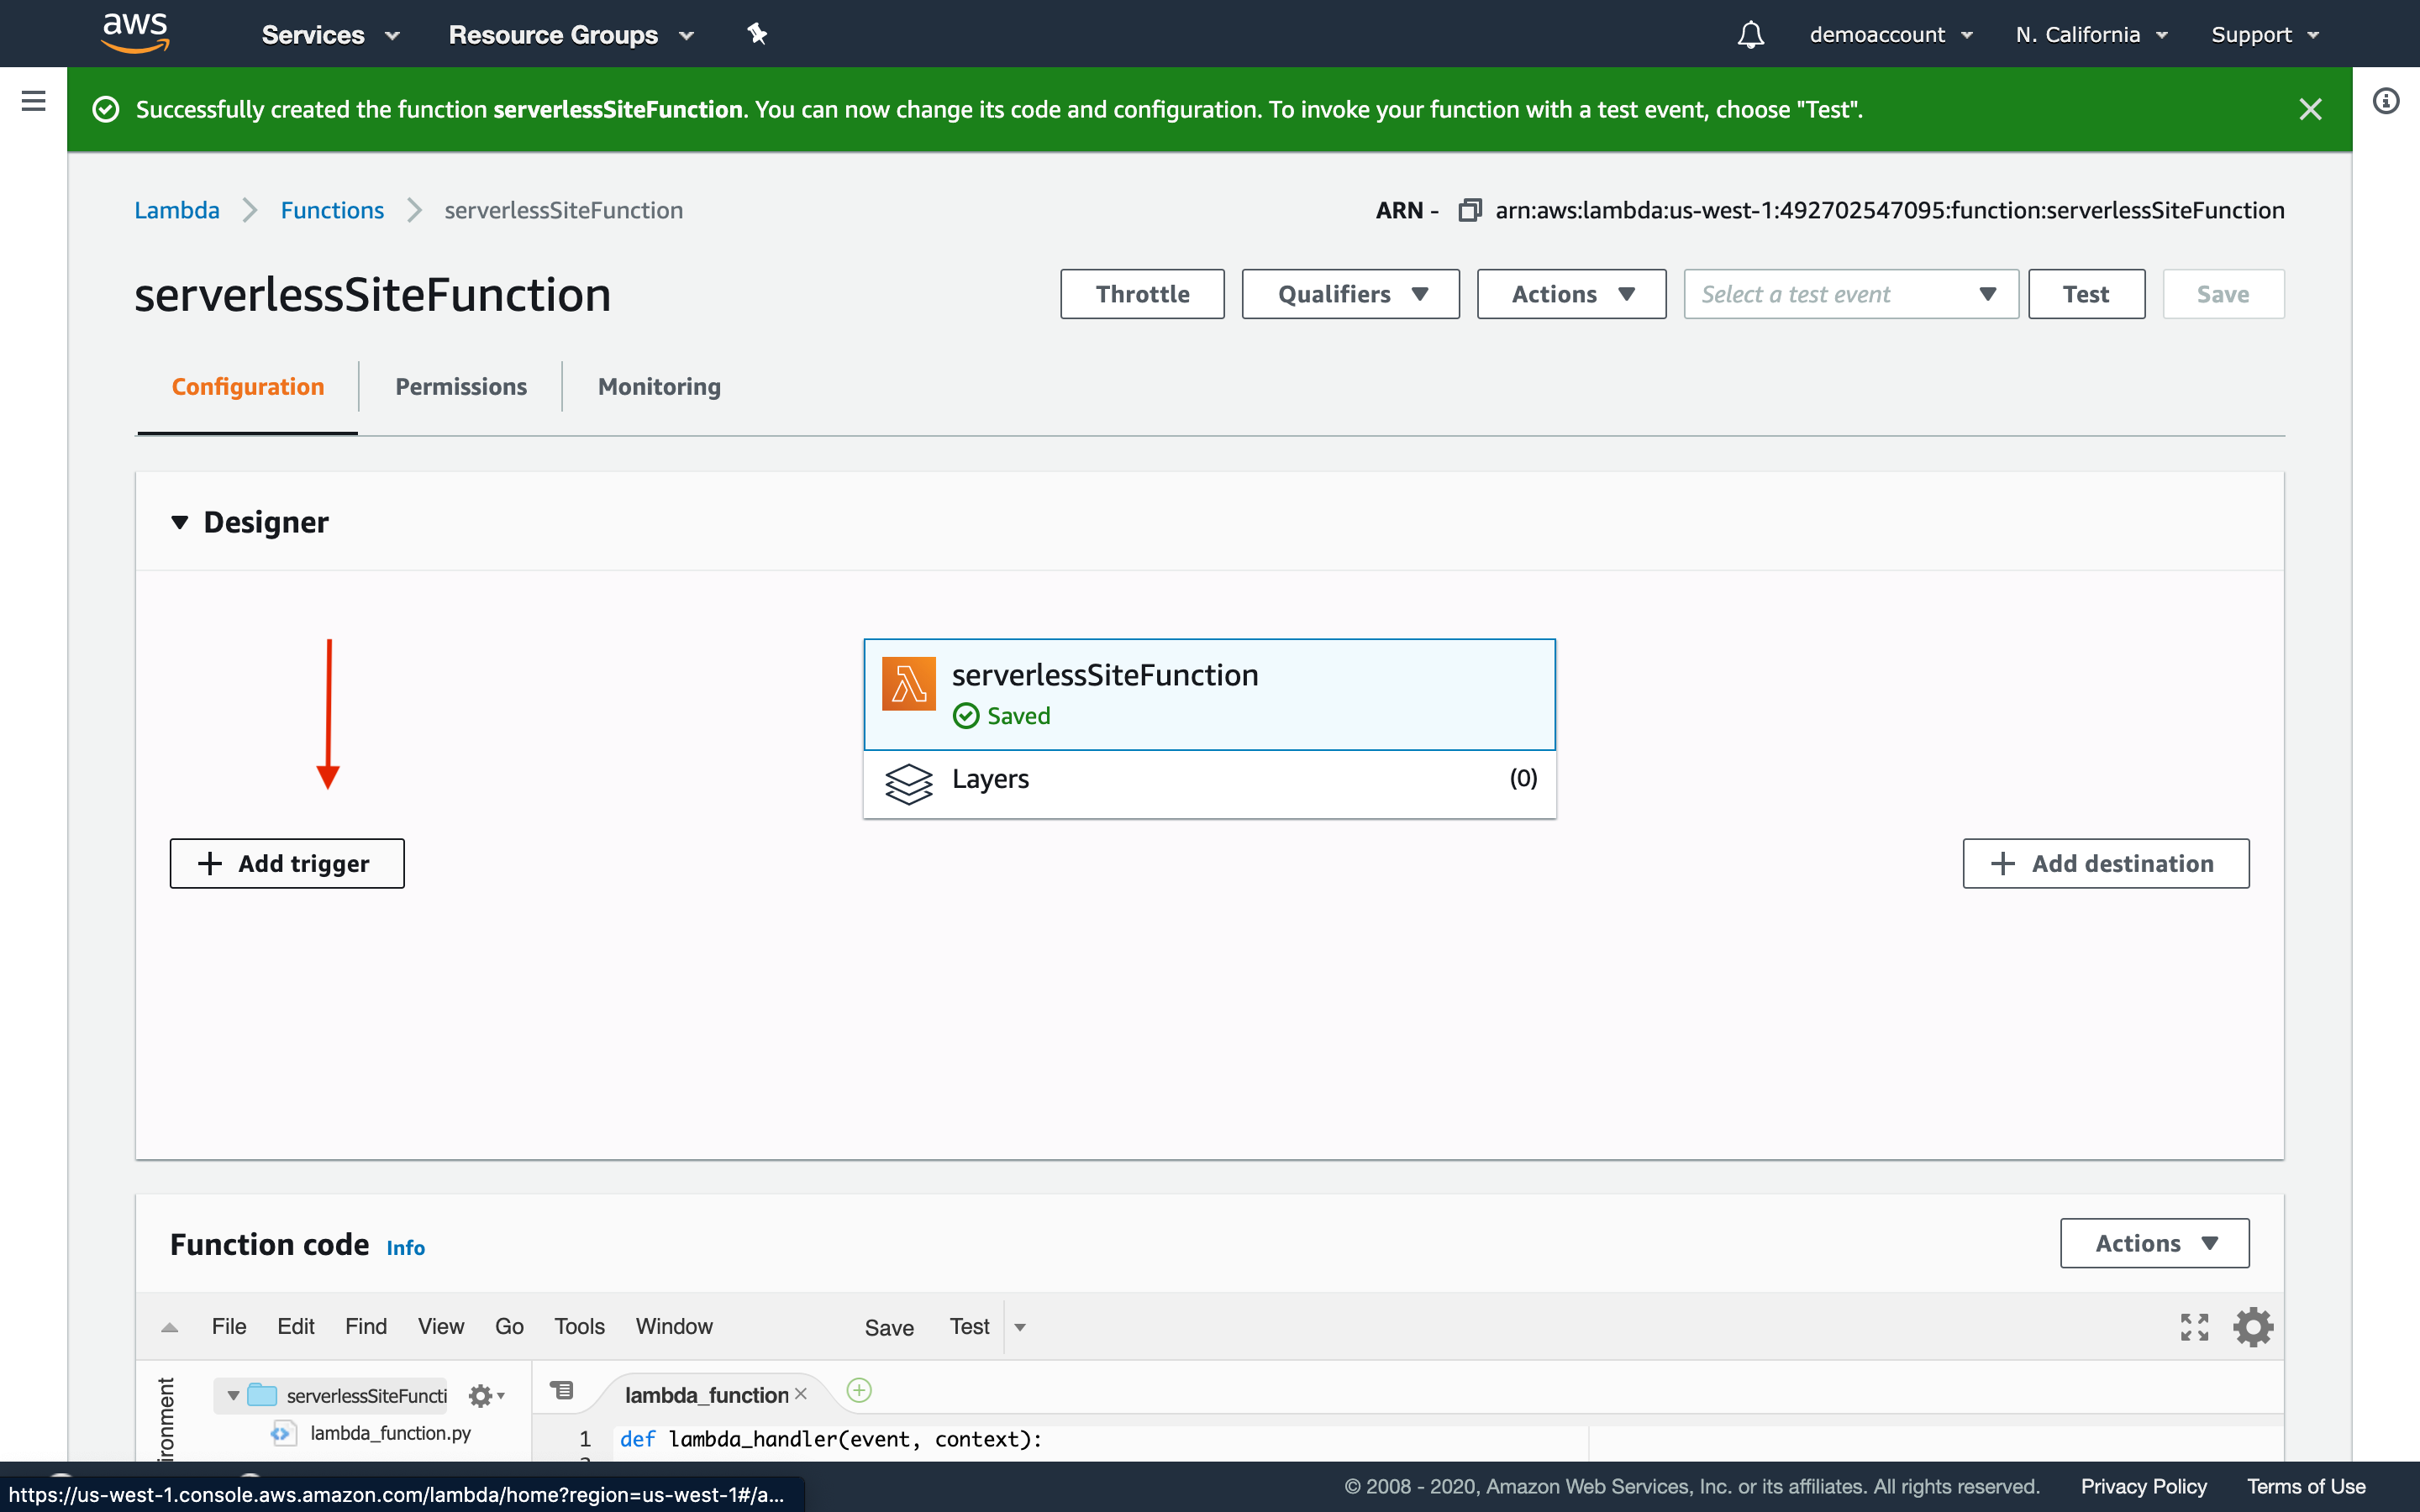
Step 8: Update your Lambda Function.
-
Once your function has been created you’ll see the Designer at the top of the page. Scroll down to the IDE, Function code.
-
Delete boiler plate and replace with the below.
def lambda_handler(event, context):

    print("In lambda handler")

    resp = {

        "statusCode": 200,

        "headers": {

            "Access-Control-Allow-Origin": "*",

        },

        "body": "Serverless Website"

    }

    return resp
- Click Save within Function code. This should cause the other Save function to turn gray.
Step 9: Add Trigger.
- Scroll back up to the Designer and click on Add trigger.
- Add API Gateway as a trigger.
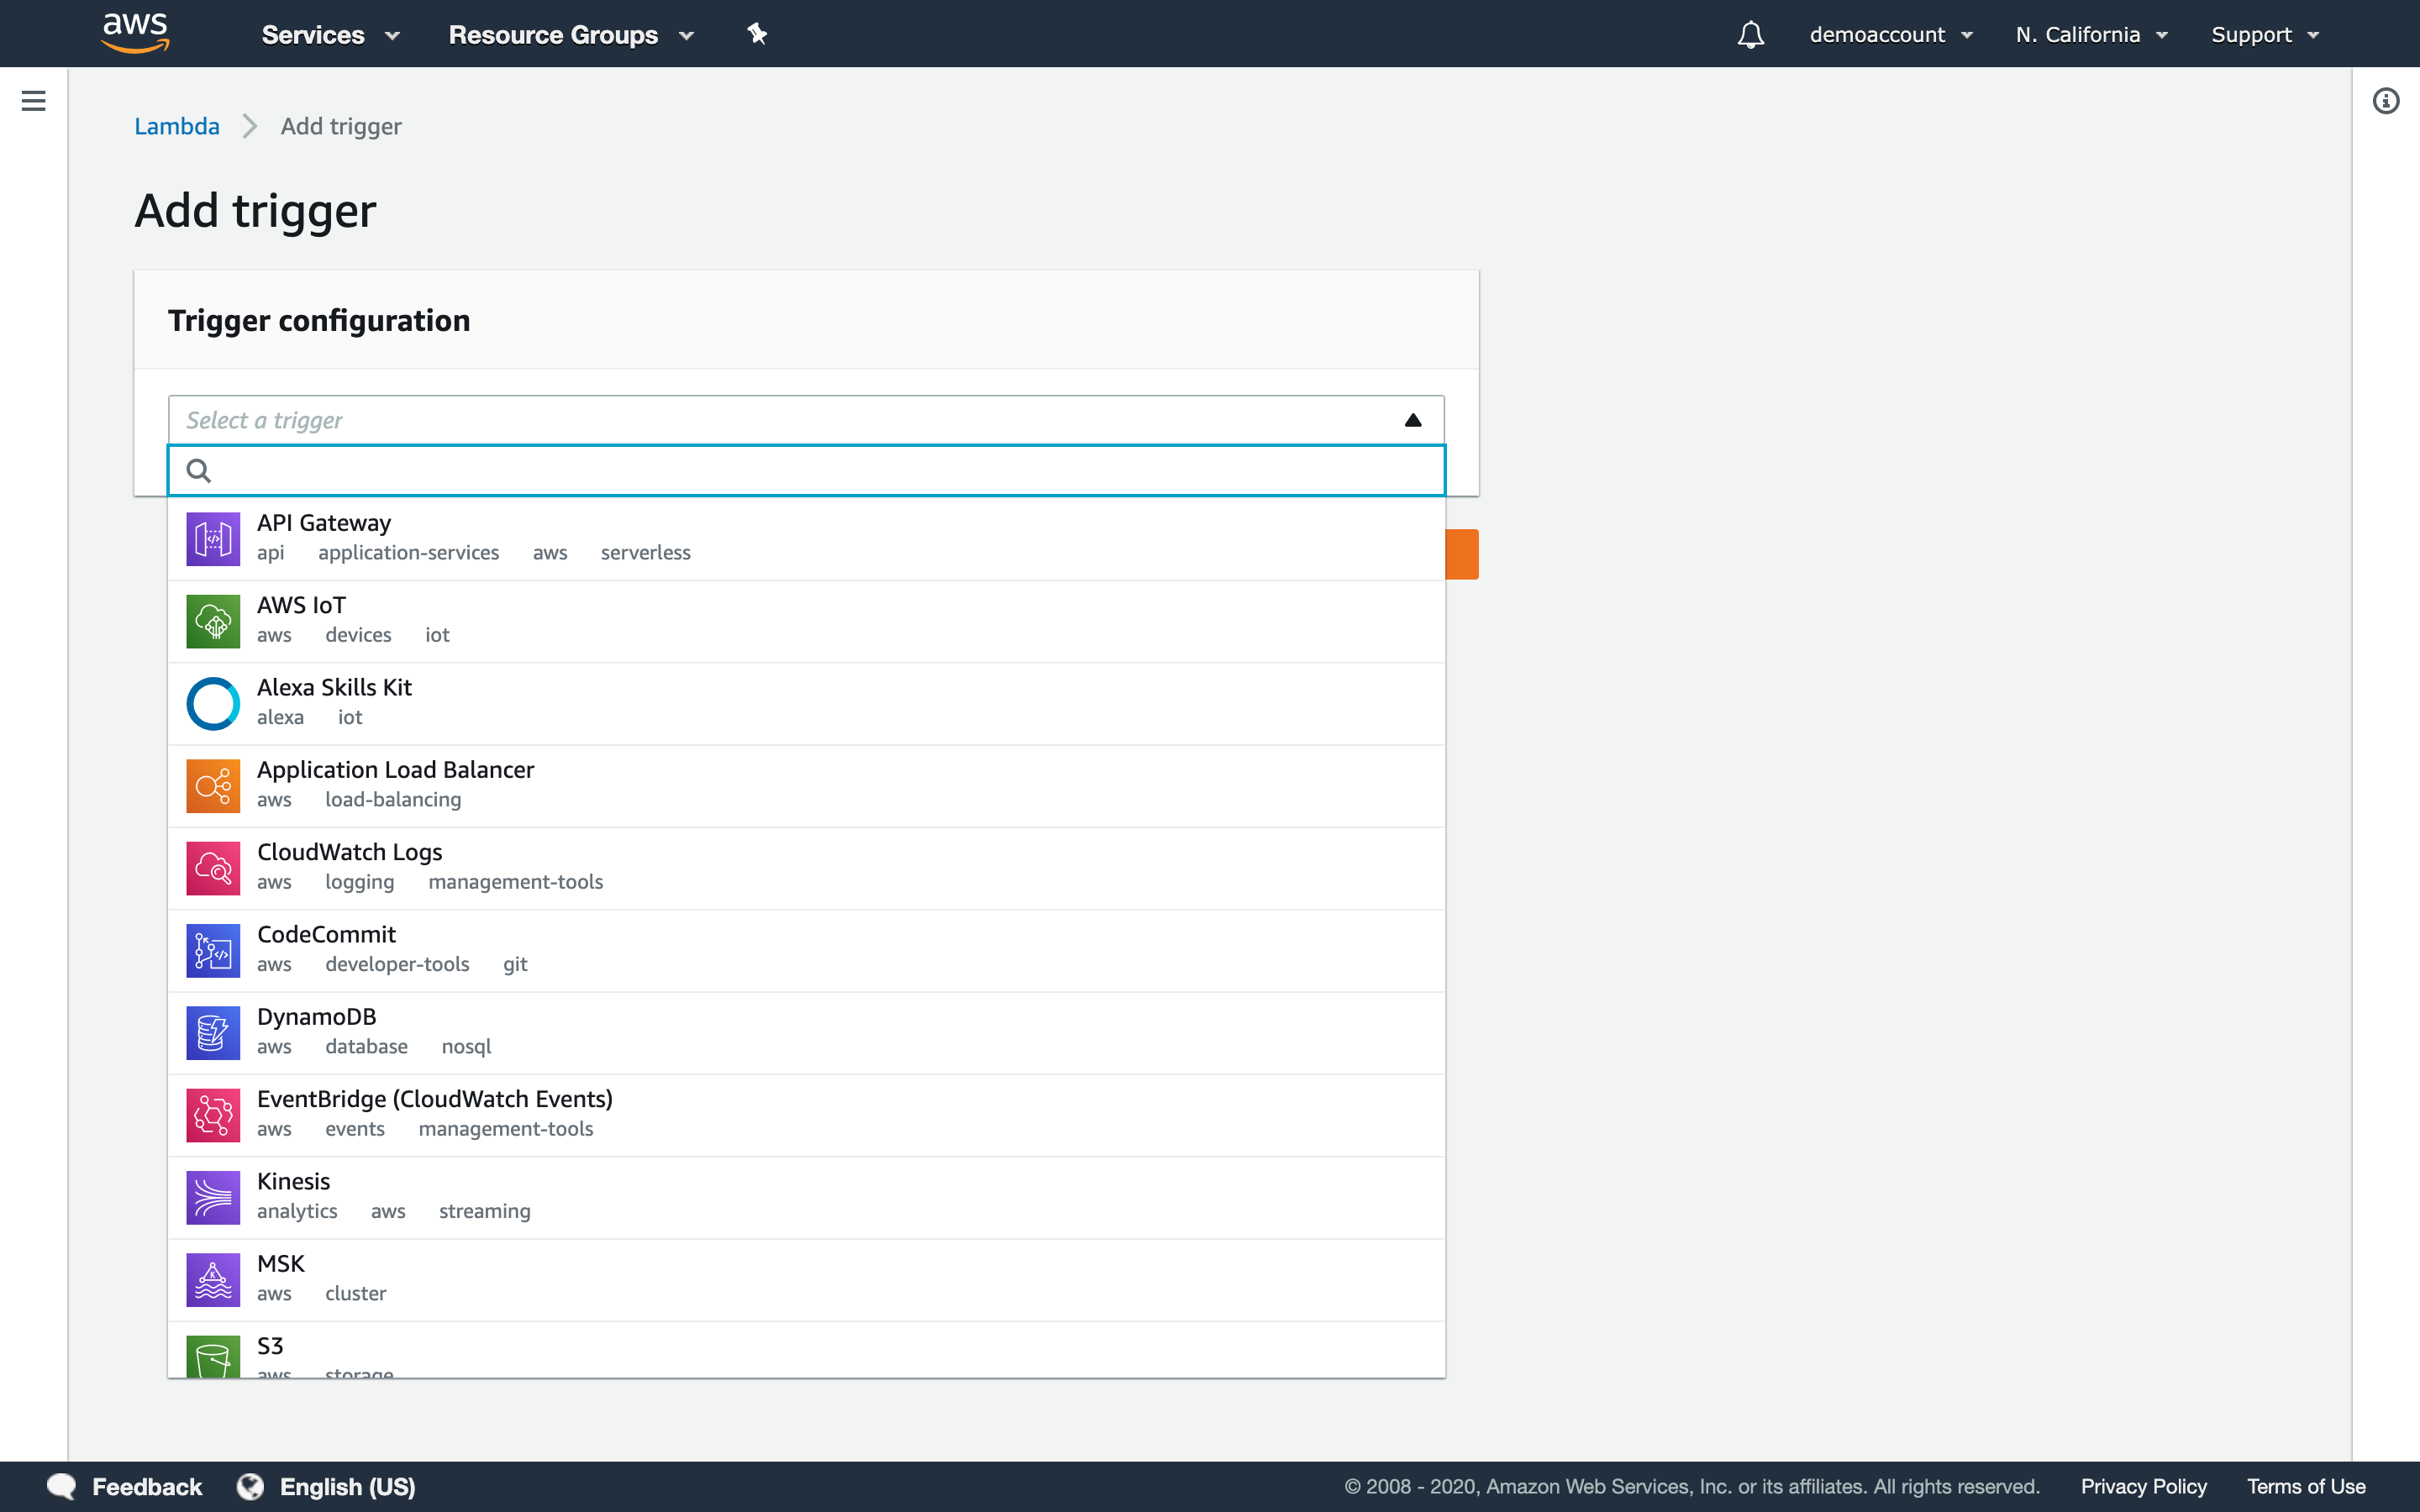
-
Select Rest API.
-
Security is left open in this demonstration, however, that is not best practice. Refer to AWS best practices for more information and choose the solution that works best for your use case.
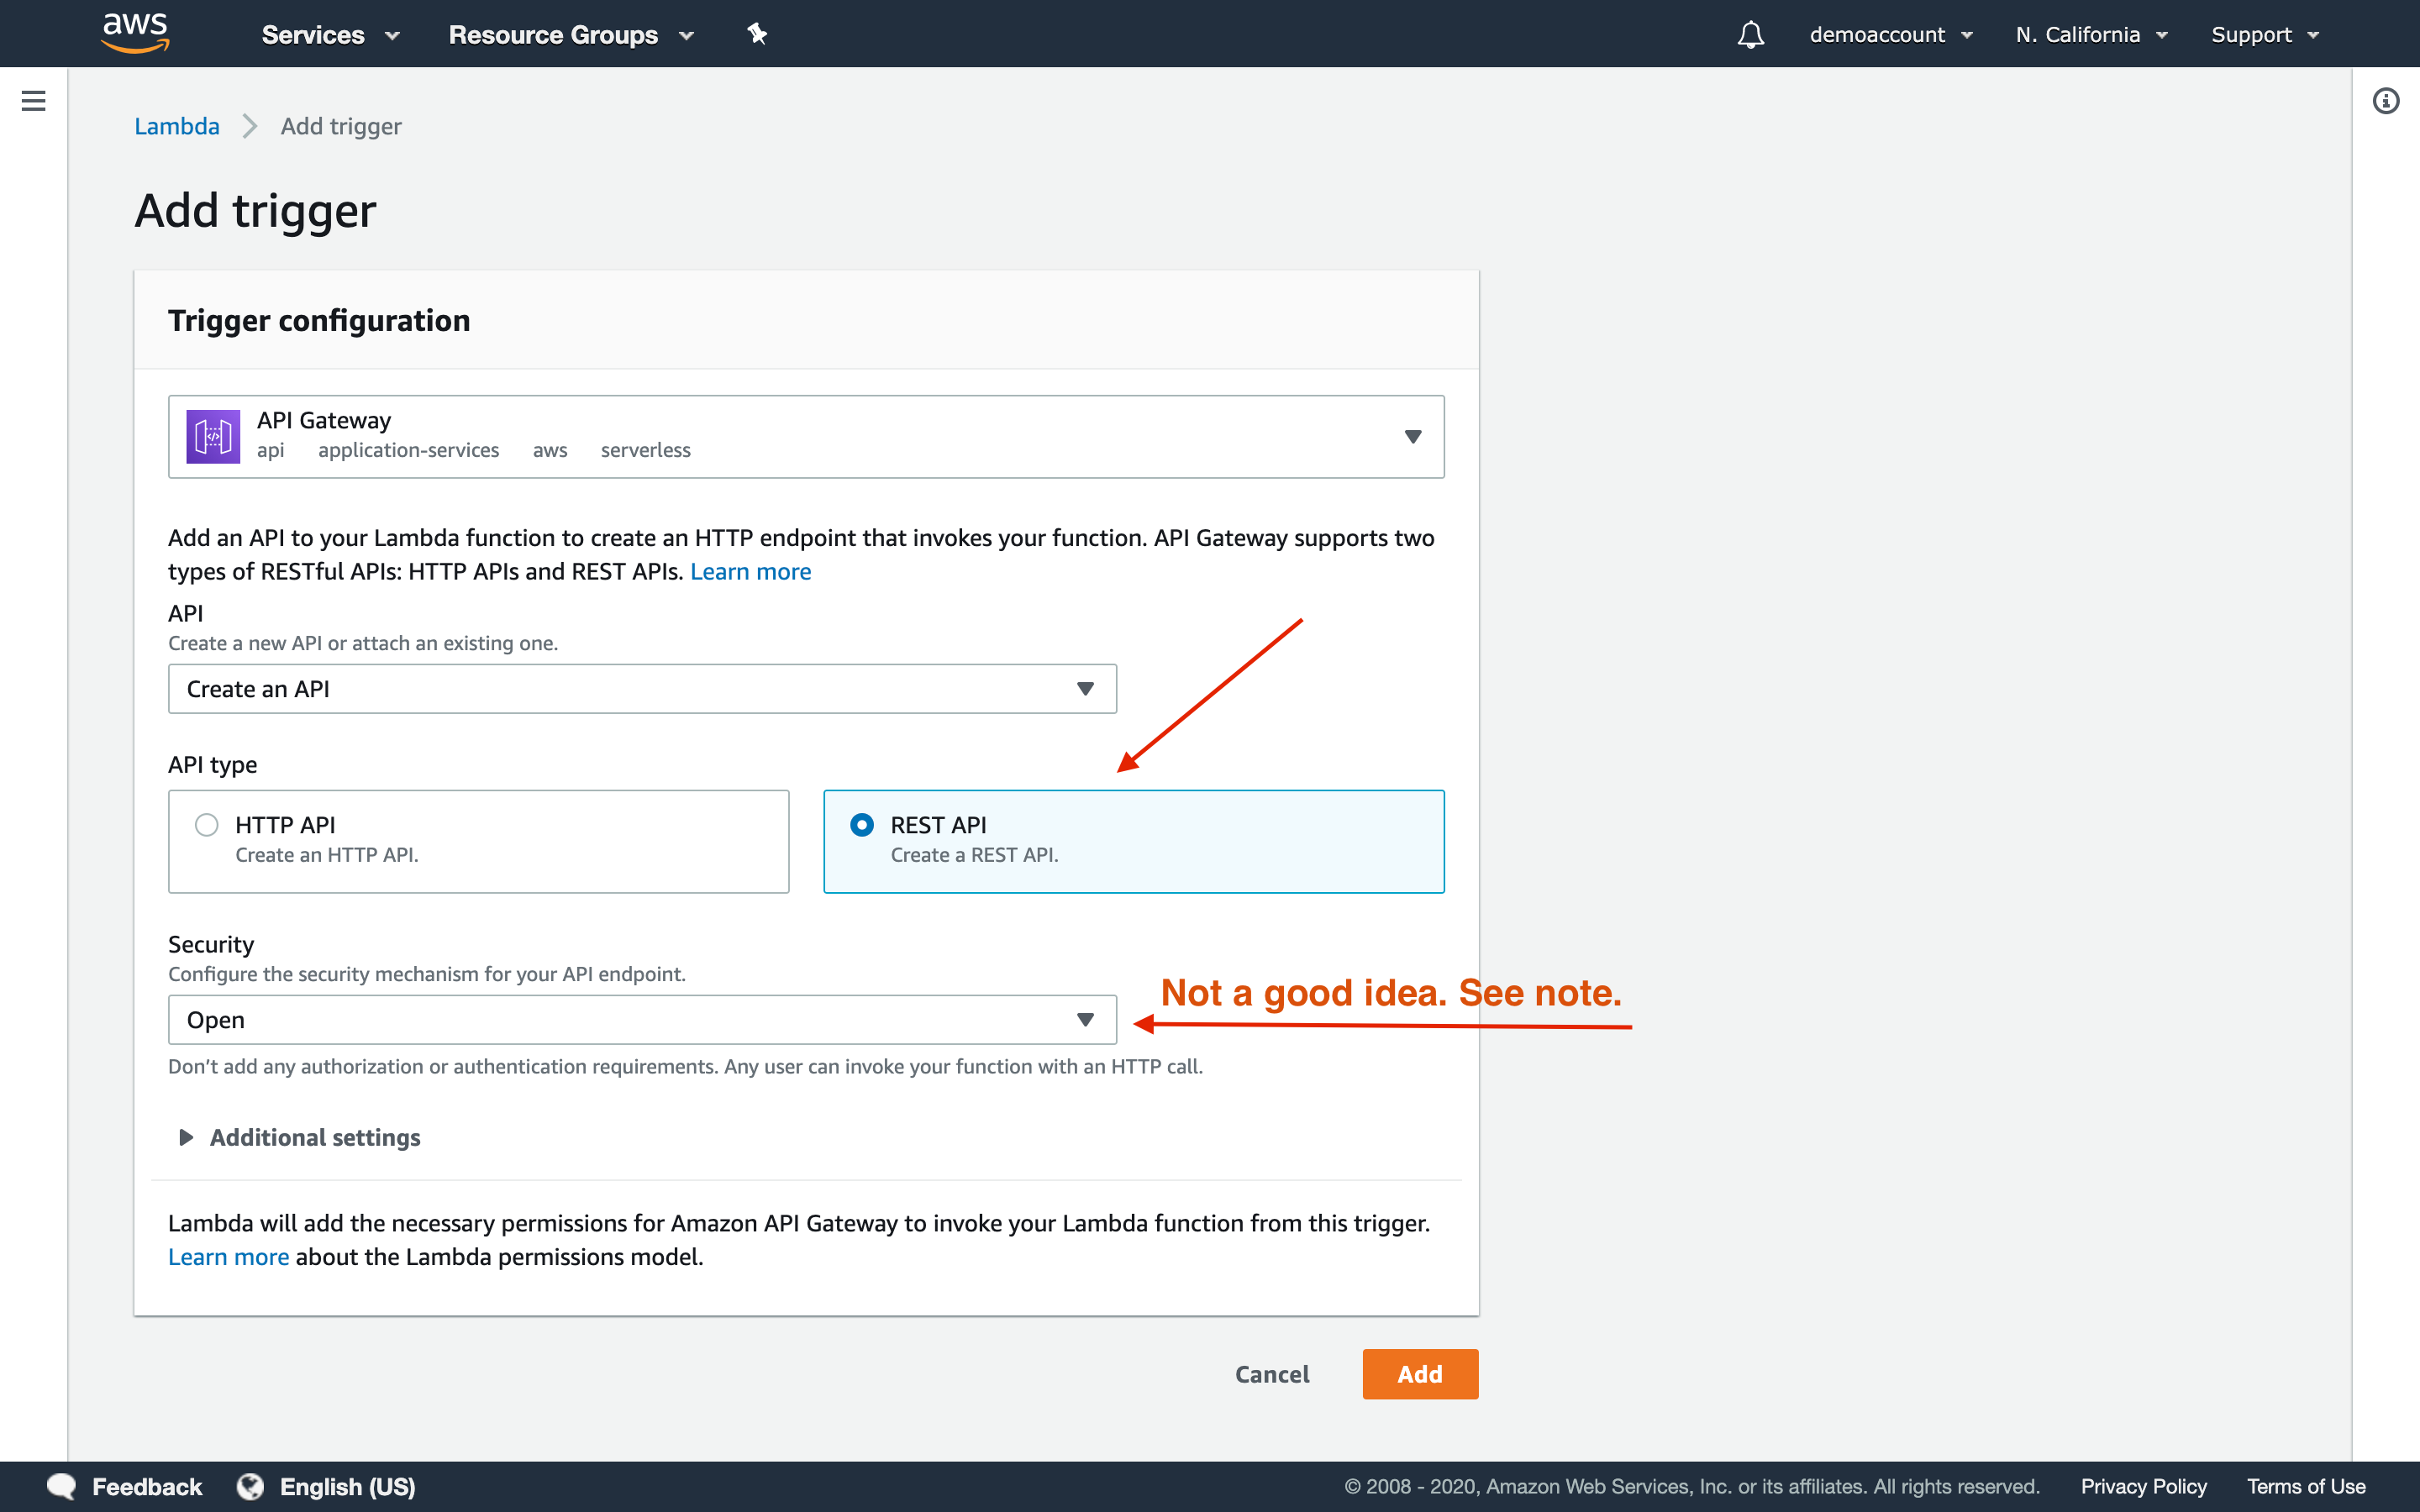
- Click Add.
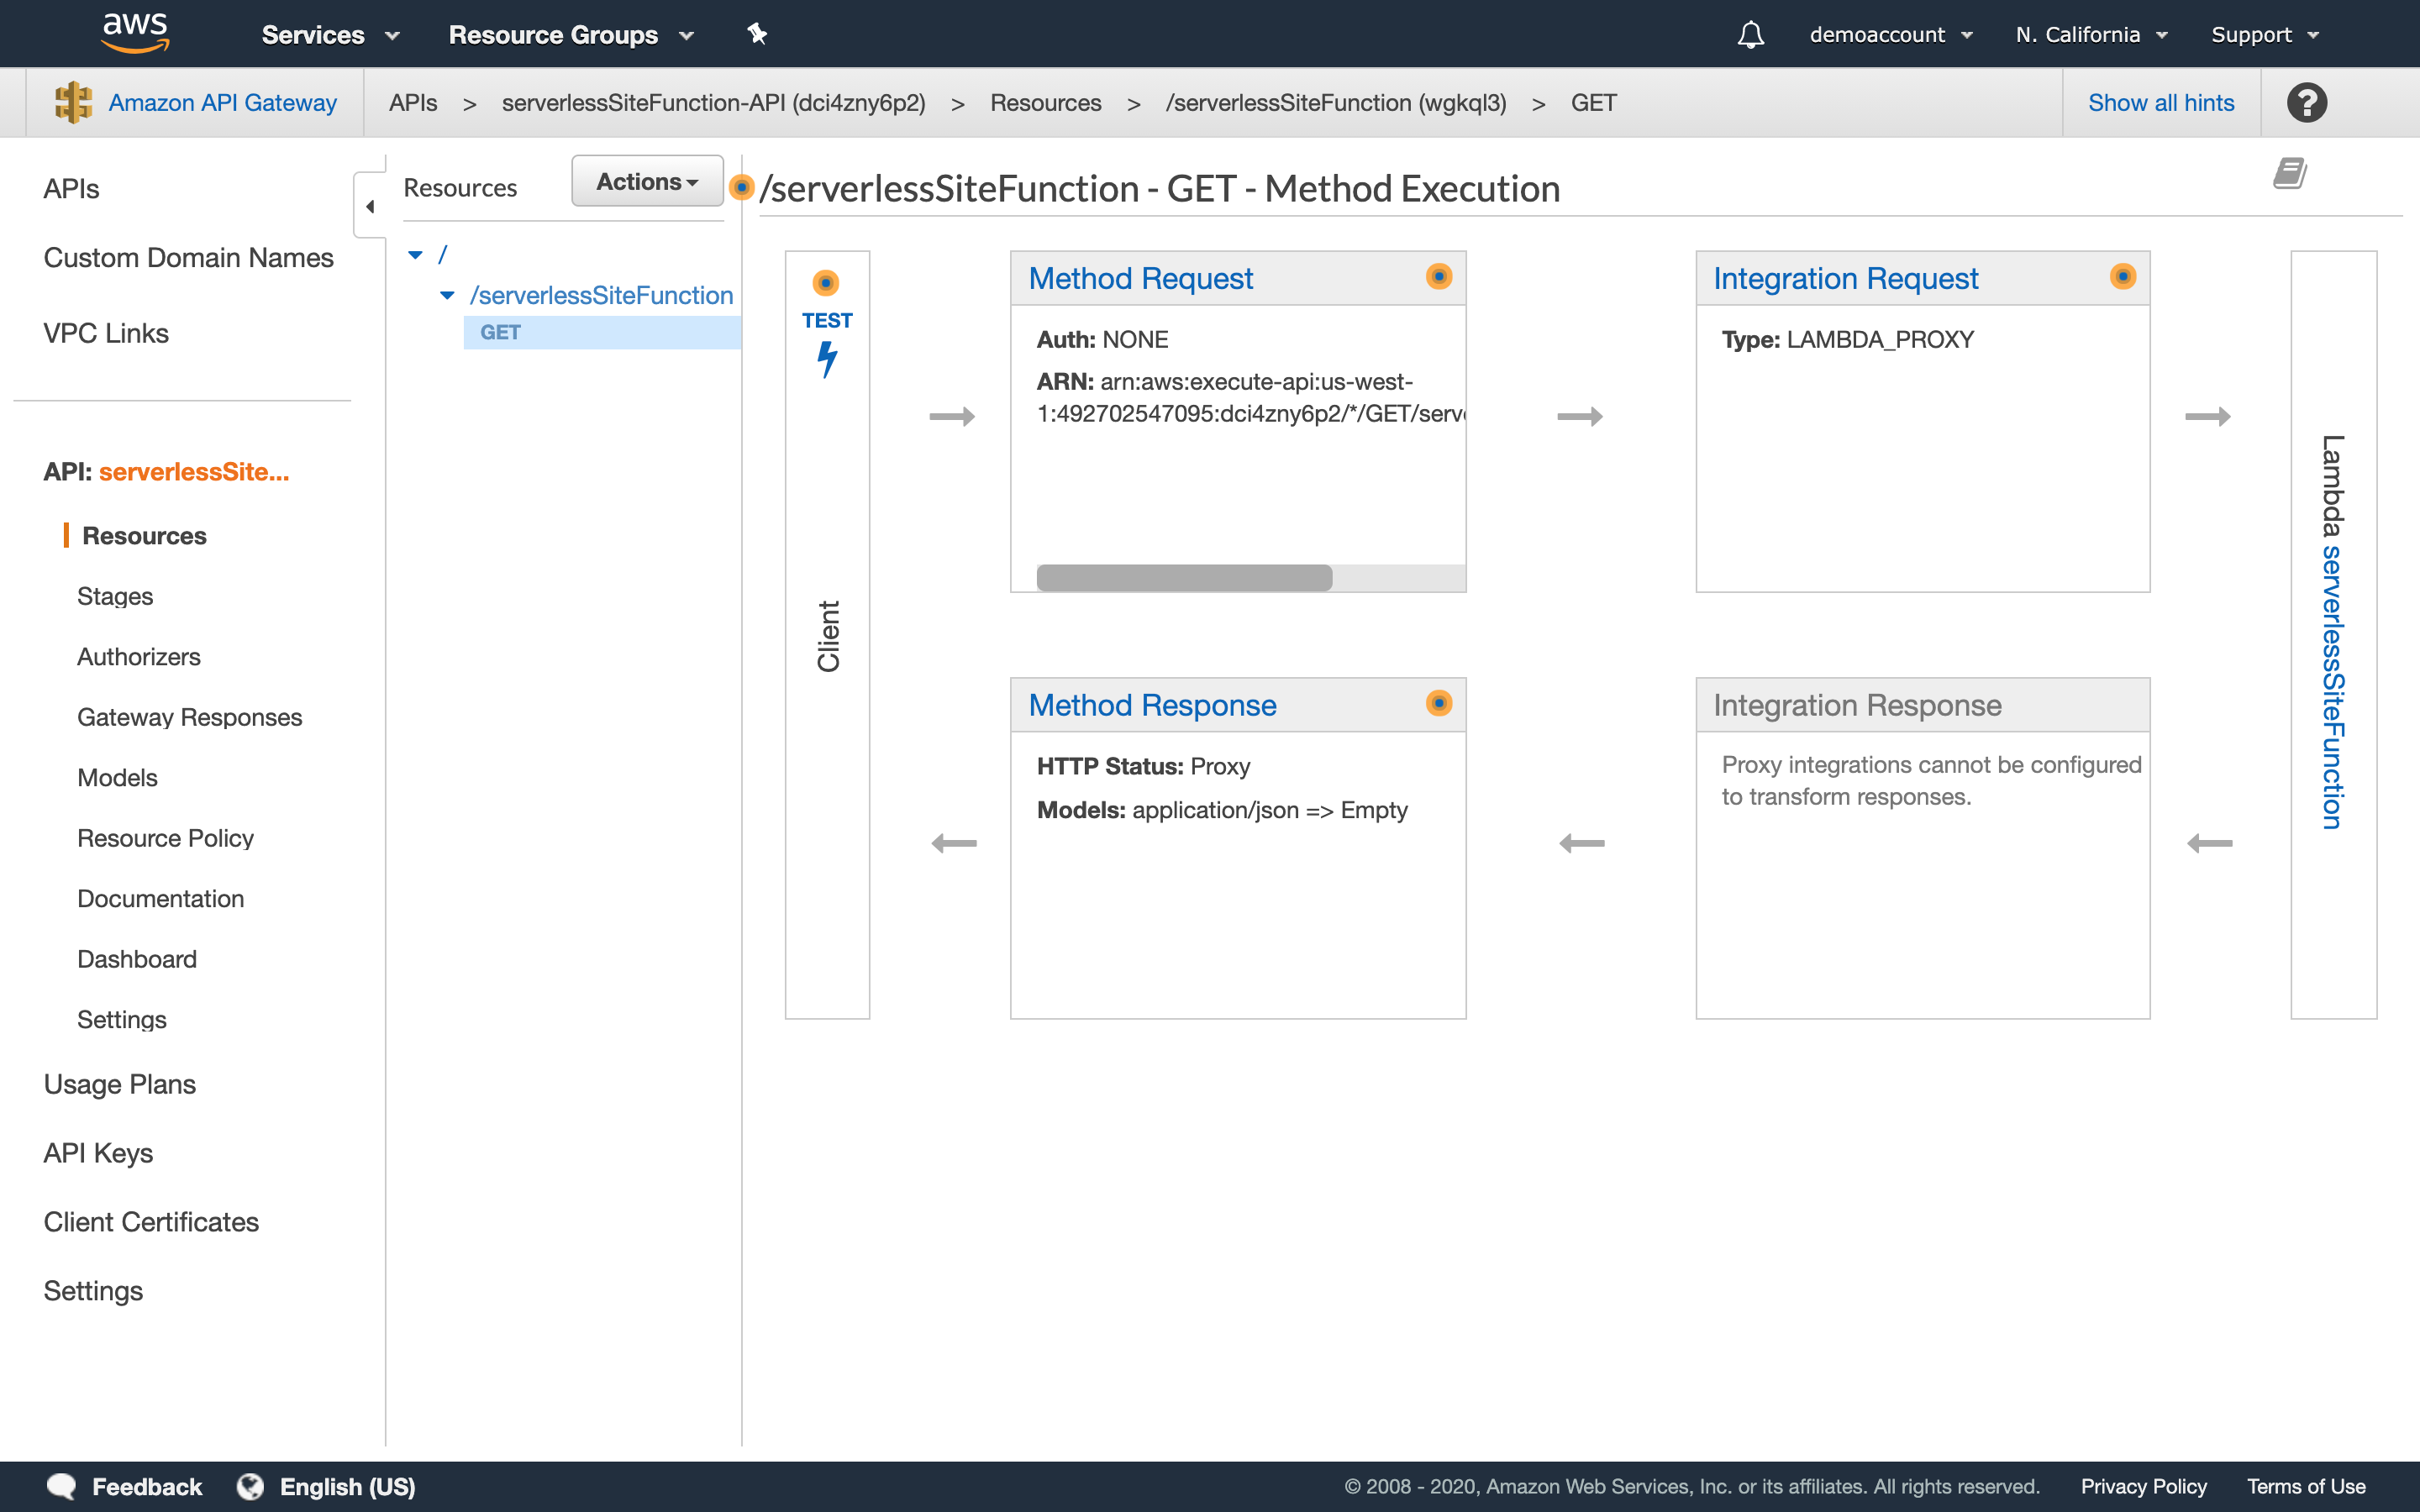
Step 10: Open API Gateway.
- Click on the hyper-linked title of your API.
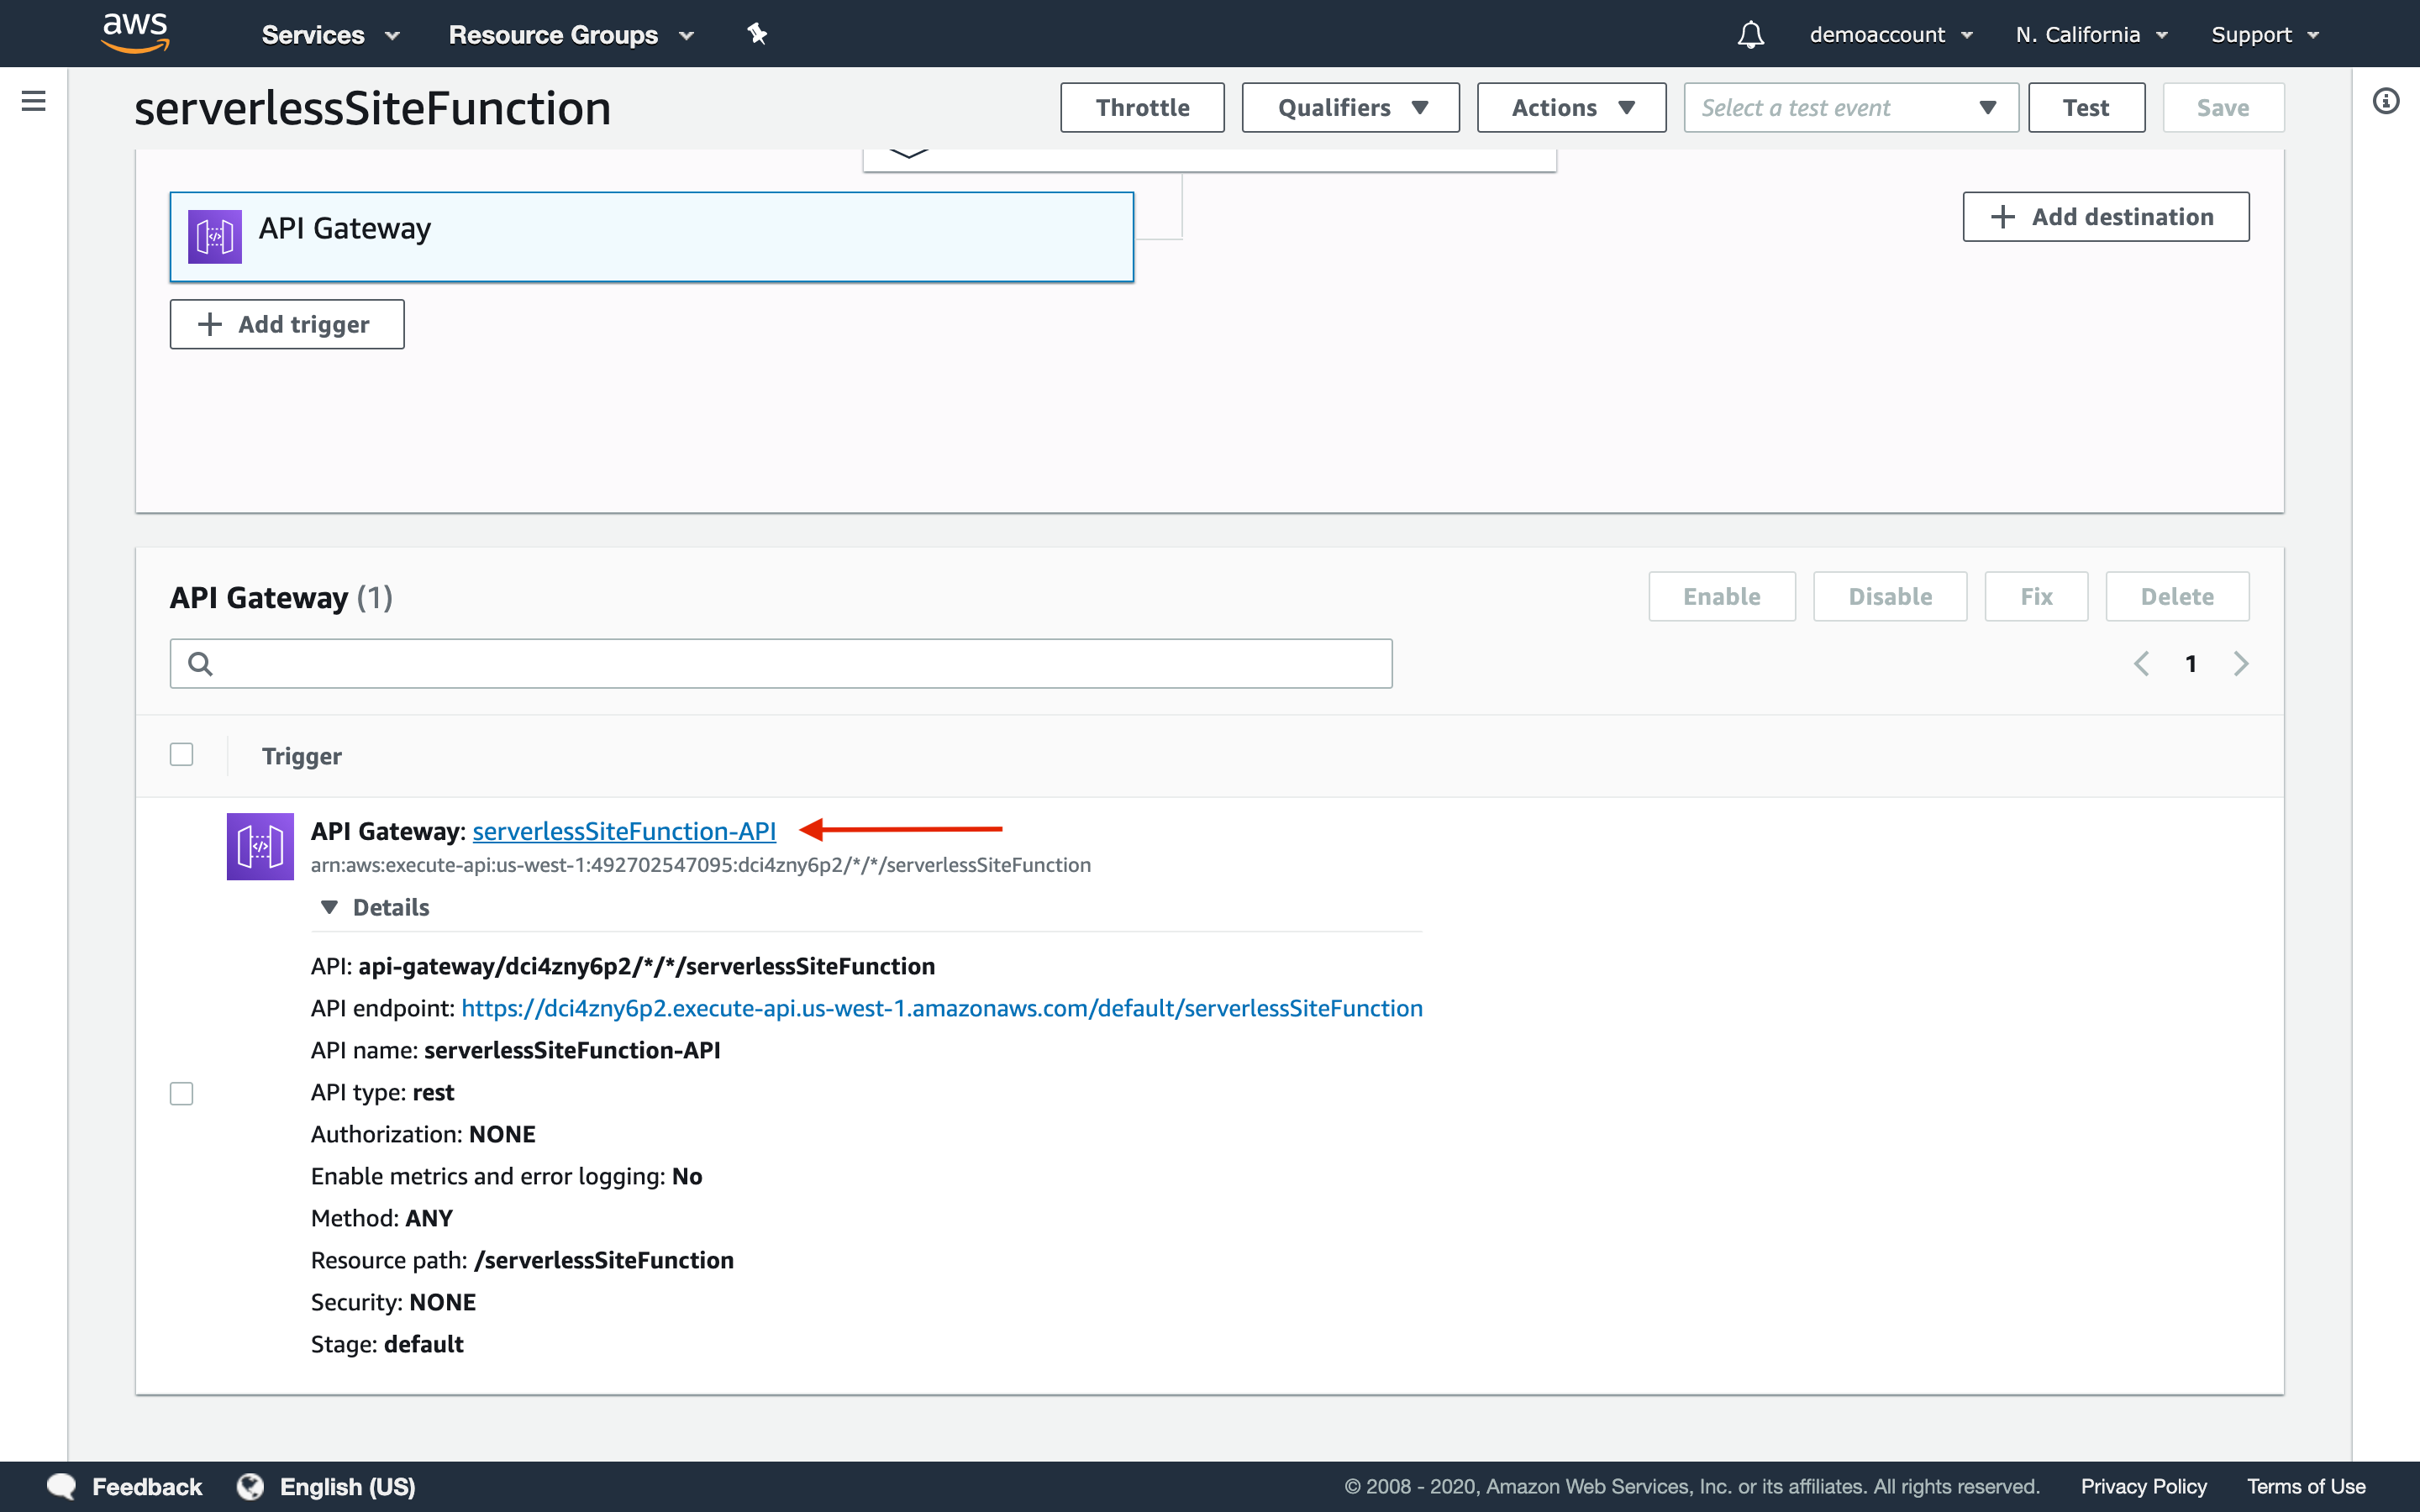
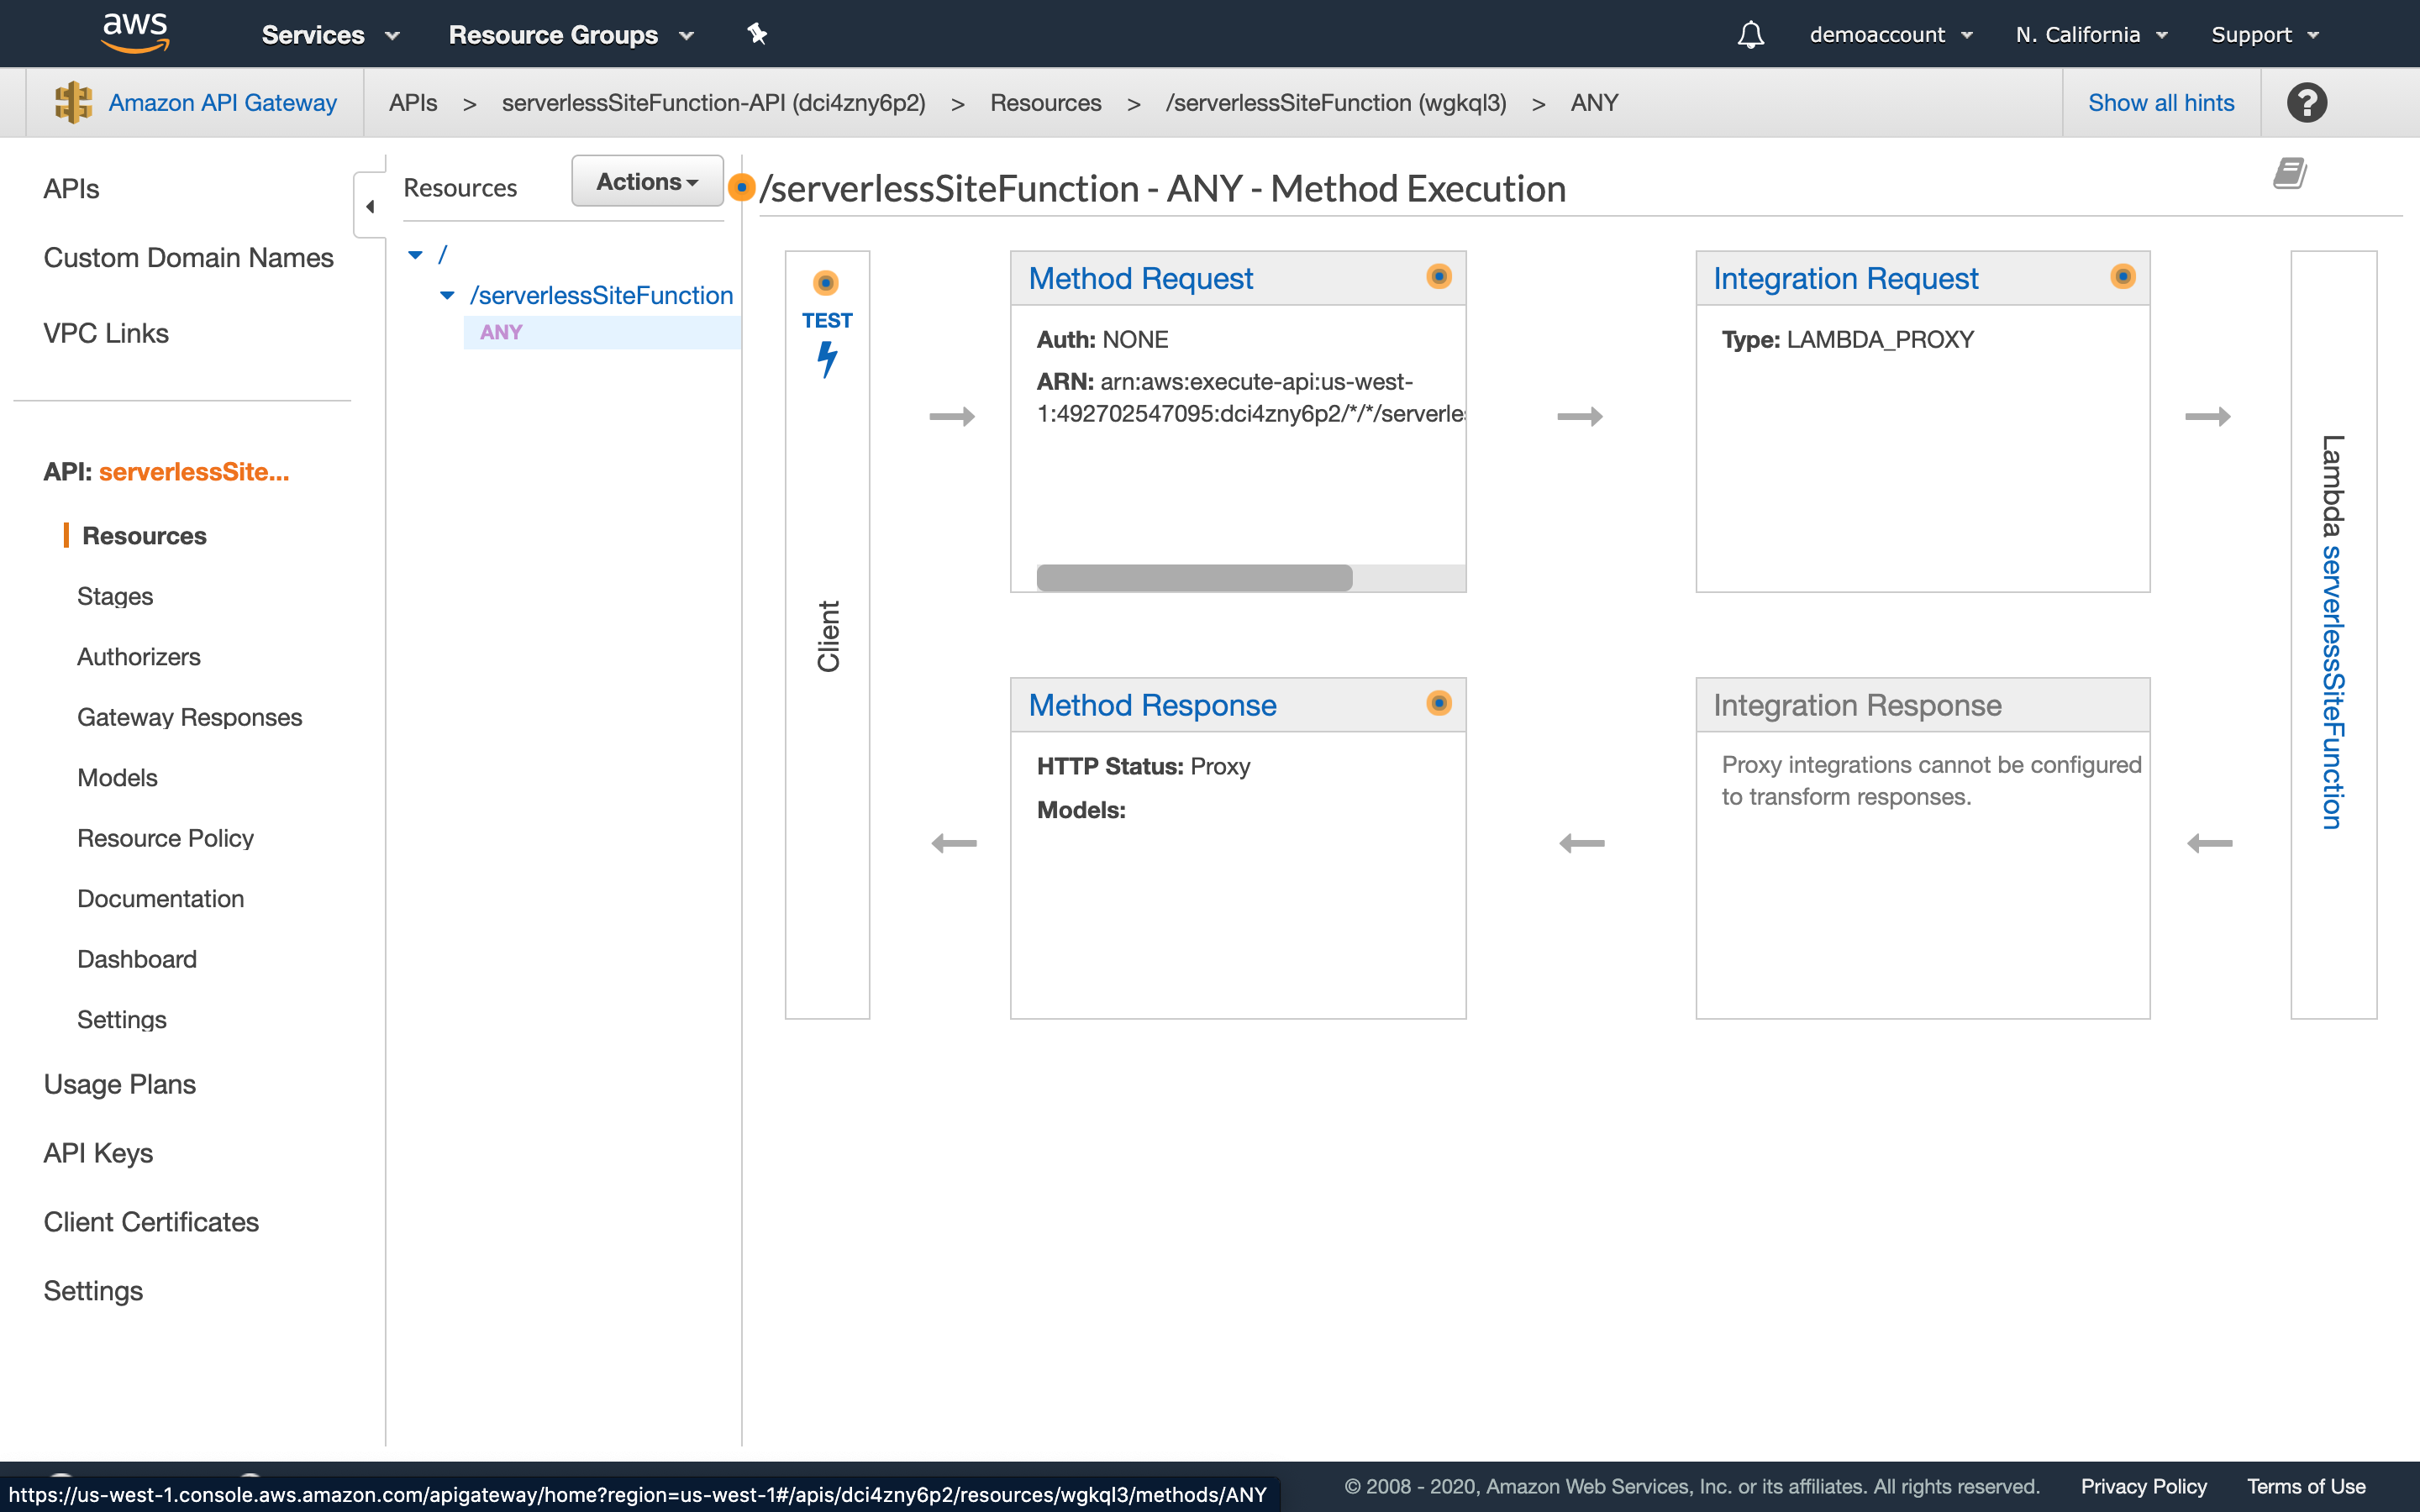
- The link will open API Gateway as shown below.
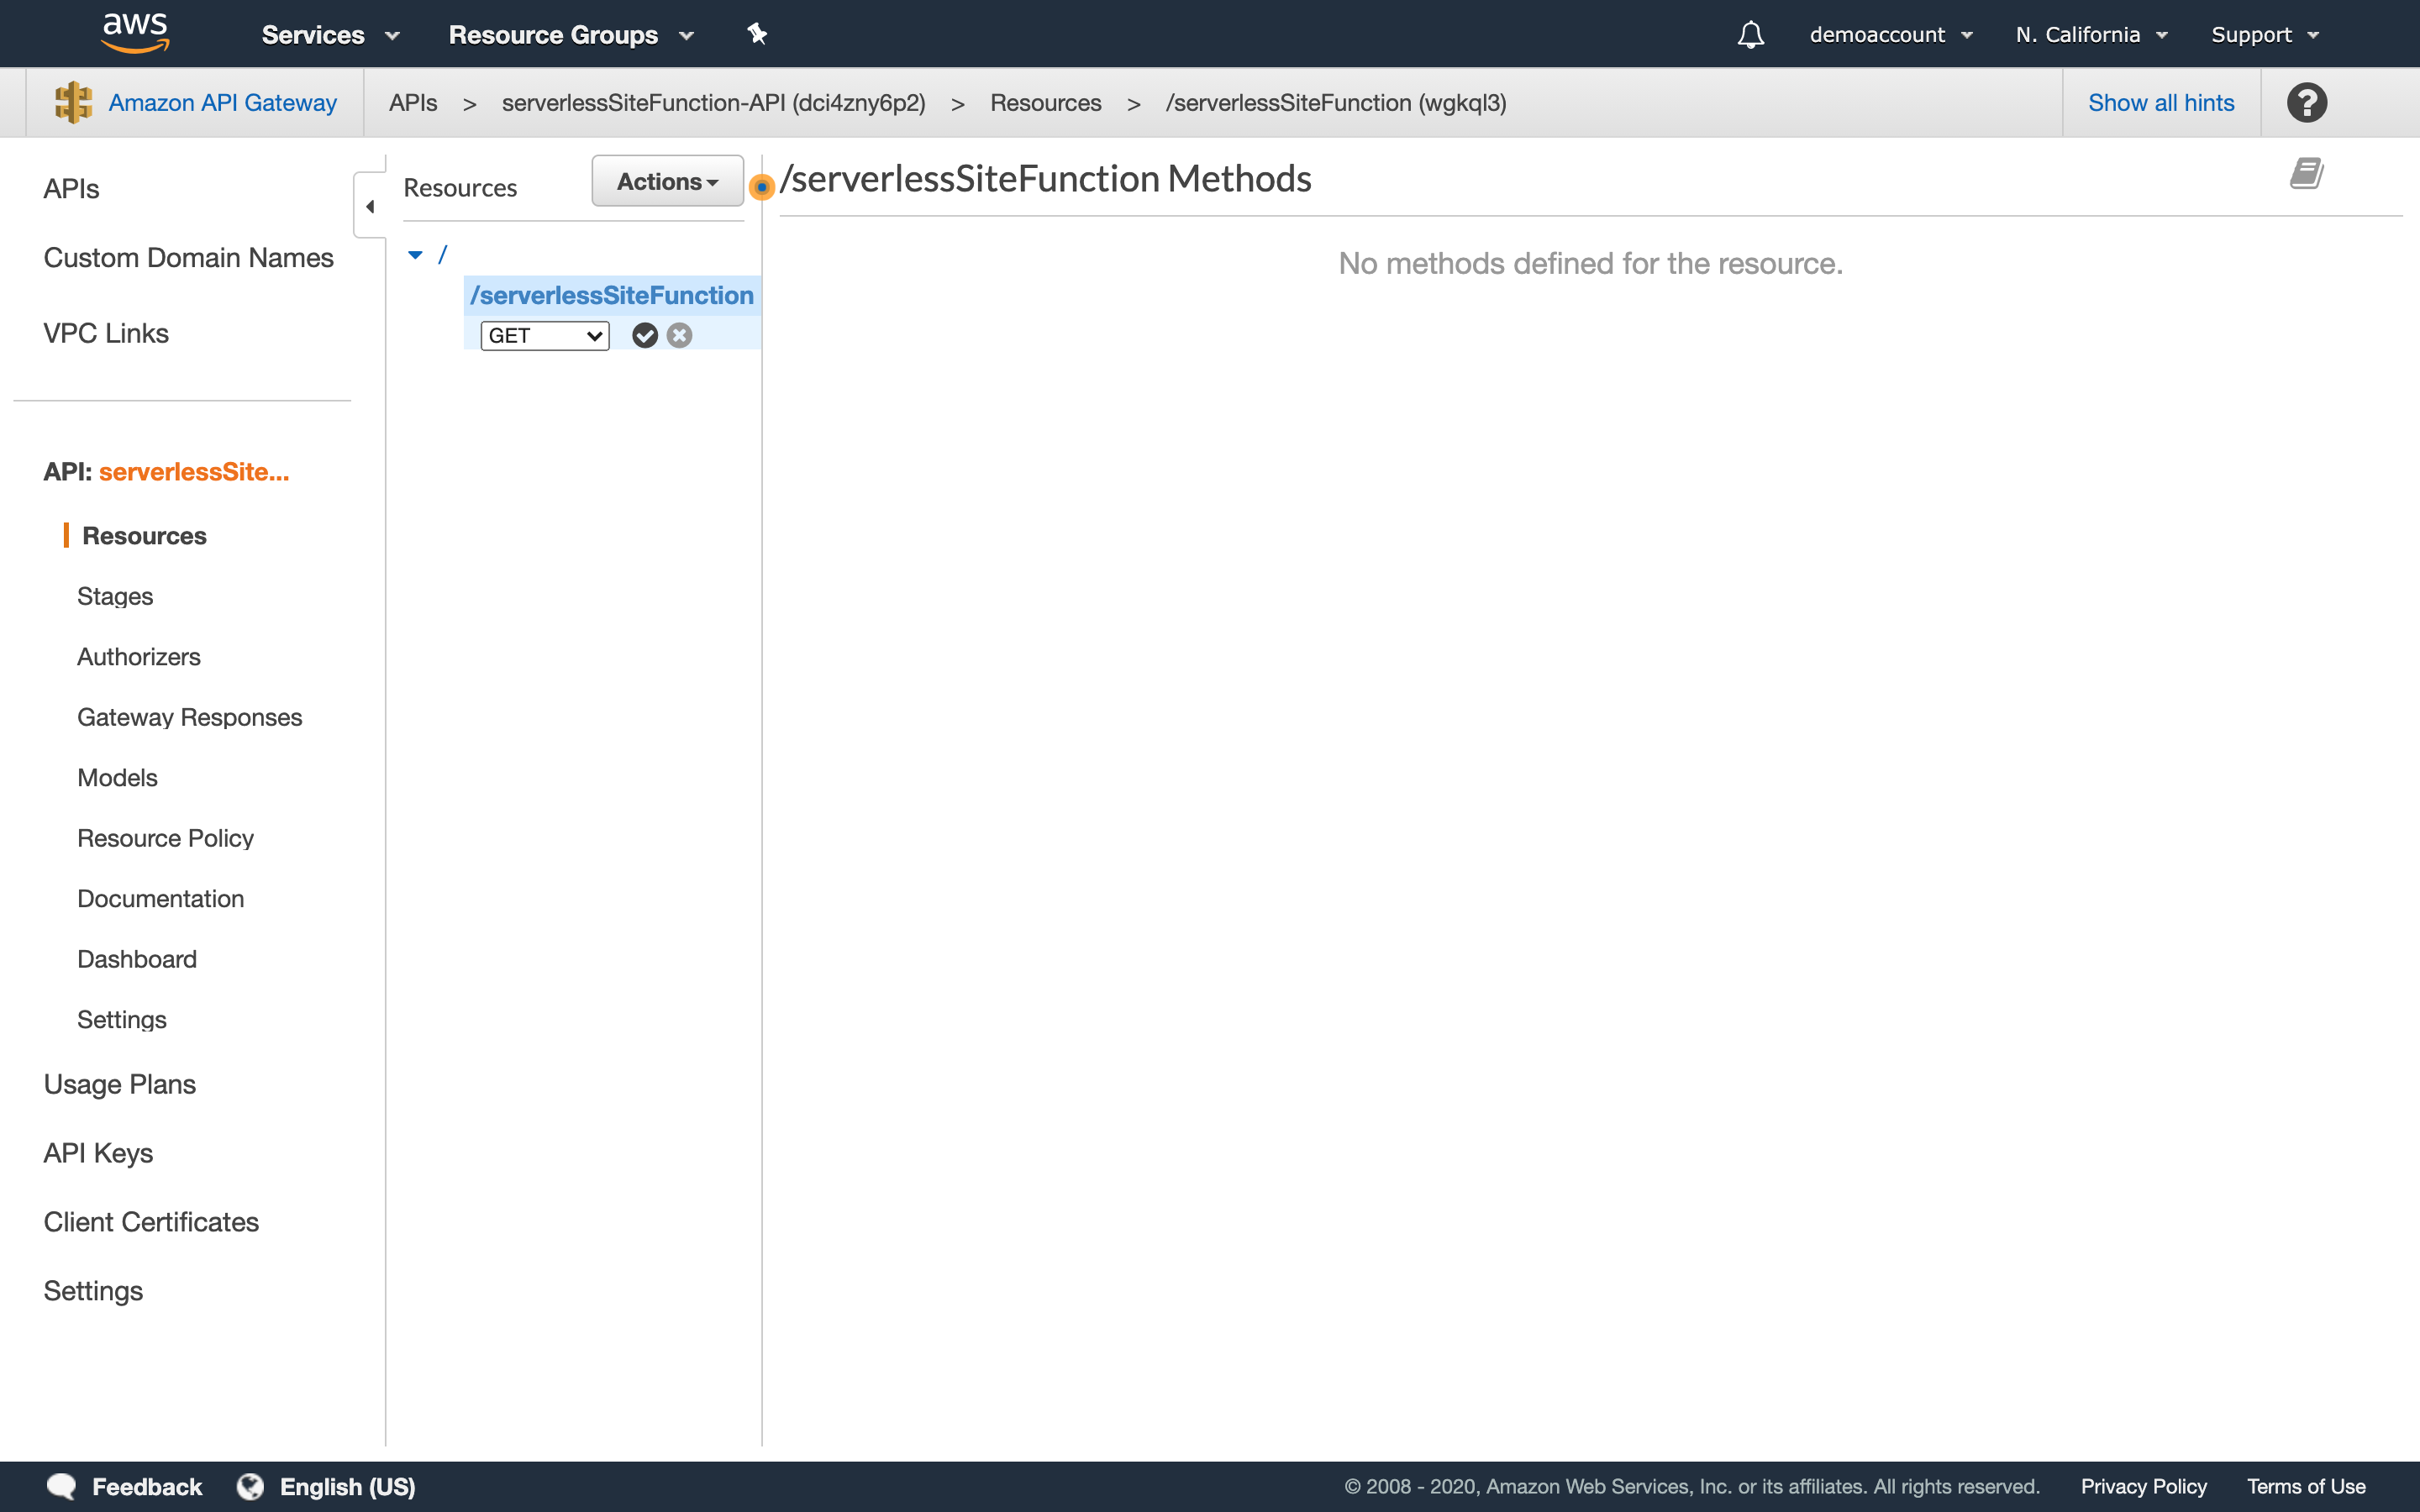
Step 11: Delete the default method.
-
Click the Any method to highlight it under your Lambda function’s name.
-
Click on Actions.
-
Click Delete Method in the drop-down menu.
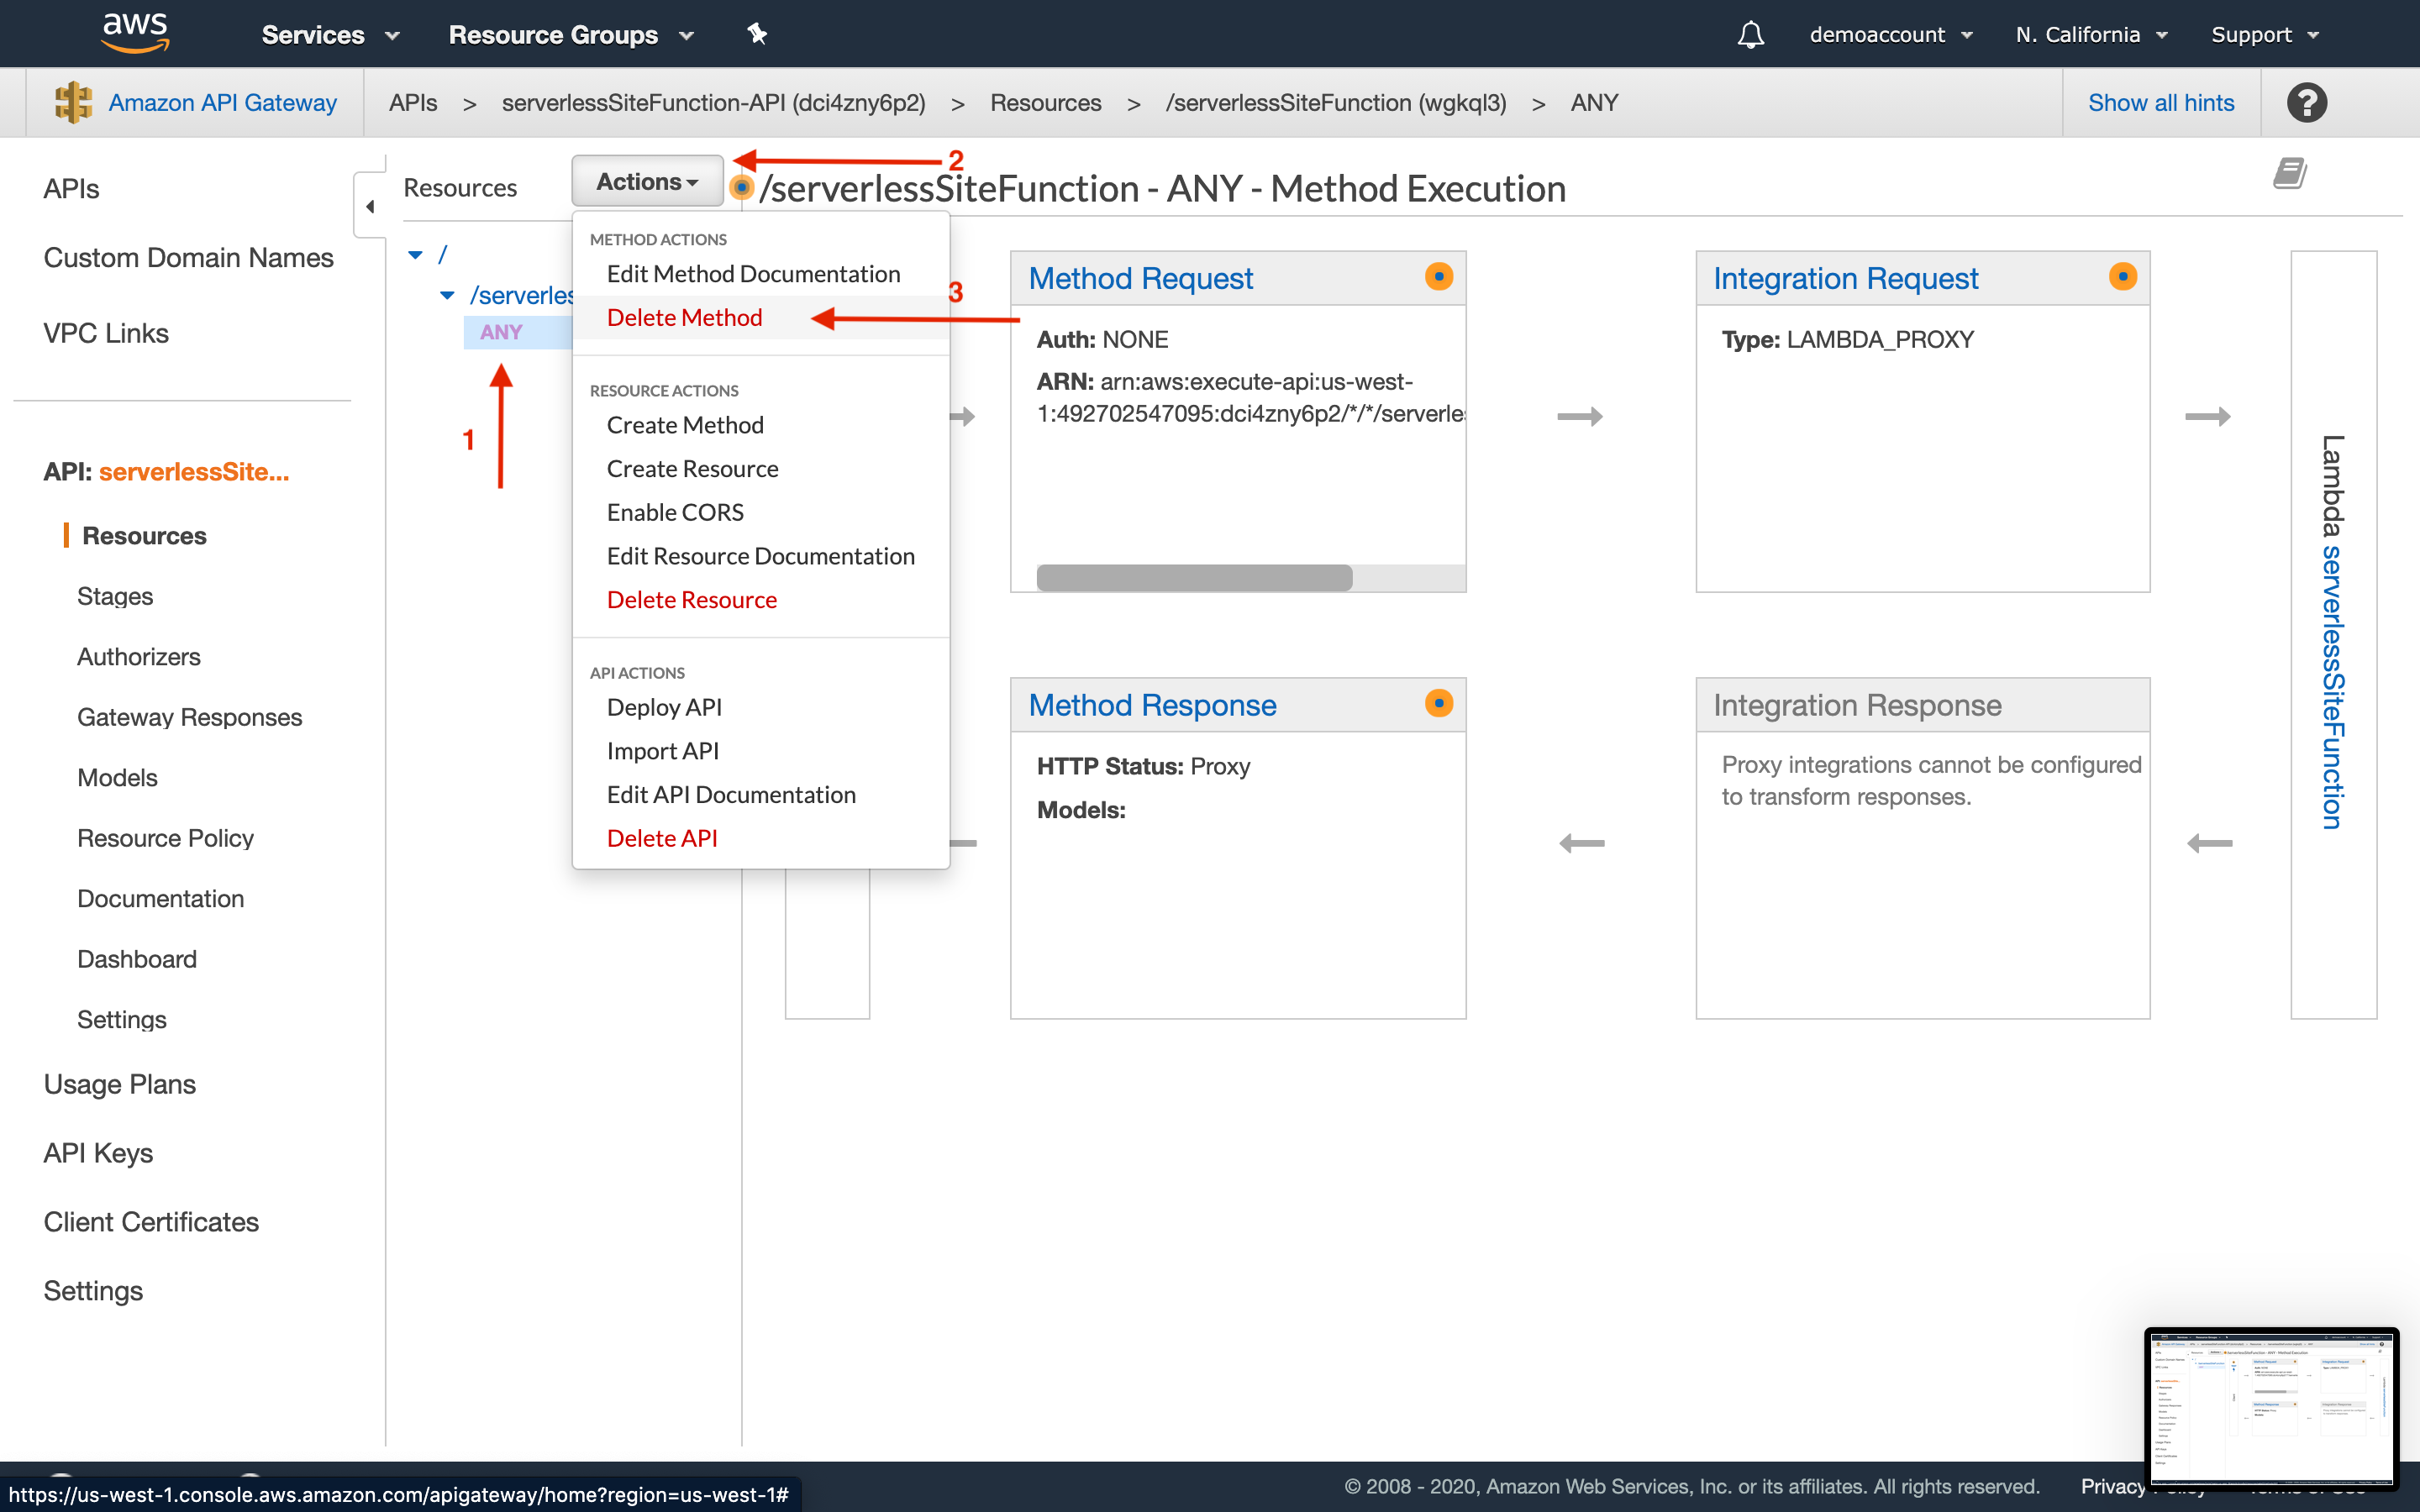
- Confirm your delete.
Step 12: Create New Method.
- Click Actions and select Create Method from the drop-down menu.
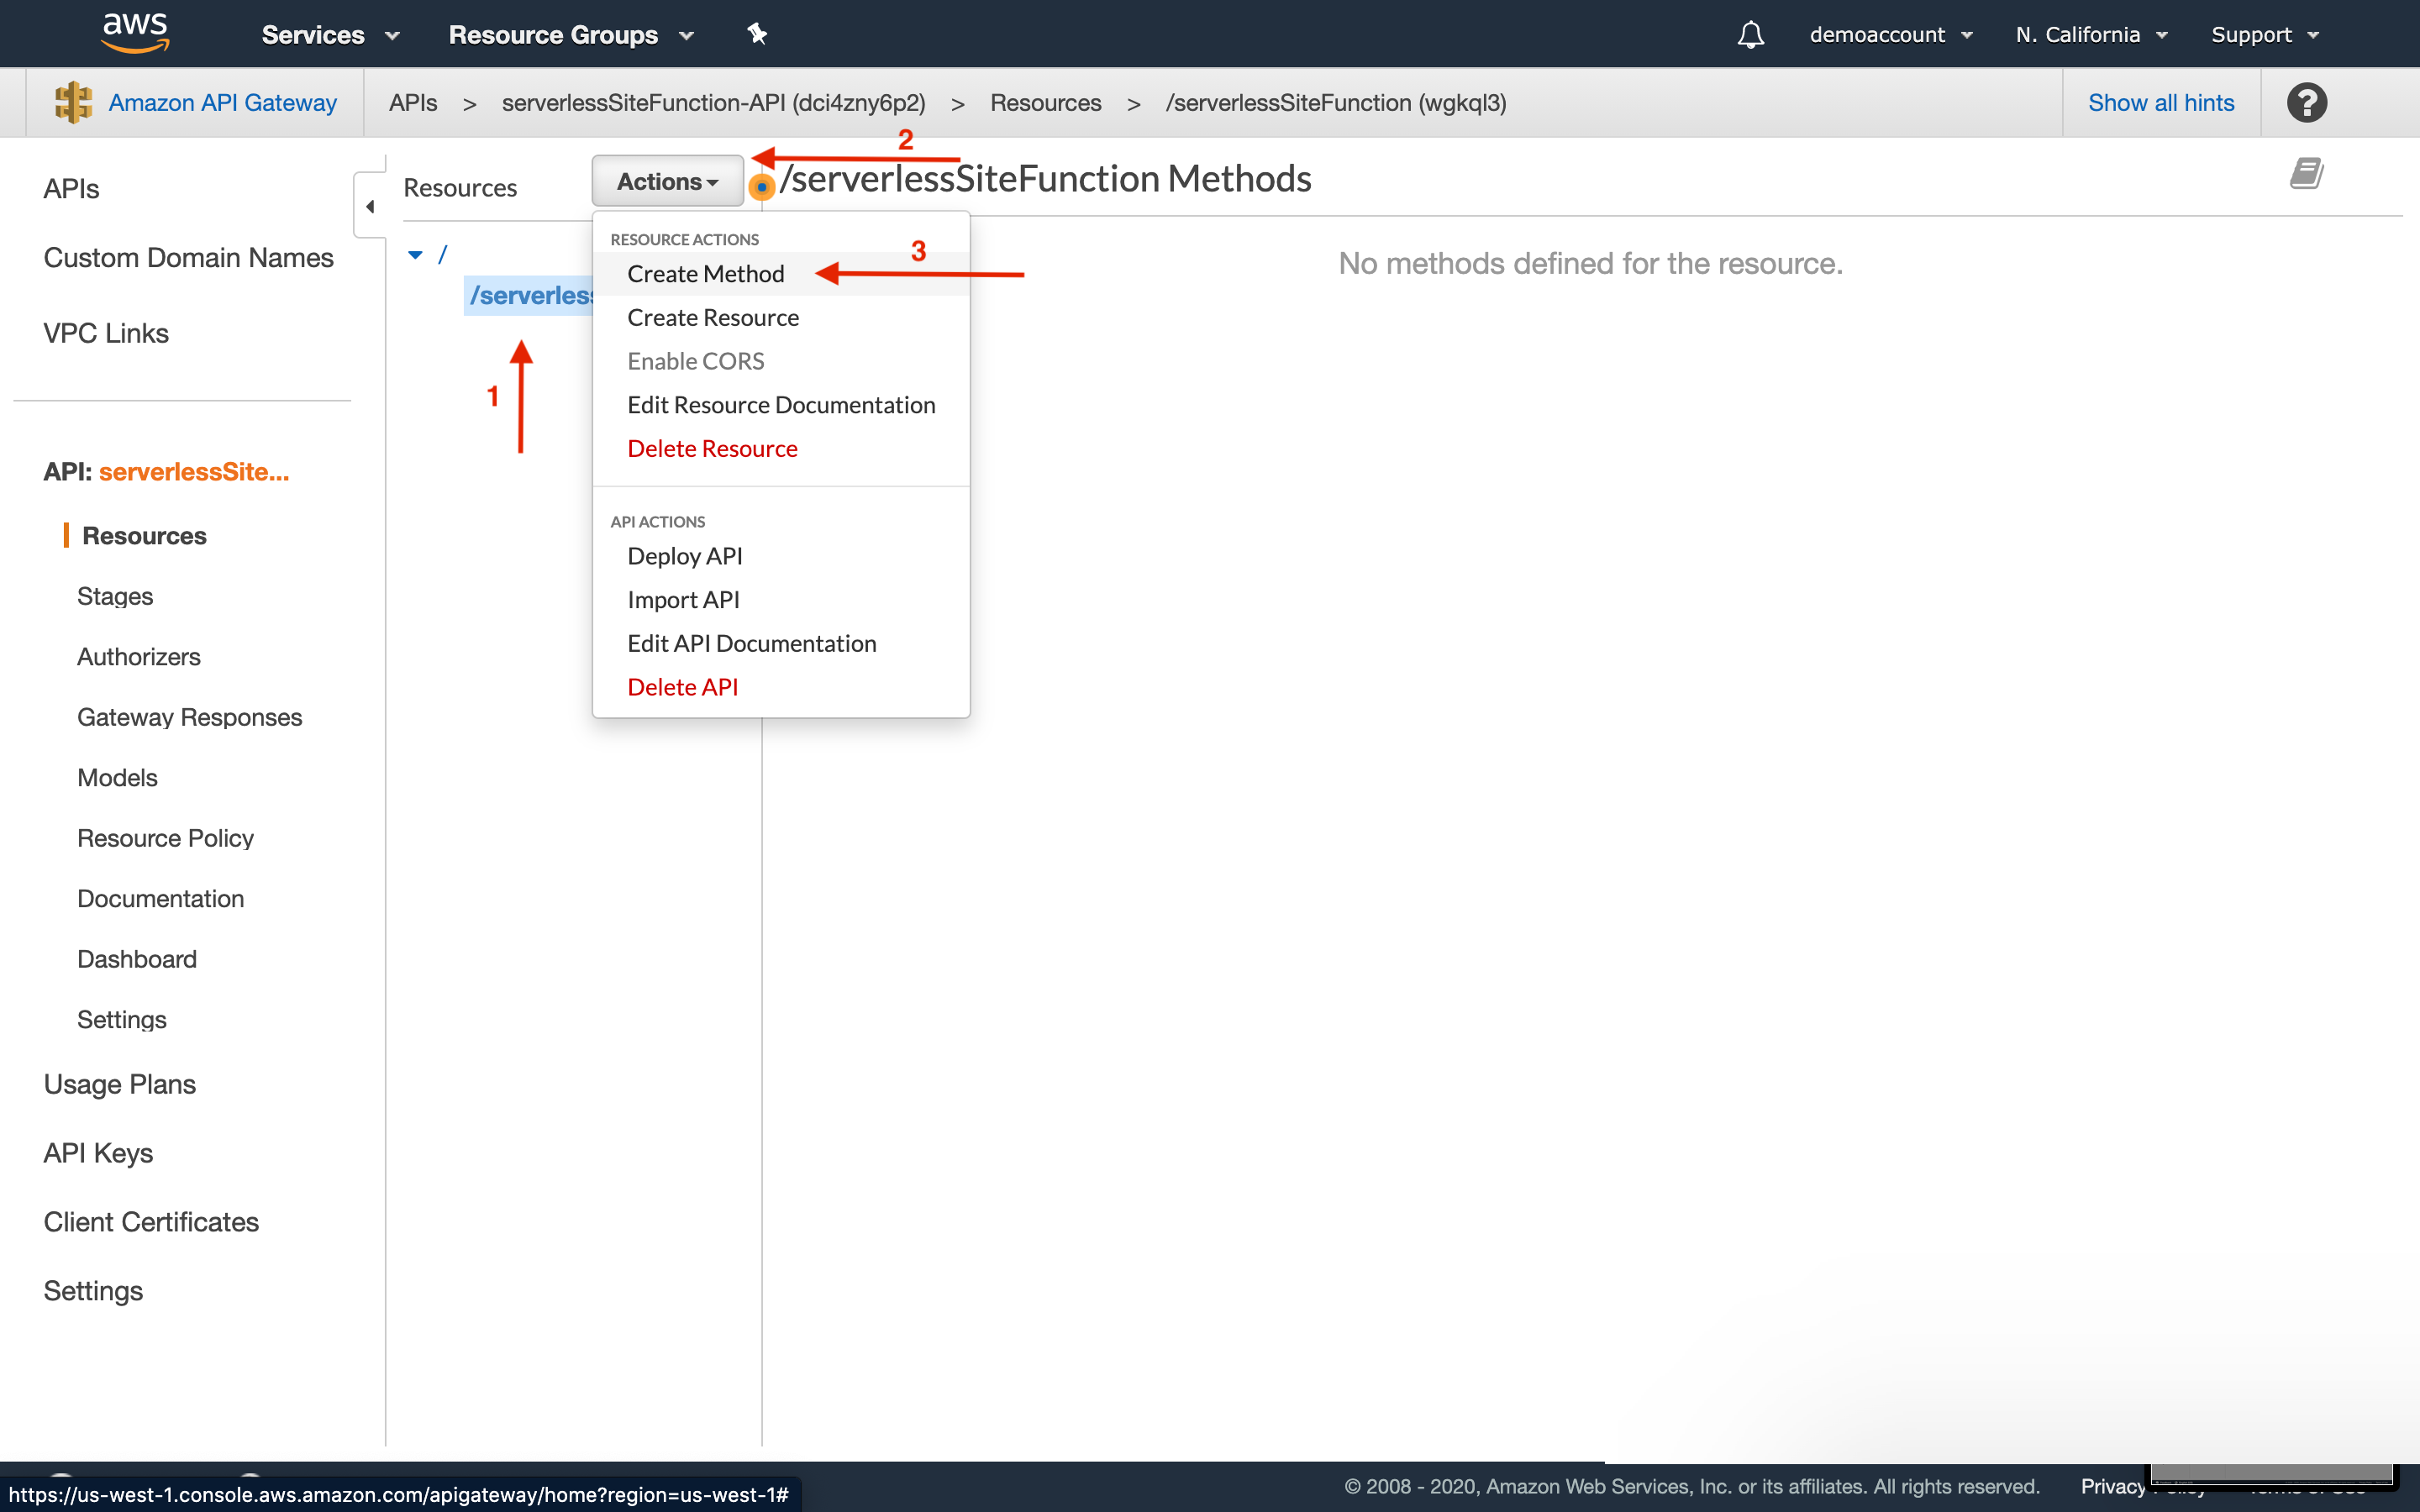
- Under your function’s name, a drop-down menu will be available.
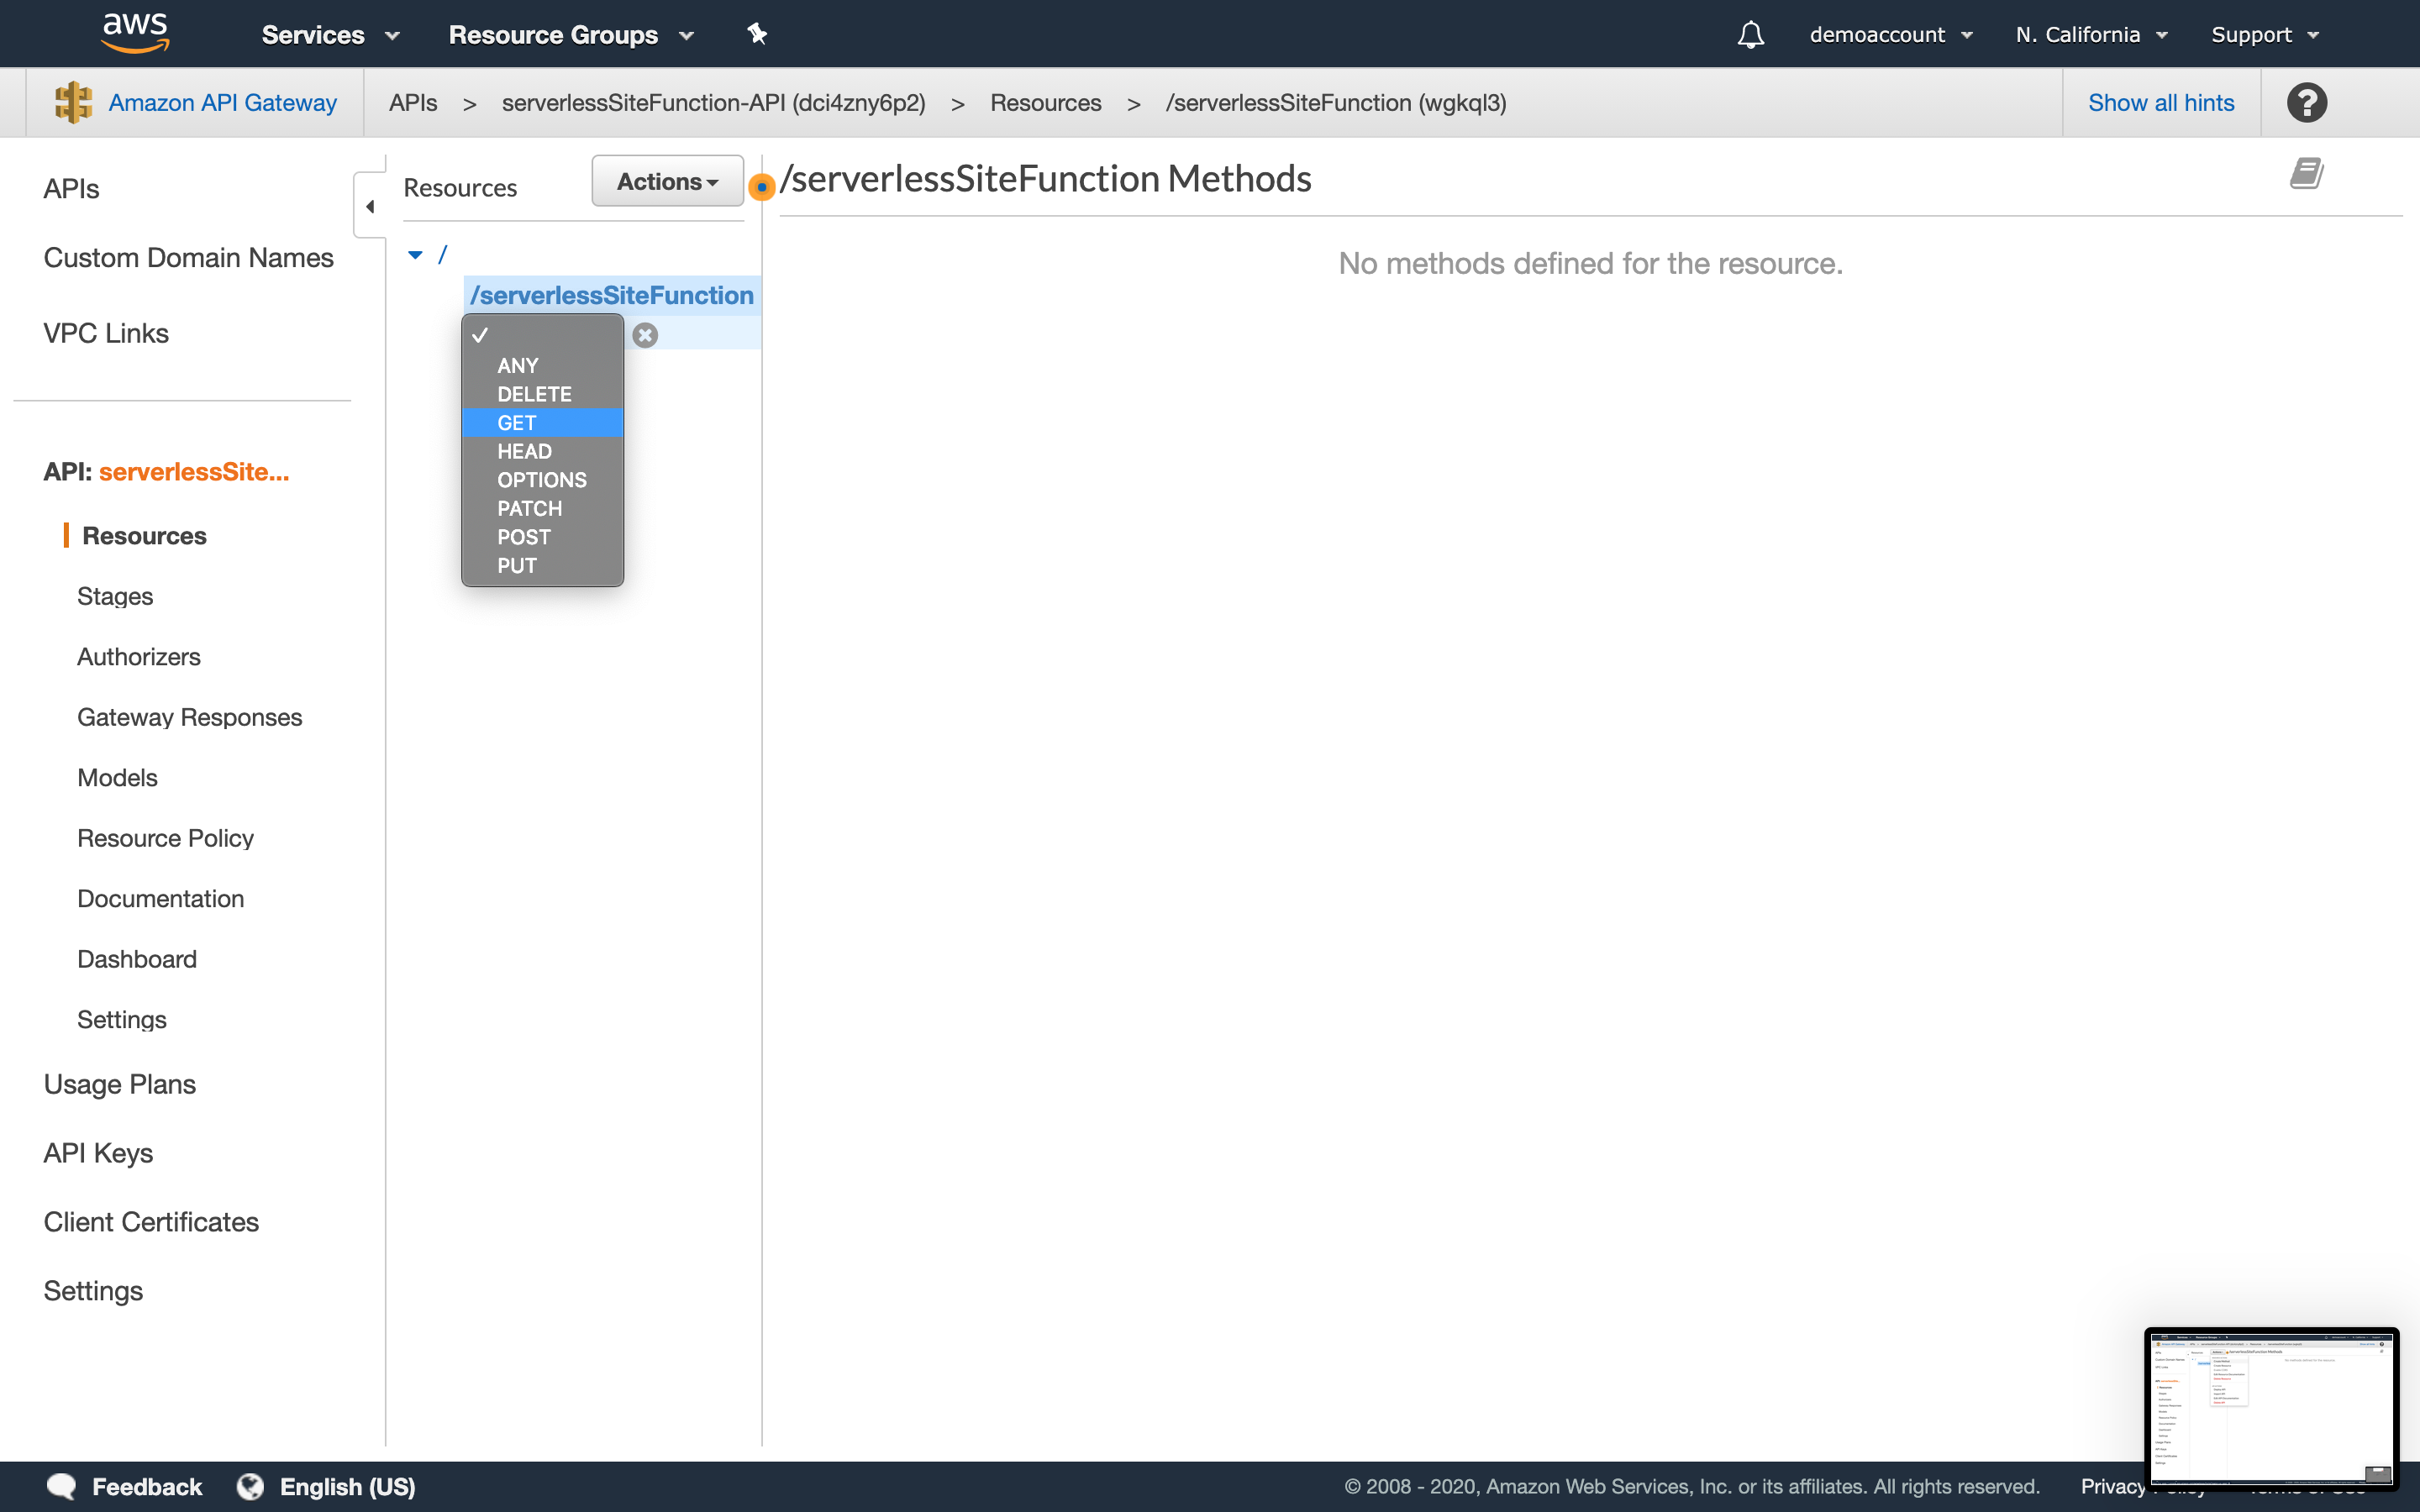
- Click on Get and then click on the check mark next to Get.
-
Integration type should automatically select Lambda Function.
-
Select Use Lambda Proxy integration.
-
If you are in the correct region, your Lambda function’s name will auto populate when you start typing its title.

- Leave Use Default Timeout selected.
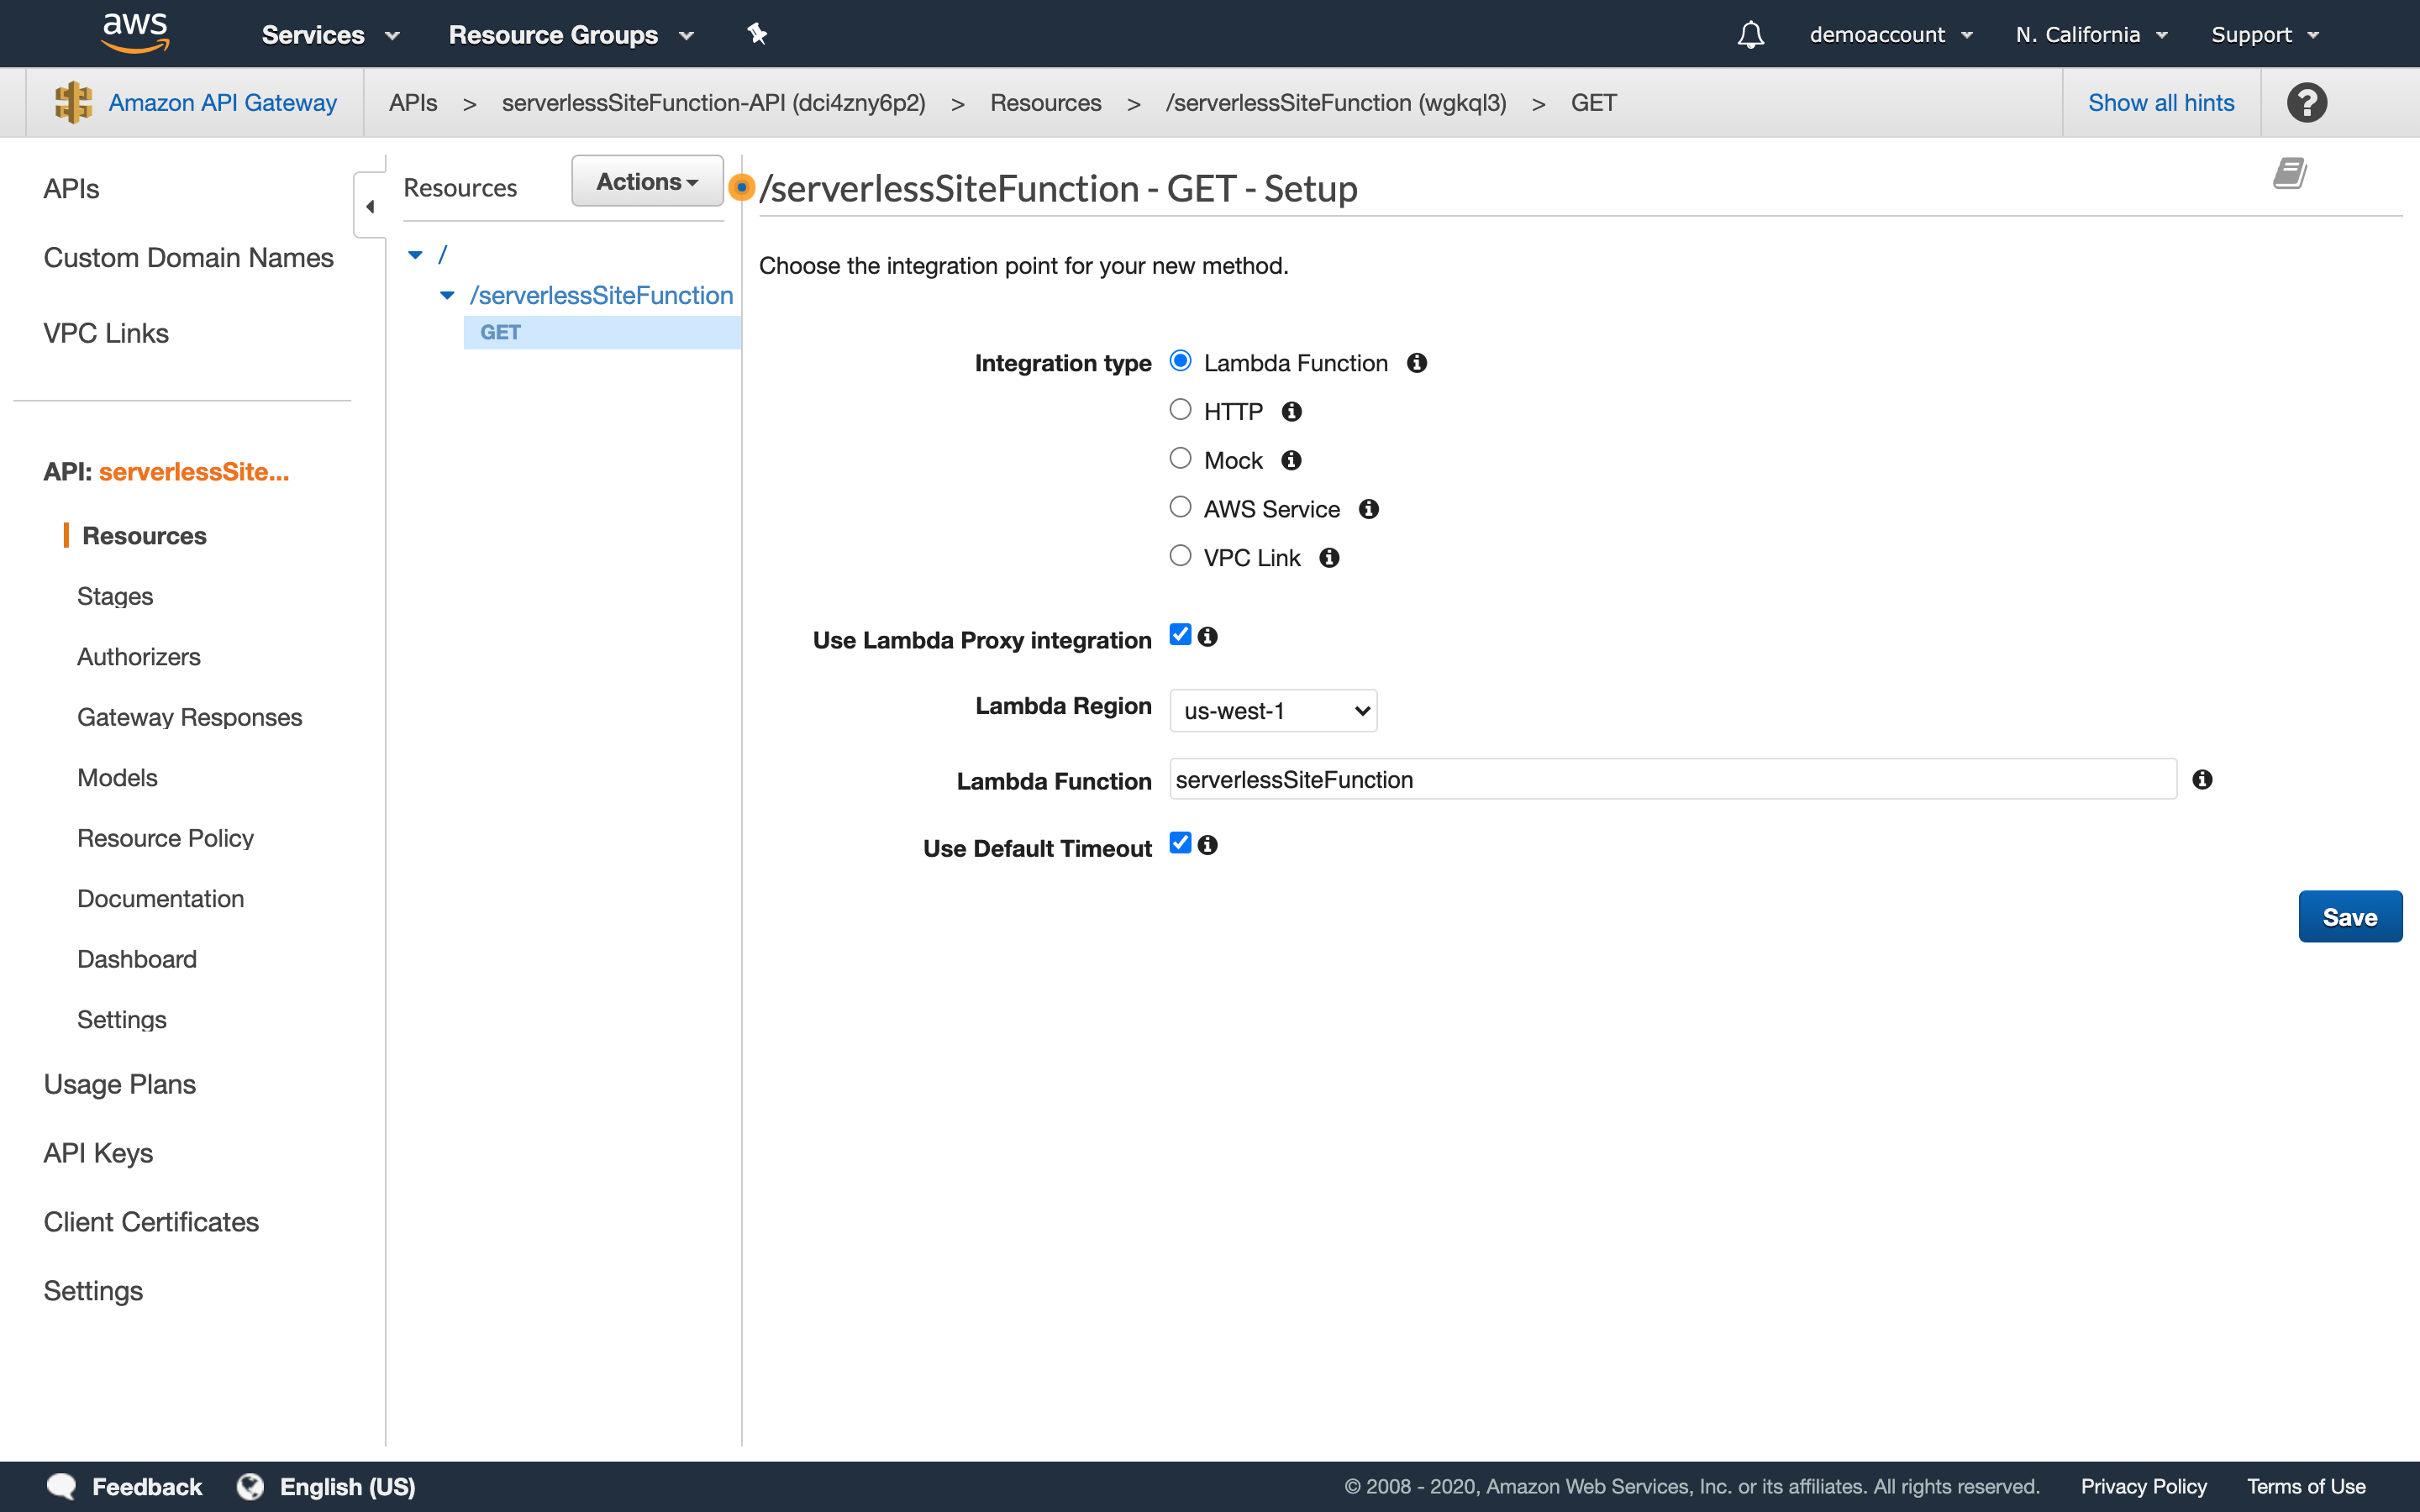
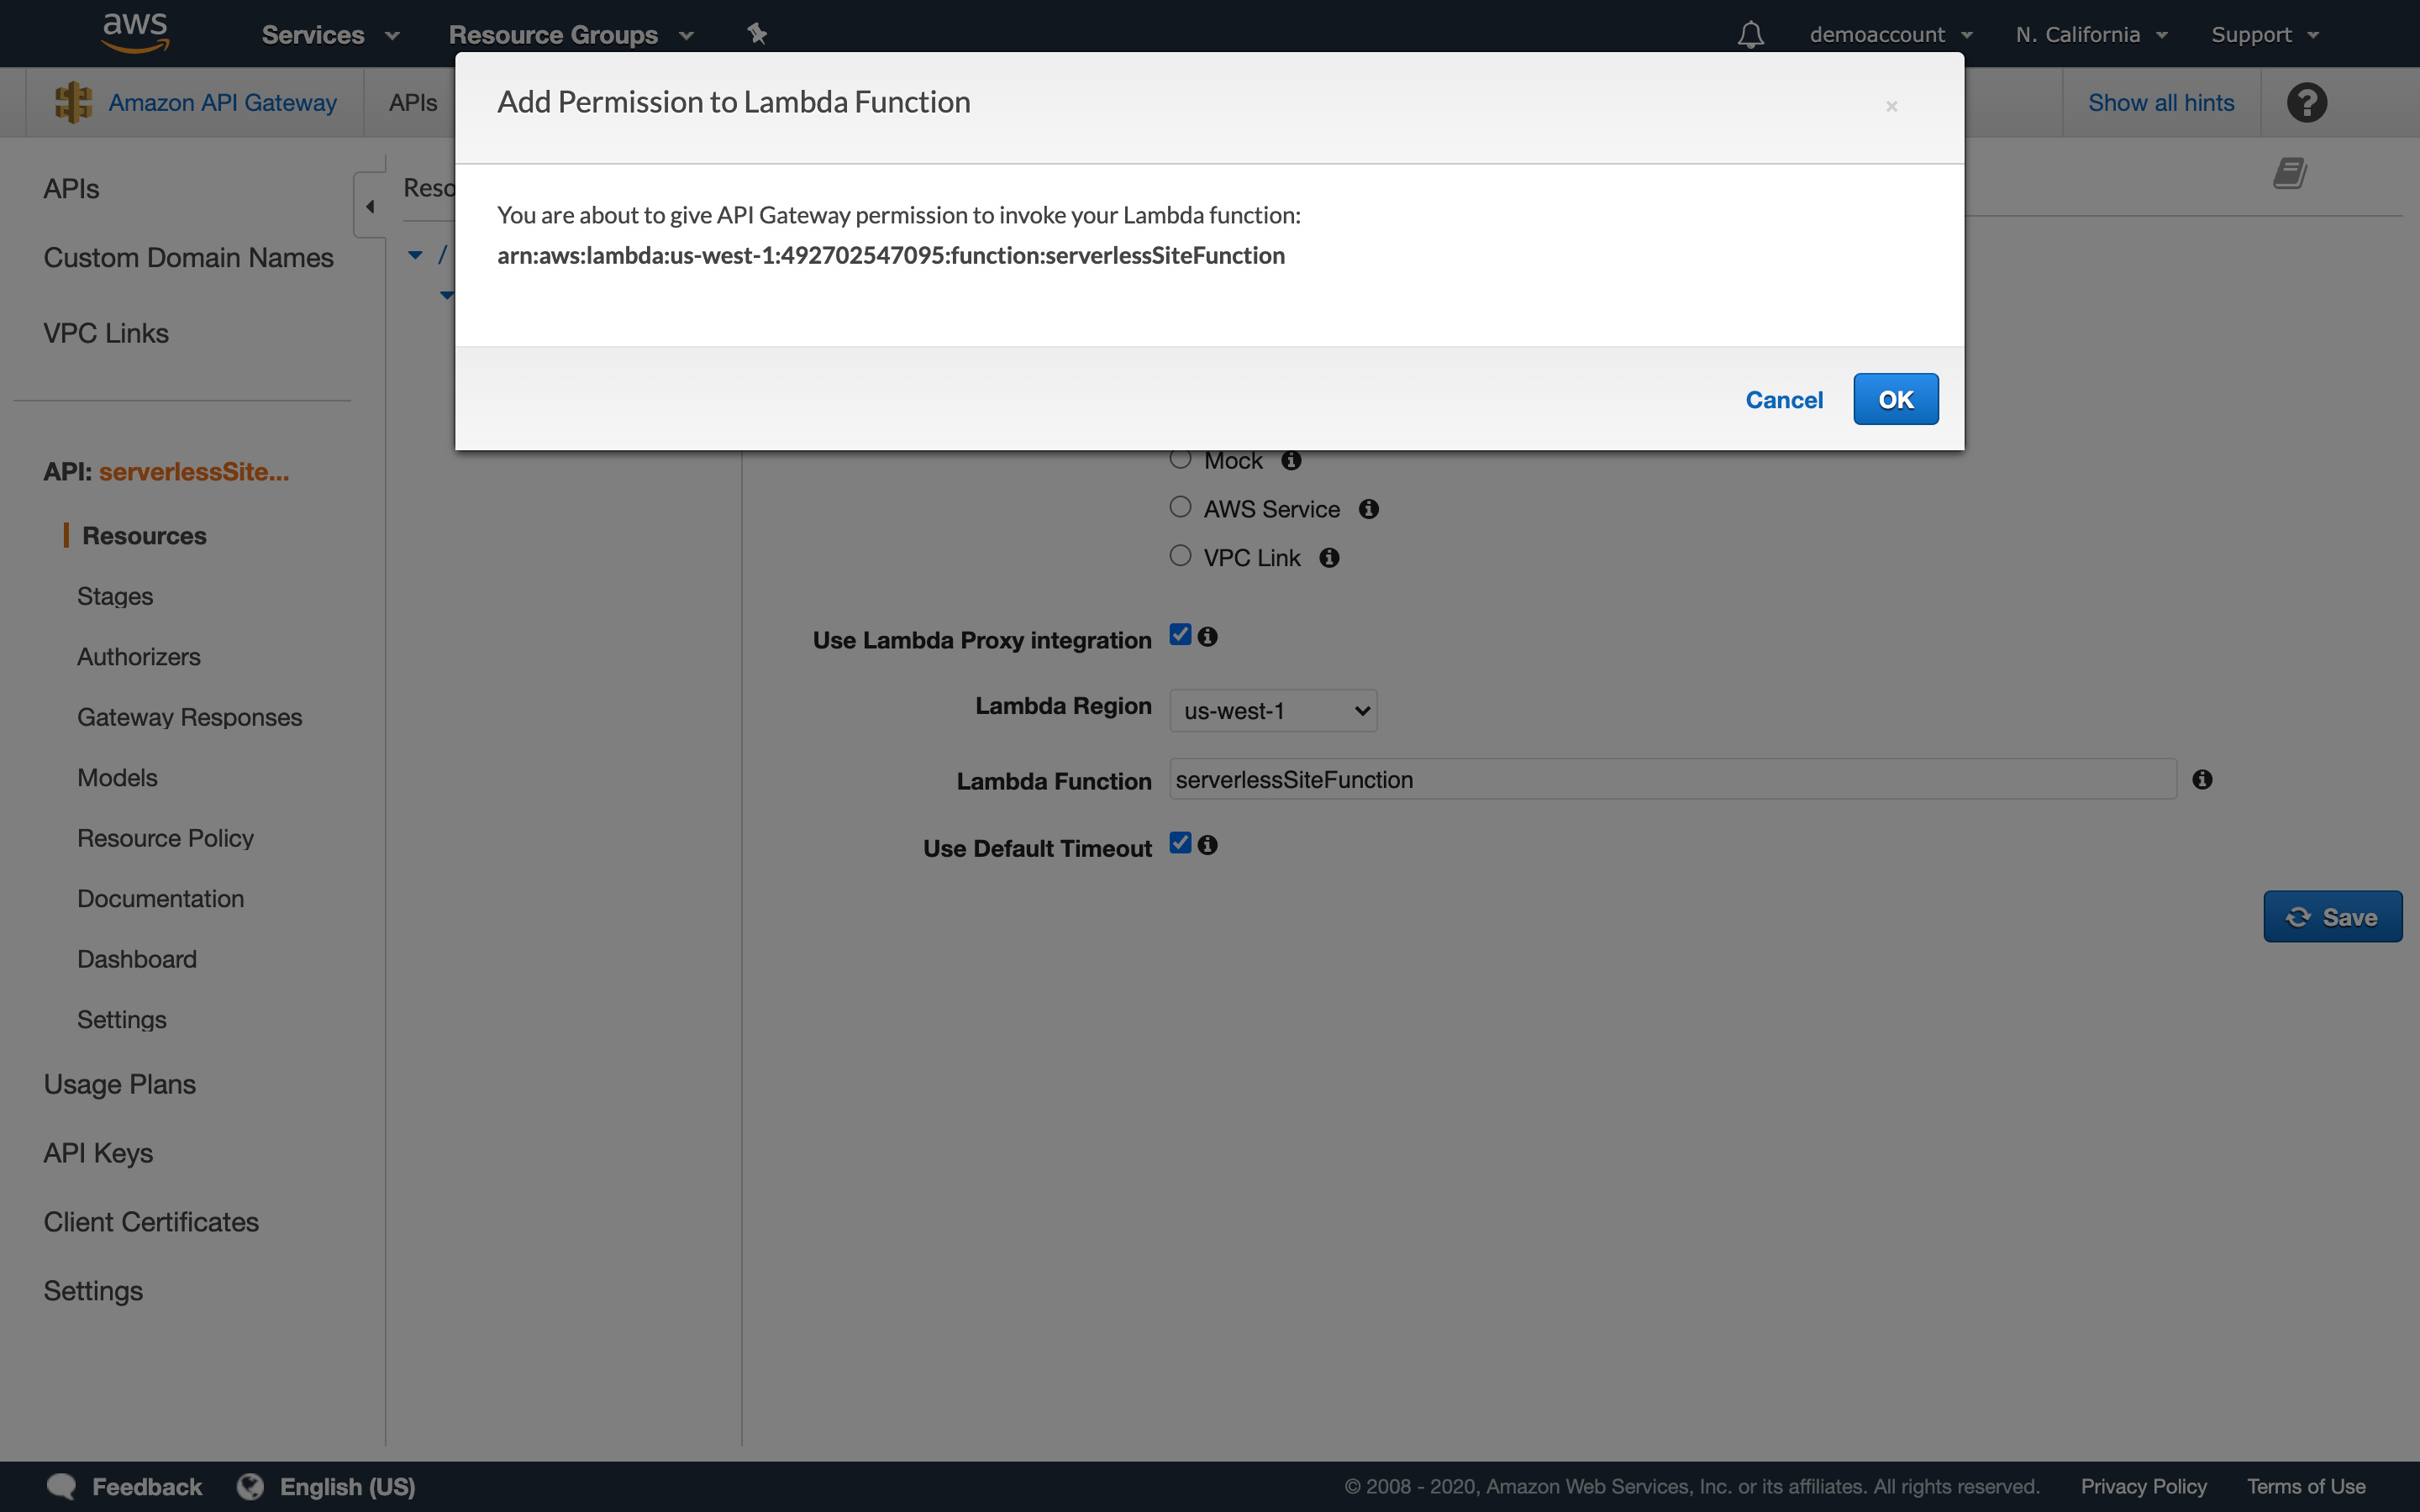
- Click Save. This will prompt a confirmation window, which will display your Lambda Function’s ARN. Click OK.
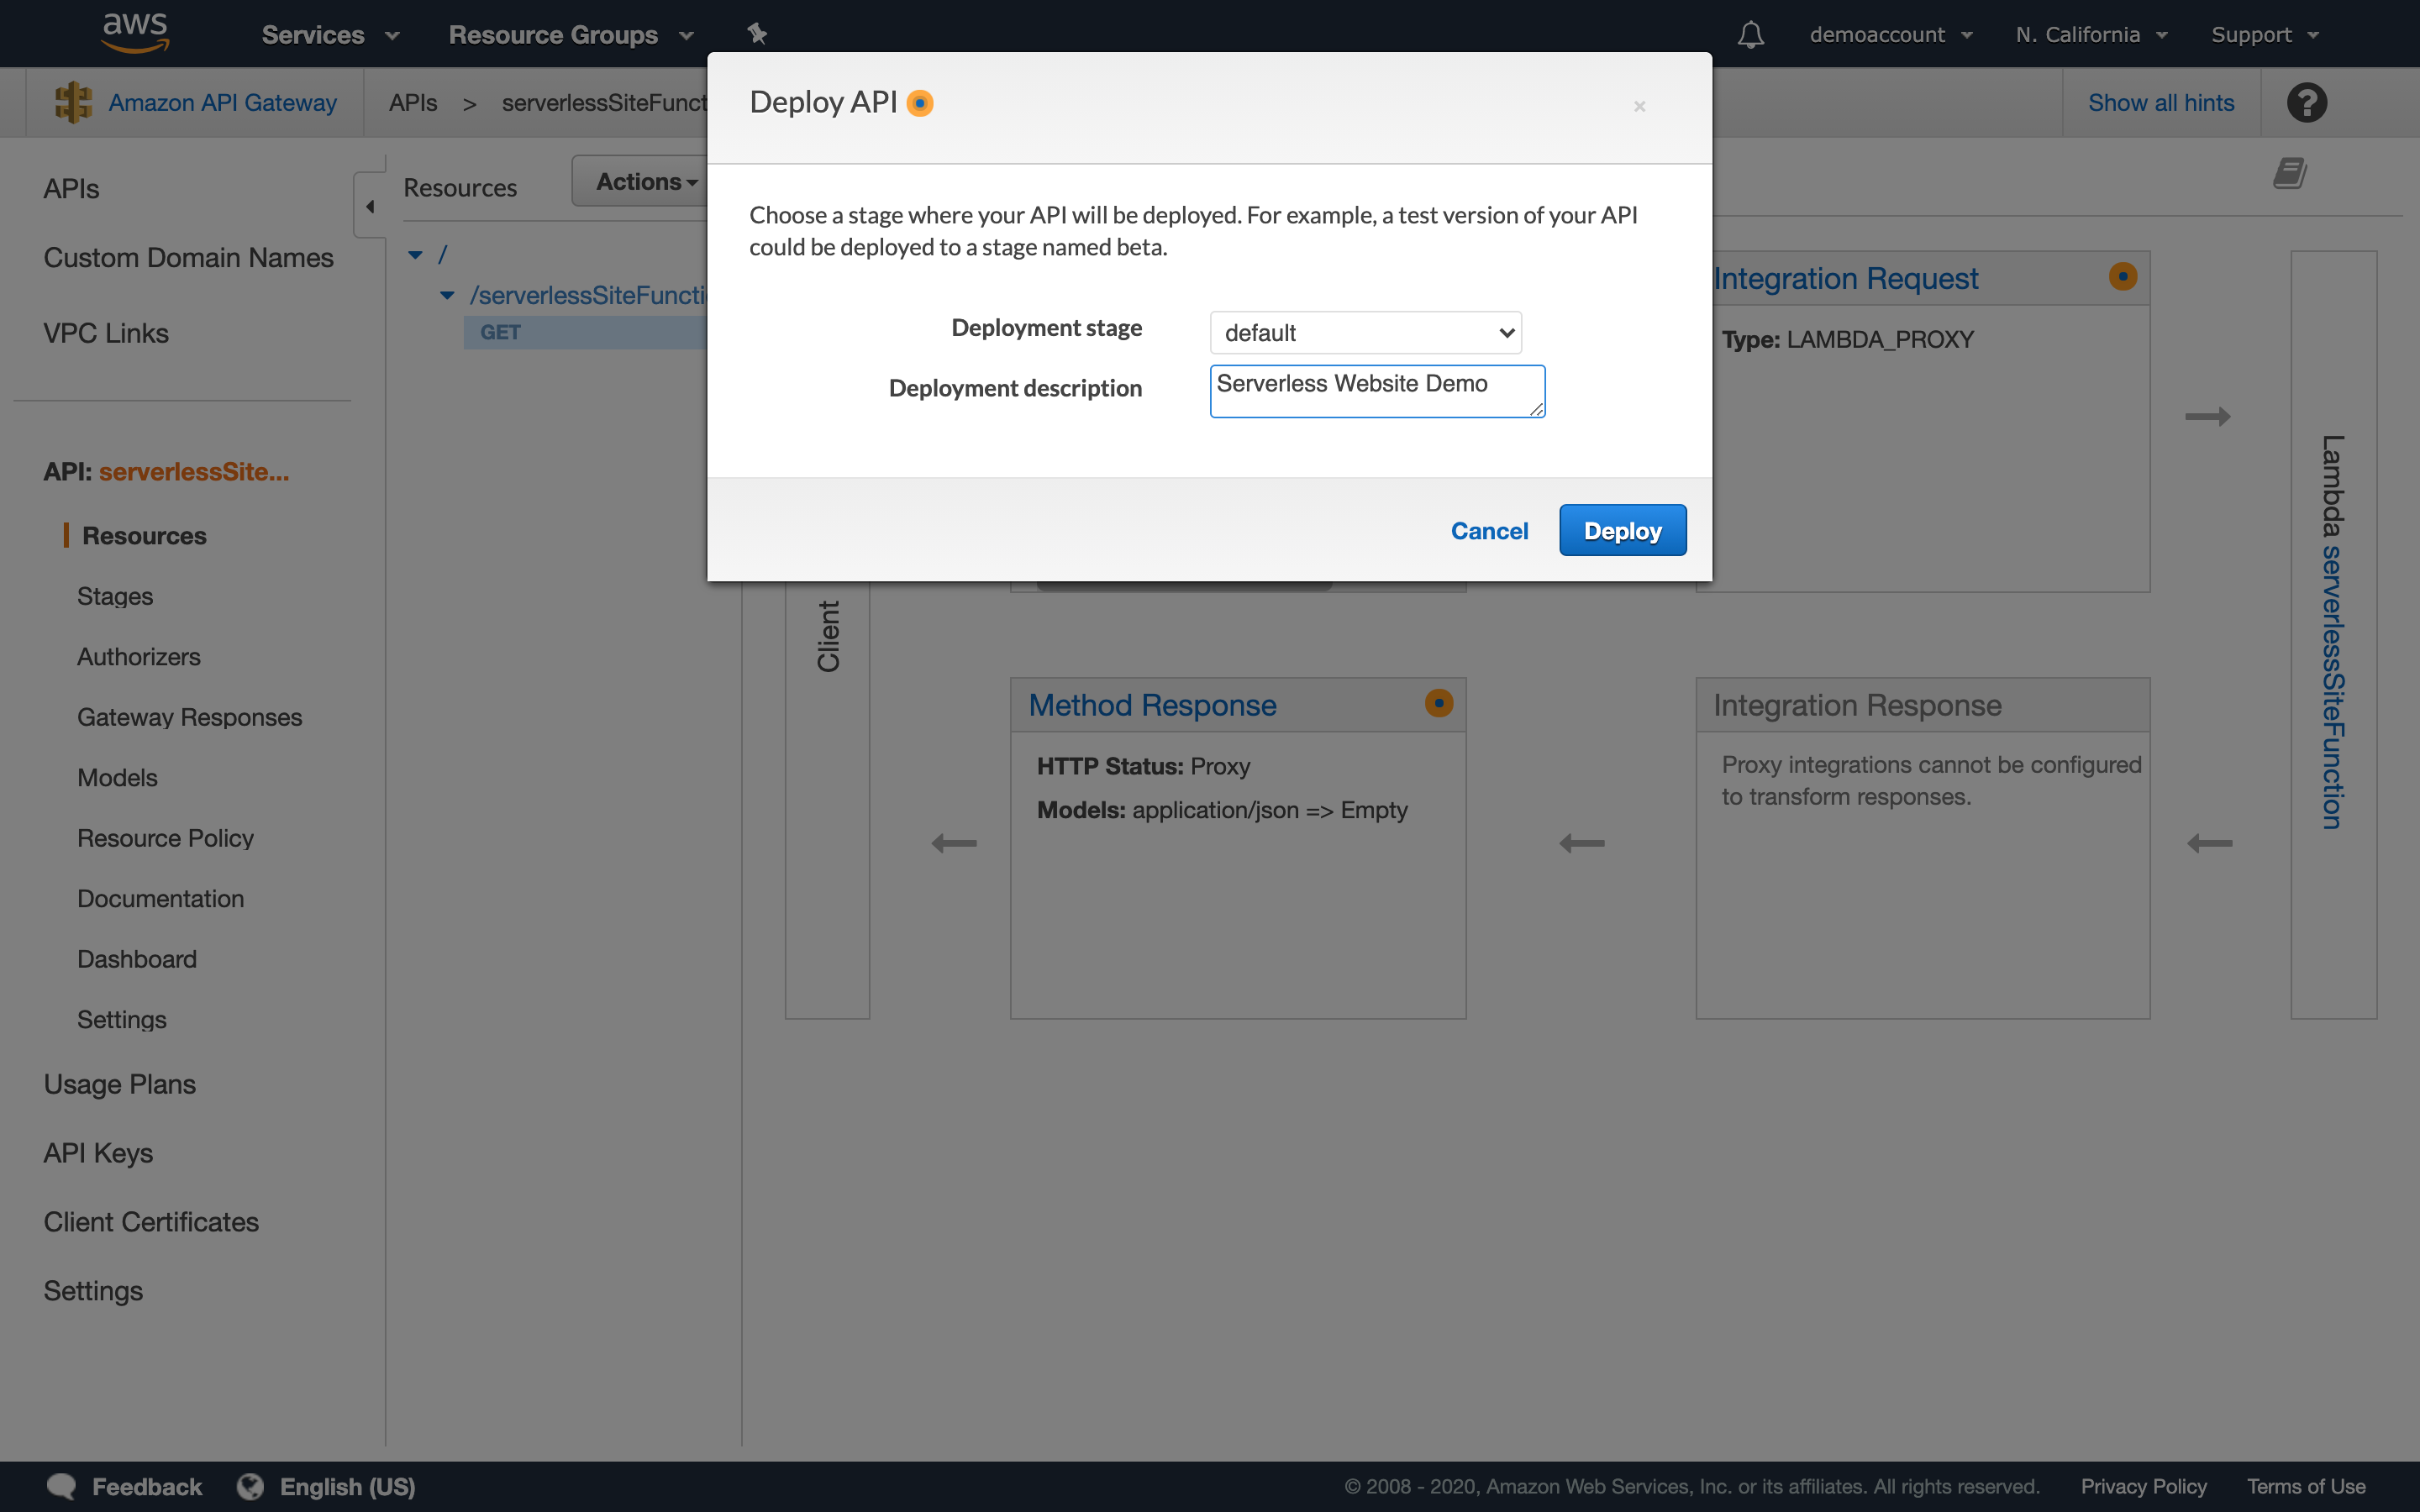
Step 13: Deploy API.
- From the Actions drop-down menu, click Deploy API.
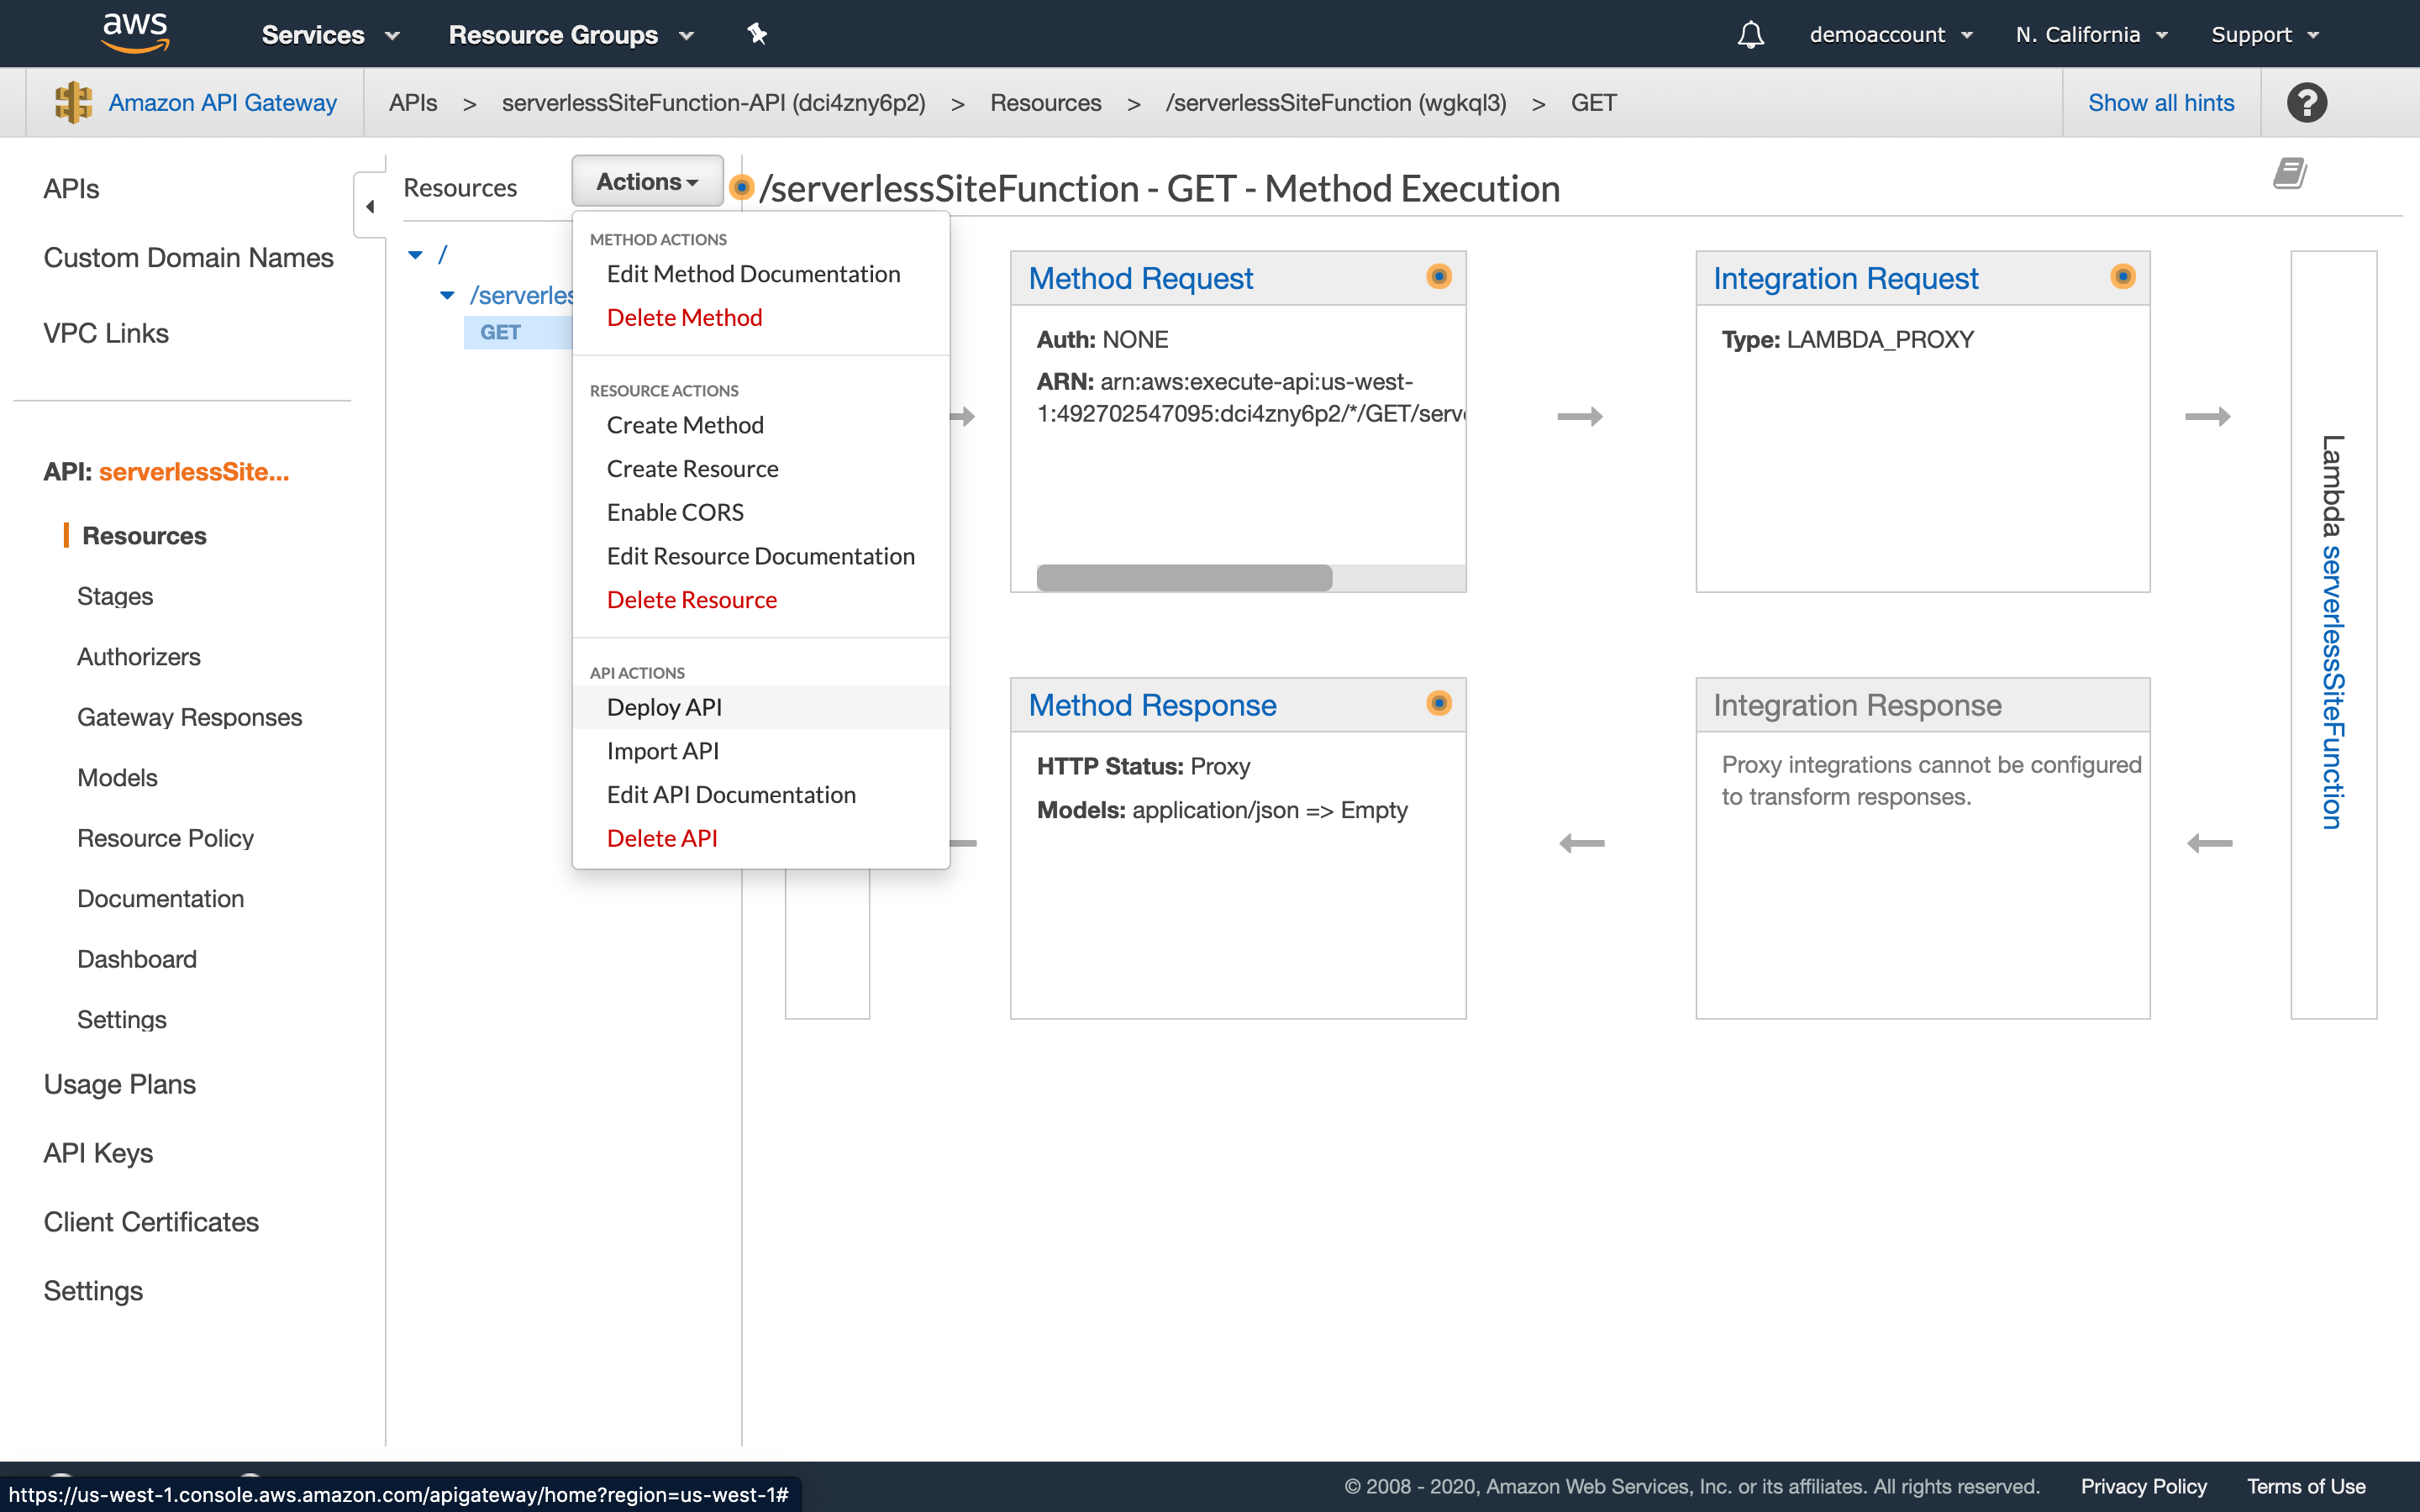
-
For the deployment stage select Default.
-
You can enter whatever description you would like.
-
Click Deploy. This will redirect you to Stages.
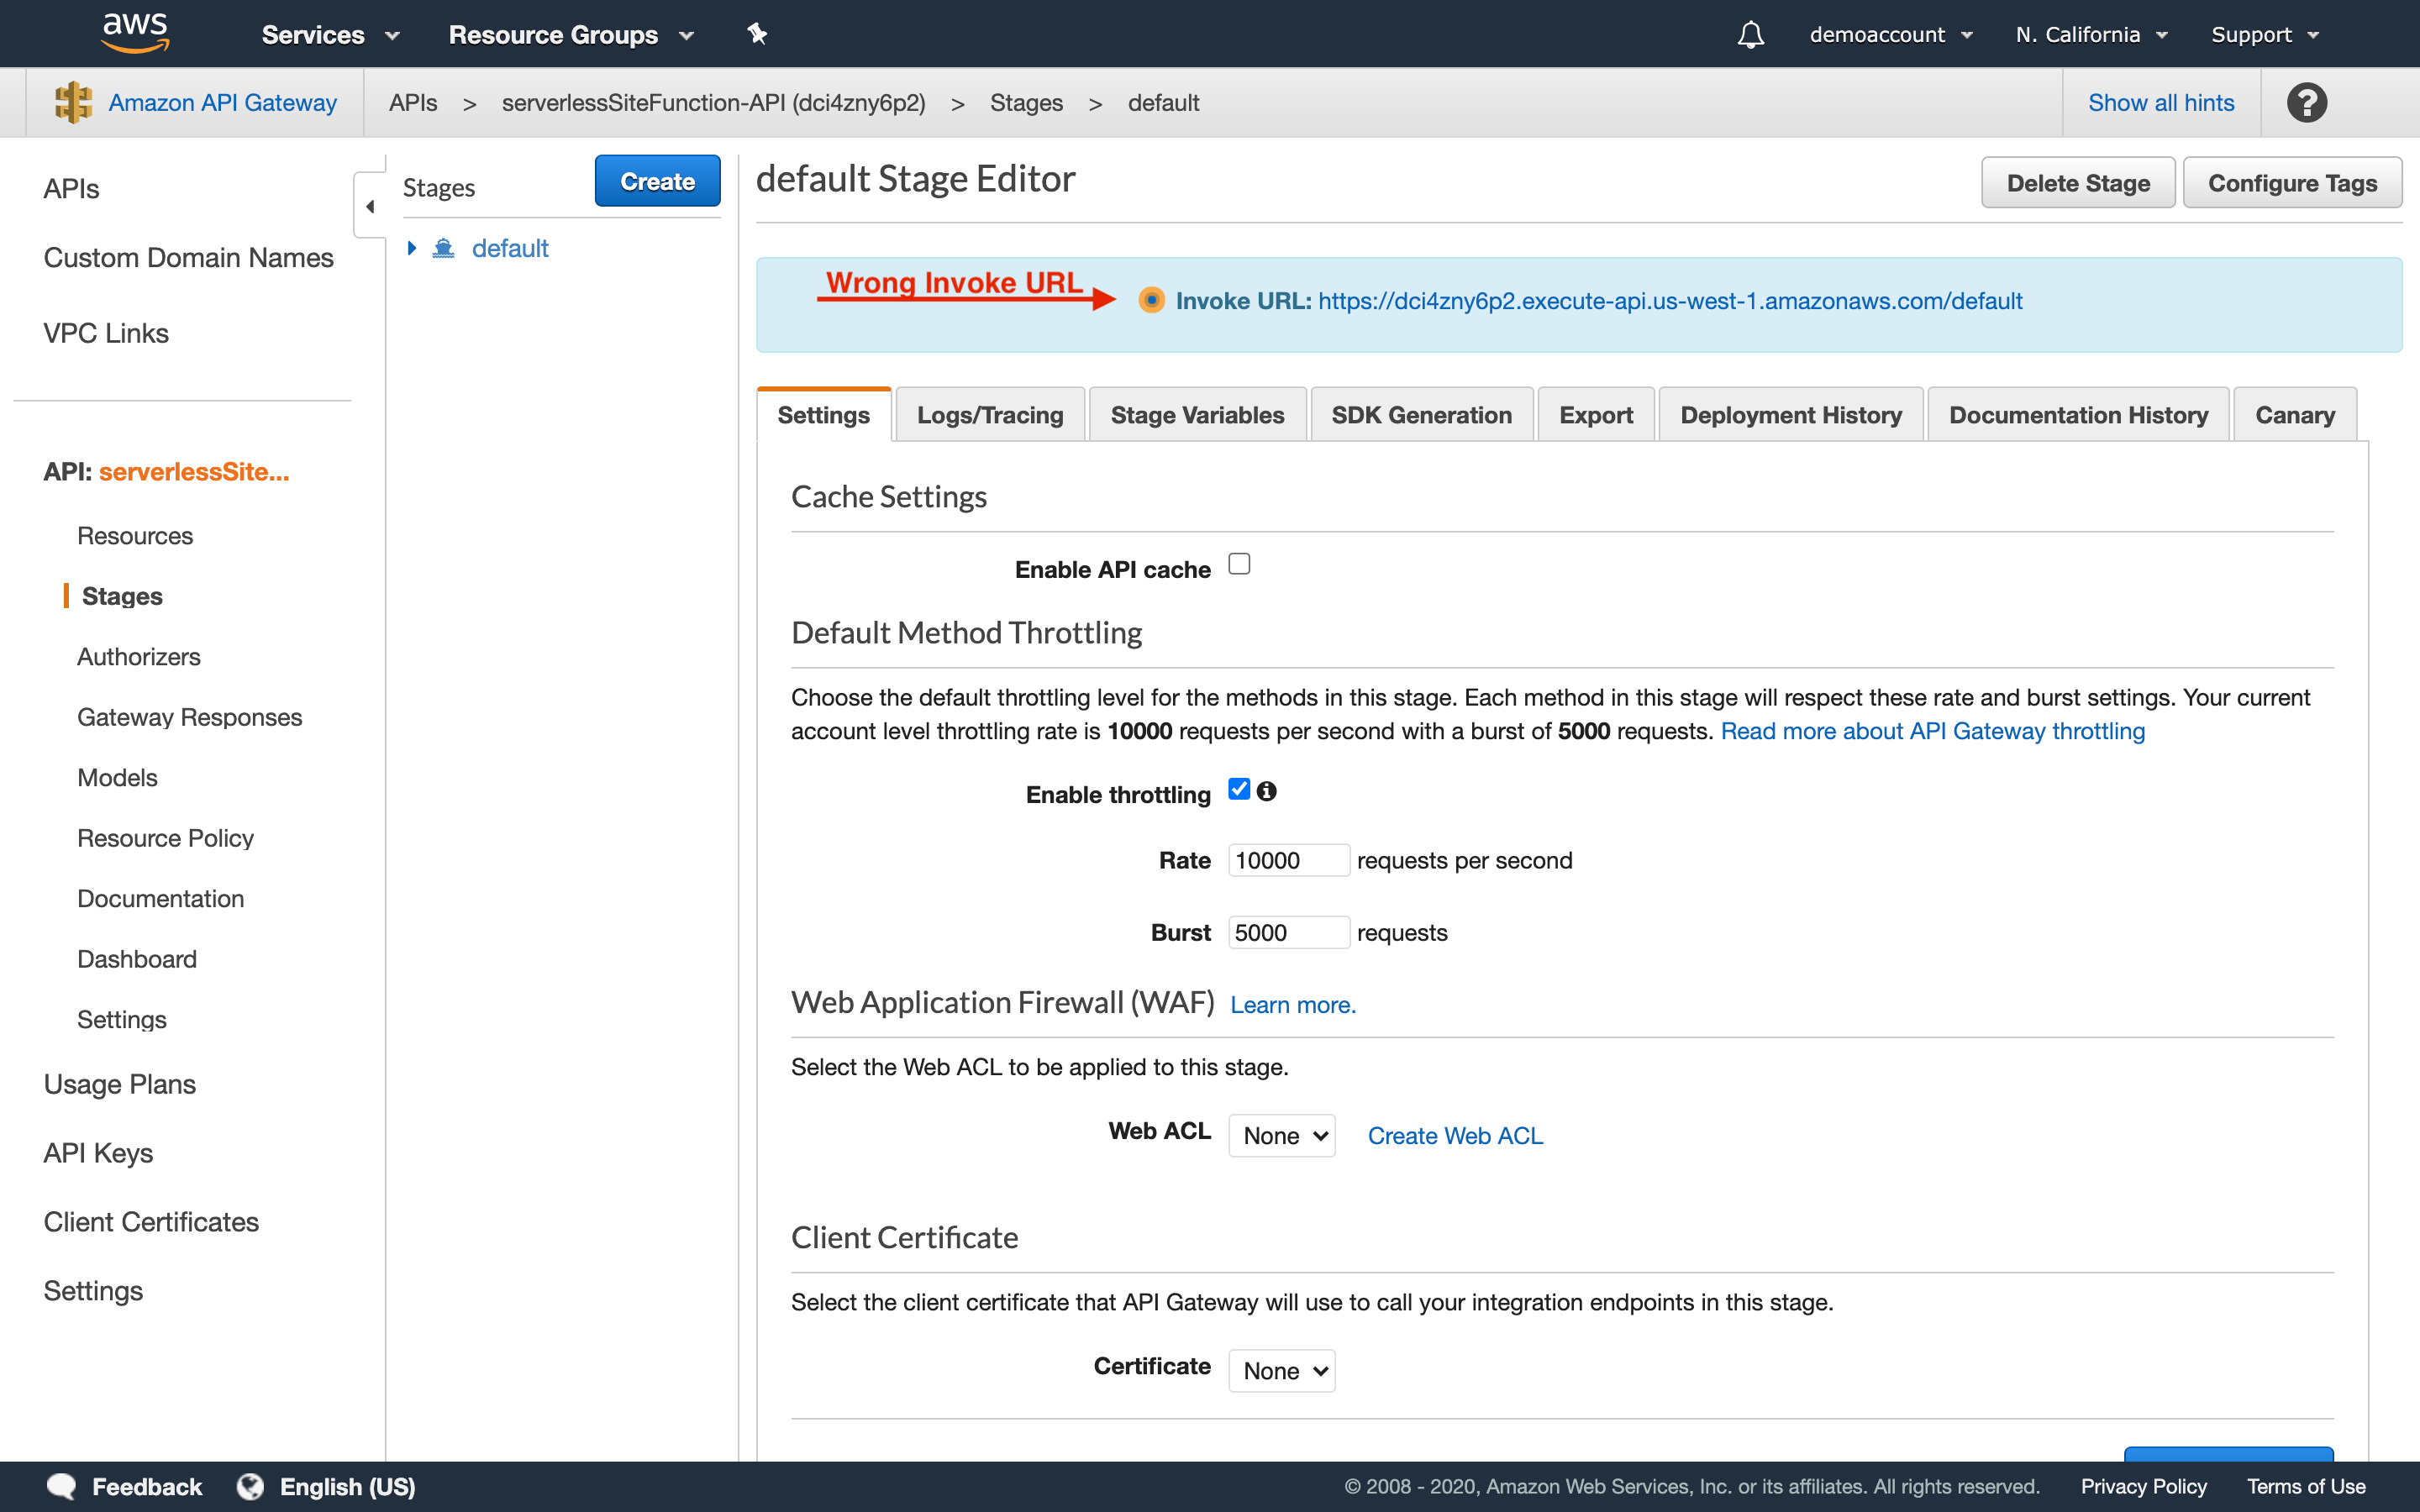
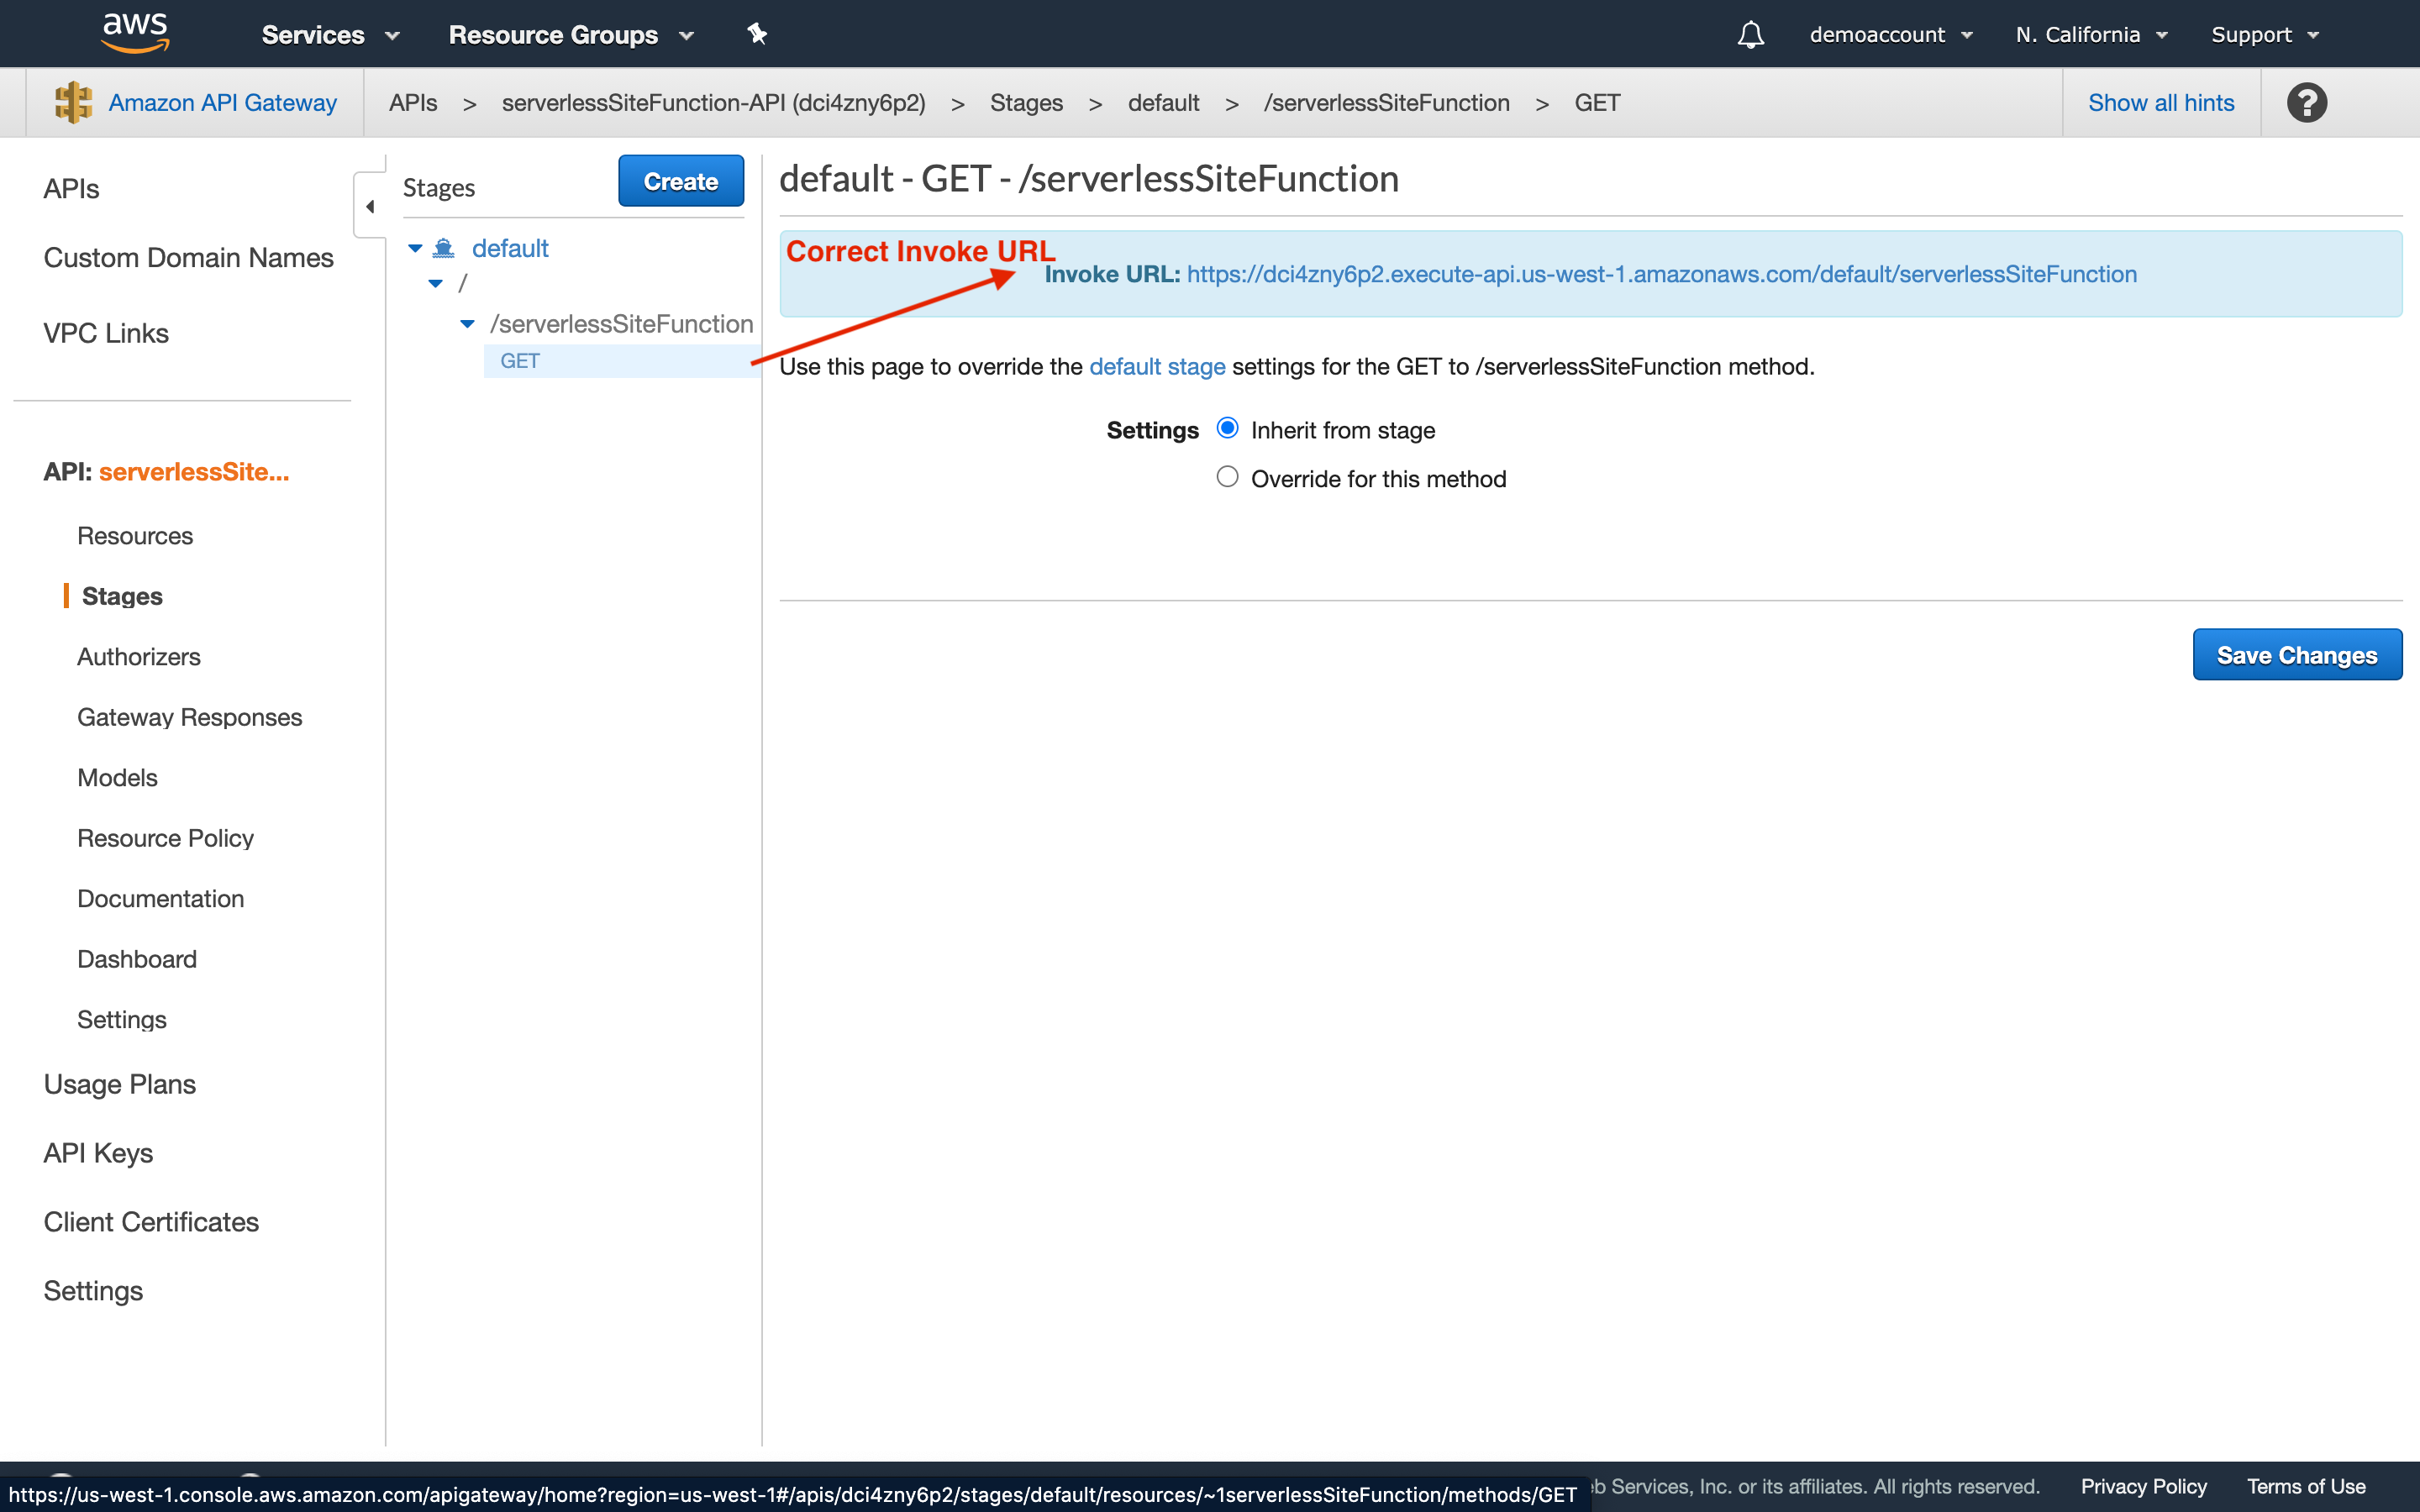
Step 14: Stages.
-
Clicking Deploy in Step 13 automatically redirects you to this page. You may also access this page from the left hand menu within API Gateway.
-
Expand default.
-
Click on Get and copy the Invoke URL. Important: If you do not click on the method before you copy the Invoke URL and instead, copy the Invoke URL from the landing page, your website will not work.
Step 15: HTML Files.
- Create an index.html file, as shown below.
<html>
    <head>
        <script>
            function myFunction() {
                var xhttp = new XMLHttpRequest();
                xhttp.onreadystatechange = function() {
                    if (this.readyState == 4 && this.status == 200) {
                    document.getElementById("my-demo").innerHTML = this.responseText;
                    }
                };
                xhttp.open("GET", "YOUR-API-GATEWAY-LINK", true);
                xhttp.send();

            }

        </script>
    </head>
<body>
    <div align="center">
        <br>
        <br>
        <br>
        <br>
        <h1>Hello <span id="my-demo">World!</span></h1>
        <button onclick="myFunction()">Click me</button>
        <br>
    </div>

    </body>
</html>
- Paste the Invoke URL that you copied in Step 14 replacing “YOUR-API-GATEWAY-LINK” in
xhttp.open("GET", "YOUR-API-GATEWAY-LINK", true);
<html>
    <head>
        <script>
            function myFunction() {
                var xhttp = new XMLHttpRequest();
                xhttp.onreadystatechange = function() {
                    if (this.readyState == 4 && this.status == 200) {
                    document.getElementById("my-demo").innerHTML = this.responseText;
                    }
                };
                xhttp.open("GET", "https://dci4zny6p2.execute-api.us-west-1.amazonaws.com/default/serverlessSiteFunction", true);
                xhttp.send();

            }

        </script>
    </head>
<body>
    <div align="center">
        <br>
        <br>
        <br>
        <br>
        <h1>Hello <span id="my-demo">World!</span></h1>
        <button onclick="myFunction()">Click me</button>
        <br>
    </div>

    </body>
</html>
- Create an error.html file.
<html>
   <head></head>
   <body>
      <h1>404 Page Not Found</h1>
   </body>
</html>
Step 16: Upload your files to your S3 bucket.
-
Navigate back to S3.
-
Click on your bucket.
-
Click Upload.
-
Drag and drop your html files or use the Add files button.
-
Click Next.
-
Allow public access to your items under the permissions tab.
-
Select storage.
-
Click Upload.
Step 17: Create a record set for your domain in Route53. (Optional)
-
Navigate to Route53, under Networking.
-
Click on Hosted Zones
-
Select your domain.
-
Click Create Record Set
-
Select Alias. Your S3 website should auto-populate. If it does not auto-populate that means that your bucket name and domain name do not match. Refer back to Step 5.
-
Click Create. This will create an A record.
-
Give the DNS cache time to update and then your website should be visible from your domain.
Step 18: Visit your site!
-
If you need to access the S3 static website hosting URL, you can always get it under Properites within your bucket.
-
Click on the button on your website. This will send a request to API Gateway and display dynamic content.
You did it. Well done!